Capture: Fetch Tasks From Todoist
You end up with one QuickAdd command that pulls tasks from your Todoist account into a note in your vault. This is useful for capturing tasks on the go with your phone, then adding them to Obsidian when you get back to your computer.
Prerequisites
Section titled “Prerequisites”- The Todoist plugin for Obsidian, set up with your API key. There is a link to grab the key in the plugin’s settings.
- A macro that runs the Todoist Script (set up below).
How it works
Section titled “How it works”The Todoist Script has three exports, SelectFromAllTasks, GetAllTasksFromProject, and GetAllTasksFromSection.
SelectFromAllTaskswill prompt you to select tasks from all tasks on your Todoist account,GetAllTasksFromProjectwill prompt you for a project and get all tasks from that project, andGetAllTasksFromSectionwill prompt you for a section and get all tasks from that section.
Personally, I just let QuickAdd ask me which one to execute.
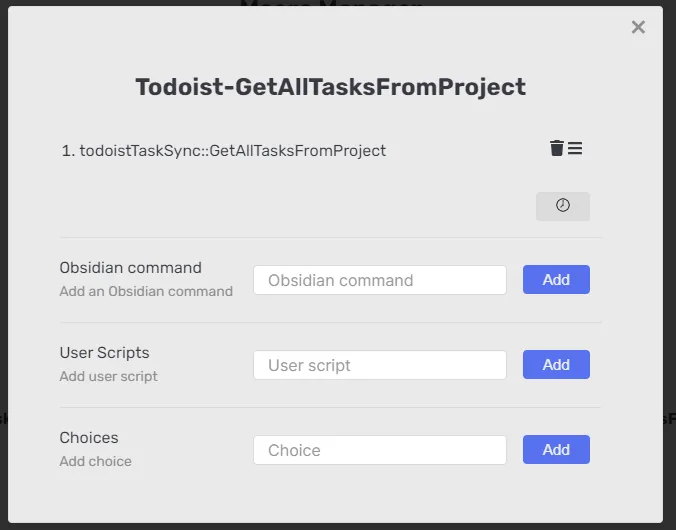
However, when you are entering the user script in the macro, you can add ::GetAllTasksFromProject (or, :: followed by any of the other exports) to directly call one of the exported functions.
IMPORTANT: If you do NOT want this script to complete tasks in Todoist that you put into your vault, remove the function call to closeSelectedTasks.
Now, you will need a Capture choice with the following settings.
- Capture to: the path to the file where you want to store the tasks.
- Capture format: Enabled - and in the format, write
{{MACRO:<MACRONAME>}}whereMACRONAMEis the name of the macro that you made earlier.
What you get
Section titled “What you get”The tasks are written in this format:
- [ ] <Task Content> 📆 <YYYY-MM-DD>
Which equals: - [ ] Buy groceries 📆 2021-06-27
This task will be recognized by the Tasks plugin for Obsidian, as well.
If there isn’t a date set for the task, they’ll simply be entered as - [ ] Buy groceries.
NOTE: If you simply follow the process below, you will be asked which export to execute each time. That is fine - if you want to be asked - but you can also make separate Capture choices for each exported function, meaning, it’ll execute that function without asking you which one to execute. Just set up the macro as shown in the image above.
- Set up the Todoist plugin - grab the API key from your Todoist account. There’s a link in the plugin’s settings.
- Download the Todoist Script (linked above) and add it to your vault as a javascript file. I’d encourage you to call it something like todoistTaskSync.js to be explicit.
- Follow along with what I do in the gif below
