This is the full developer documentation for QuickAdd
# Getting Started
> Get started with QuickAdd: install it, pick between Template, Capture, Macro, and Multi choices, and build your first workflow
QuickAdd turns your repetitive Obsidian actions - creating a note from a template, logging a line to your journal, running a script - into single commands you trigger with a hotkey. Set a workflow up once, then run it in a keystroke from anywhere in your vault.
New here? Build your [first workflow](#first-workflow) below in about a minute.
## Install QuickAdd
[Section titled “Install QuickAdd”](#install-quickadd)
Install QuickAdd from Obsidian’s Community plugins browser, then enable it.
If you cannot use the plugin browser, follow the [manual installation guide](/docs/ManualInstallation/).
## Choose the right choice type
[Section titled “Choose the right choice type”](#choose-the-right-choice-type)
| If you want to… | Use this | Start here |
| ---------------------------------------------------------- | --------------- | -------------------------------------------------- |
| Create a new note from a reusable file | Template choice | [Template Choices](/docs/Choices/TemplateChoice/) |
| Append text to a journal, log, task list, or existing file | Capture choice | [Capture Choices](/docs/Choices/CaptureChoice/) |
| Run one or more Obsidian commands, scripts, or choices | Macro choice | [Macro Choices](/docs/Choices/MacroChoice/) |
| Group choices into a nested menu | Multi choice | [Multi Choices](/docs/Choices/MultiChoice/) |
| Share configured workflows across vaults | Package | [Share QuickAdd Packages](/docs/Choices/Packages/) |
Most workflows start with either a Template choice or a Capture choice. Add a Macro choice when you need scripting, multiple steps, or data from another plugin or API.
## First workflow
[Section titled “First workflow”](#first-workflow)
Let’s build a capture that adds a timestamped line to your daily journal. It takes about a minute.
1. Open **Settings → QuickAdd**, click **New choice**, and pick **Capture**. Its settings open right away, as a page of the settings window.
2. Set **Name** to `Add to journal`. (Before QuickAdd 2.30.0, the settings open in a dialog; click the name at the top to rename it.)
3. Set **Capture to** to `Journal/{{DATE}}.md` - the note today’s entries land in.
4. Turn on **Create file if it doesn’t exist**, so the first capture of the day creates today’s note instead of stopping with a “Target file missing” notice.
5. In **Capture format**, enter `- {{DATE:HH:mm}} {{VALUE}}` - the shape of one entry. (Before QuickAdd 2.30.0, turn on the **Capture format** toggle first.)
6. Close the settings. Open the command palette (Ctrl/Cmd+P), run **QuickAdd: Run**, pick `Add to journal`, and type your entry.
QuickAdd writes a line like `- 09:42 Standup moved to Wednesday` to the top of today’s journal note, without opening it.

Once it works the way you want, click the ⚡ icon next to the choice to add it to the command palette, then give it a hotkey in Obsidian’s **Settings → Hotkeys**.
The `{{DATE}}` and `{{VALUE}}` above are [format syntax](/docs/FormatSyntax/): placeholders QuickAdd fills in each time you run the choice. There are placeholders for dates, your answers, links, clipboard content, and more. When a prompt asks you for text, the [suggester system](/docs/SuggesterSystem/) lets you type `[[` or `#` to pull in a file, tag, or heading from your vault.
## Common paths
[Section titled “Common paths”](#common-paths)
### I want examples first
[Section titled “I want examples first”](#i-want-examples-first)
Use the [examples overview](/docs/Examples/) to pick a complete workflow by choice type, difficulty, prerequisites, and outcome.
Good first examples:
* [Capture: Add entries to your daily note](/docs/Examples/Capture_ToDailyNote/)
* [Template: Add an Inbox Item](/docs/Examples/Template_AddAnInboxItem/)
* [Macro: Book Finder](/docs/Examples/Macro_BookFinder/)
* [Capture: Canvas Capture](/docs/Examples/Capture_CanvasCapture/)
### I want to automate with scripts
[Section titled “I want to automate with scripts”](#i-want-to-automate-with-scripts)
Start with the [scripting overview](/docs/Advanced/ScriptingGuide/), then move to [User Scripts](/docs/UserScripts/) and the [QuickAdd API reference](/docs/QuickAddAPI/) when you need exact method details.
### I want to call QuickAdd from outside Obsidian
[Section titled “I want to call QuickAdd from outside Obsidian”](#i-want-to-call-quickadd-from-outside-obsidian)
Use [Obsidian URI](/docs/Advanced/ObsidianUri/) for URI-triggered workflows, or the [QuickAdd CLI](/docs/Advanced/CLI/) for shell scripts and external automation.
# API Overview
> Reference for the QuickAdd scripting API - where it is available and the method families for input, choices, dates, AI, and fields
This page maps the QuickAdd API: where you can call it from, and which method family handles each kind of task. For exact signatures and edge cases, follow the links into the [full reference](/docs/QuickAddAPI/).
Reach for the API when a workflow needs scripted input, file operations, formatting, model calls, or access from another plugin. If you only need to create a note or append text, start with [Template Choices](/docs/Choices/TemplateChoice/) or [Capture Choices](/docs/Choices/CaptureChoice/) - add the API when the workflow needs logic.
## Where the API is available
[Section titled “Where the API is available”](#where-the-api-is-available)
| Context | Access pattern | Use it for |
| ----------------- | ---------------------------------- | -------------------------------------------------- |
| Macro user script | `params.quickAddApi` | Scripted macro steps |
| Inline script | `this.quickAddApi` | Small transformations inside templates or captures |
| Other plugin | `app.plugins.plugins.quickadd.api` | Calling QuickAdd from plugin code |
| Templater script | `app.plugins.plugins.quickadd.api` | Prompting or running choices from Templater |
## Common tasks
[Section titled “Common tasks”](#common-tasks)
| Task | Method family | Reference |
| -------------------------------------------------- | ------------------------ | ----------------------------------------------------------------------- |
| Ask for text, selections, dates, or grouped inputs | User input methods | [QuickAdd API Reference](/docs/QuickAddAPI/#user-input-methods) |
| Run another choice from a script | Choice execution | [Choice Execution](/docs/QuickAddAPI/#choice-execution) |
| Read selected text or clipboard content | Utility module | [Utility Module](/docs/QuickAddAPI/#utility-module) |
| Format dates | Date module | [Date Module](/docs/QuickAddAPI/#date-module) |
| Call configured AI providers | AI module | [AI Module](/docs/QuickAddAPI/#ai-module) |
| Read field suggestions from the vault | Field suggestions module | [Field Suggestions Module](/docs/QuickAddAPI/#field-suggestions-module) |
## Recommended path
[Section titled “Recommended path”](#recommended-path)
1. Read the [scripting overview](/docs/Advanced/ScriptingGuide/) if you have not written a QuickAdd script before.
2. Copy a working pattern from the [examples overview](/docs/Examples/).
3. Use the [QuickAdd API reference](/docs/QuickAddAPI/) for exact signatures and edge-case behavior.
## Minimal macro script
[Section titled “Minimal macro script”](#minimal-macro-script)
```javascript
module.exports = async ({ quickAddApi }) => {
const title = await quickAddApi.inputPrompt("Book title");
return `# ${title}`;
};
```
The returned value can be used by later macro steps or inserted through format syntax.
# QuickAdd CLI
> Run, list, and check QuickAdd choices from Obsidian's native CLI, pass variables non-interactively, and create notes from templates
QuickAdd hooks into Obsidian’s own command-line interface, so you can run a choice from a terminal, a shell script, or a scheduled job - no link-building or extra plugins. Point the `obsidian` command at a vault and a choice, and it runs.
```bash
obsidian vault=dev quickadd choice="Daily log"
```
QuickAdd registers these CLI handlers automatically on any Obsidian version that supports plugin CLI commands. The [Raycast extension](/docs/Advanced/RaycastExtension/) is built on these commands, so you can run choices from Raycast without typing any.
## What you need
[Section titled “What you need”](#requirements)
* Obsidian `1.12.2` or newer (the plugin CLI handler API arrived in `1.12.2`).
* QuickAdd enabled in the target vault.
## The commands
[Section titled “The commands”](#commands)
### Run a choice: `quickadd` / `quickadd:run`
[Section titled “Run a choice: quickadd / quickadd:run”](#quickadd--quickaddrun)
Run a QuickAdd choice from the CLI, by name or by id:
```bash
obsidian vault=dev quickadd choice="Daily log"
obsidian vault=dev quickadd:run id="choice-id"
obsidian vault=dev quickadd:run choice="Weekly review" date=lw
```
`date=` is the day for `{{DATE}}`. Pass a real day (`2026-08-21`, `last friday`, `lw`) and the choice’s Which day setting is skipped. Pass `ask` to open the date picker instead.
`current=` names the run’s current note (QuickAdd 2.32.0 or later). By default that is the active tab, which a run started from outside Obsidian cannot see. Pass a vault path (`.md` may be omitted) and every part of the run that reads the current note uses that note instead: **Capture to active file**, **Link to captured file** (**Link to created file** in a Template), `{{LINKCURRENT}}`, `{{LINKSECTION}}`, `{{FILENAMECURRENT}}`, `{{FOLDERCURRENT}}`, `{{SELECTED}}`, and a Template’s **Same folder as current file**. Pass `none` to run without a current note.
```bash
obsidian vault=dev quickadd:run choice="Add to today" value-value="Call Sam" current="Daily/2026-10-07"
obsidian vault=dev quickadd:run choice="Inbox" value-value="Idea" current=none
```
* A path with no note returns `{"ok":false,"error":"No note at '…'."}` before anything runs.
* When the named note is not open in the active editor, QuickAdd writes through the vault: a capture set to **At cursor**, **New line above cursor**, or **New line below cursor** goes to the top of the note, a link goes on a new last line (or into its frontmatter property), `{{LINKSECTION}}` links to the note without a heading, and `{{SELECTED}}` is empty.
* With `none`, a choice that requires the current note fails with an error that says the run was started with `current=none`. A Template set to **Same folder as current file** uses the vault root instead. An optional link or token is left empty.
* Macro scripts that call `app.workspace.getActiveFile()` themselves are not affected; `current=` only changes what QuickAdd resolves. An **Obsidian Command** step that runs a QuickAdd choice’s command uses the named note too.
`current=` is also accepted by `quickadd:run-template`, `quickadd:check`, and `quickadd:interactive`.
### List your choices: `quickadd:list`
[Section titled “List your choices: quickadd:list”](#quickaddlist)
List every QuickAdd choice (including nested choices inside multis):
```bash
obsidian vault=dev quickadd:list
obsidian vault=dev quickadd:list type=Capture
obsidian vault=dev quickadd:list commands
```
Each Template and Capture carries a `writes` object that says what it writes, read from its settings (QuickAdd 2.30.0 or later). You (or an agent) can tell choices apart without opening them:
```json
{"name":"Daily log","type":"Capture","currentNote":"none","writes":{"target":"Daily/{{DATE:YYYY-MM-DD}}.md","position":"after","line":"## Log","format":"- {{TIME}} {{VALUE}}\n","createWithTemplate":"Templates/Daily.md"}}
{"name":"Meeting note","type":"Template","currentNote":"optional","writes":{"template":"Templates/Meeting.md","folder":"Meetings","fileName":"{{DATE}} {{VALUE:topic}}"}}
```
Every choice also carries `currentNote` (QuickAdd 2.32.0 or later), which says whether the choice uses the current note, so a caller knows when to pass `current=`: `required` when the run fails, or lands somewhere else, without one (**Capture to active file**, a link set to **Enabled (strict)**, a `{{LINKCURRENT}}`-style token, **Same folder as current file**, or no folder setting while Obsidian creates new notes in the current file’s folder), `optional` when something is left empty without one (a link set to **Enabled (skip if unavailable)** and the tokens it makes optional, `{{SELECTED}}`, a `{{FIELD:…|default-from:active}}` default), and `none` otherwise. The tokens are read from every text the run formats, including the template a Capture creates its target with and the files a template includes. Macros and Multis are always `none`. The same key is in the `choice` summary that `quickadd:check`, `quickadd:run`, and `quickadd:interactive` return.
| Capture key | Meaning |
| -------------------- | ---------------------------------------------------------------------------------------------------------------------------------------------------------------------- |
| `target` | The **Capture to** value, or `` |
| `position` | `top`, `bottom`, `after`, `before`, `cursor`, `newLineAbove`, `newLineBelow`, or `property`, matching **Write position** |
| `line` | The line for `after` or `before` |
| `property` | The property a `property` capture writes |
| `format` | The text written: the **Capture format**, or `{{VALUE}}` when it is empty (before QuickAdd 2.30.0: when its toggle is off) |
| `task` | `true` when the capture is written as a task |
| `eachLine` | `true` when [**One entry per line**](/docs/Choices/CaptureChoice/#one-entry-per-line) is on: each line of `{{VALUE}}` becomes its own entry (QuickAdd 2.30.0 or later) |
| `createWithTemplate` | The template for a target file that doesn’t exist yet |
| Template key | Meaning |
| ------------ | ------------------------------------------------------------------------------------------------------------------------ |
| `template` | The template file |
| `folder` | The folder the note goes in; `` is Obsidian’s default location for new notes |
| `fileName` | The **File name**, or `{{VALUE}}` when it is empty (before QuickAdd 2.30.0: when the **File name format** toggle is off) |
Formats are shown unexpanded. `` means QuickAdd asks for that part when the choice runs. Macros and Multis have no `writes`.
### See what a choice still needs: `quickadd:check`
[Section titled “See what a choice still needs: quickadd:check”](#quickaddcheck)
Check which inputs are still missing before a non-interactive run:
```bash
obsidian vault=dev quickadd:check choice="Daily log"
```
### Suggest links and tags: `quickadd:suggest`
[Section titled “Suggest links and tags: quickadd:suggest”](#quickaddsuggest)
List what Obsidian’s own `[[` link or `#` tag suggester offers, so another app can complete links and tags the way the editor does:
```bash
obsidian vault=dev quickadd:suggest kind=links
obsidian vault=dev quickadd:suggest kind=links source="Daily/2026-10-04.md"
obsidian vault=dev quickadd:suggest kind=tags
```
* `kind=links` returns one item per linkable file and per alias, newest first, with files in Obsidian’s **Excluded files** list last. `text` is what goes inside `[[...]]` (`Plan`, `Projects/Meeting` when two notes share a name, `Plan|Big Plan` for an alias), `path` is the file, and `alias` is set on alias items. Pass `source=` when you know which note the link goes into: under the **Relative path to file** link format the text depends on it; without `source` the text is computed from the vault root.
* `kind=tags` returns `{"tag":"work","count":3}` items, most used first, without the `#`.
### Create a note from a template: `quickadd:run-template`
[Section titled “Create a note from a template: quickadd:run-template”](#quickaddrun-template)
Create a new note from a template file, with no dedicated Template choice required. This is the scriptable form of the **New note from template** command.
```bash
obsidian vault=dev quickadd:run-template \
path="Templates/Meeting.md" \
value-value="2026-06-14 Standup"
```
* `path=` is the template file (vault-relative). A leading slash is allowed and a missing `.md` extension is added, matching how Template choices resolve paths. If no file resolves there, the command returns `{"ok":false}` up front.
* The new note’s name comes from `{{VALUE}}` - pass it as `value-value=...`. A non-interactive run with an empty or missing name returns `missingFlags` instead of creating an unnamed note. The note is created in Obsidian’s “Default location for new notes”.
* The picker (interactive command) only lists templates inside your configured template folder(s); `path=` here is explicit, so any vault file resolves.
* Like `quickadd:run`, name collisions on the target note still prompt (the file-exists choice is not a pre-collected input). Under `quickadd:interactive` that prompt is forwarded to you like any other.
### Save a clipboard image: `quickadd:save-clipboard-image`
[Section titled “Save a clipboard image: quickadd:save-clipboard-image”](#quickaddsave-clipboard-image)
Save a 1x1 PNG through the same path QuickAdd uses when you paste an image into a prompt or when `{{CLIPBOARD}}` falls back to an image. Useful for checking attachment naming without driving a modal.
```bash
obsidian vault=dev quickadd:save-clipboard-image \
sourcePath="Meetings/Meeting notes.md" \
nameAfterNoteTitle=true
```
* `sourcePath=` is the note the attachment belongs to (the capture destination). Empty uses vault-root attachment placement and the timestamp name even when title-naming is on.
* `nameAfterNoteTitle=` overrides the **Name pasted images after the note title** setting for this save. Omit it to use the setting.
### Preview and import a package: `quickadd:package-preview` / `quickadd:package-import`
[Section titled “Preview and import a package: quickadd:package-preview / quickadd:package-import”](#quickaddpackage-import)
Review a [package](/docs/Choices/Packages/) as JSON, or install it with the import modal’s default decisions:
```bash
obsidian vault=dev quickadd:package-preview path=path/to/package.quickadd.json
obsidian vault=dev quickadd:package-import path=path/to/package.quickadd.json acknowledge=true
```
A package that runs code is refused until you pass `acknowledge=true`. See [Preview a package from the command line](/docs/Choices/Packages/#preview-from-the-command-line) for the other options. `quickadd:package-import` needs QuickAdd 2.28.0 or later.
### Check an AI provider: `quickadd:ai-test-connection`
[Section titled “Check an AI provider: quickadd:ai-test-connection”](#quickaddai-test-connection)
Check that an [AI provider](/docs/AIAssistant/#add-a-provider) accepts its linked key. This is the provider page’s **Test connection** button:
```bash
obsidian vault=dev quickadd:ai-test-connection provider=openai
```
* `provider=` is the provider’s ID, such as `openai`, or its name. The ID must match exactly; the name can be in any case.
* A working key returns `"ok":true` and the number of models the provider lists:
```json
{"command":"quickadd:ai-test-connection","provider":"openai","ok":true,"modelCount":64,"apiKeyLinked":true}
```
A rejected key returns `"ok":false` with the provider’s error.
* An unknown or missing `provider=` returns `"ok":false` and lists the provider IDs you can use.
* The output never contains the key. This command needs QuickAdd 2.28.0 or later.
## Let an AI agent write through your choices
[Section titled “Let an AI agent write through your choices”](#agents)
Coding agents such as Claude Code and Codex can edit your vault’s files directly, but then they copy your conventions by hand and sometimes miss one. QuickAdd ships an [agent skill](https://github.com/chhoumann/quickadd/tree/master/skills/quickadd) that tells an agent to list your choices, check their inputs, and run them with `verify` instead. It can also create a new choice for you by importing a package.
Install it into your vault:
```bash
npx skills add chhoumann/quickadd
```
Or copy `skills/quickadd/SKILL.md` into your agent’s skills folder, such as `.claude/skills/quickadd/` in your vault.
The skill needs QuickAdd 2.30.0 or later: it picks a choice by the `writes` object that [`quickadd:list`](#quickaddlist) shows.
## Pass variables to a choice
[Section titled “Pass variables to a choice”](#passing-variables)
QuickAdd’s CLI accepts variables three ways:
1. `value-=...` (the same form the URI uses)
2. extra `key=value` args
3. `vars=` for structured values
```bash
obsidian vault=dev quickadd \
choice="Daily log" \
value-project="QuickAdd" \
mood="focused"
obsidian vault=dev quickadd \
choice="Daily log" \
vars='{"project":"QuickAdd","sprint":42}'
```
Values are passed through exactly as provided. If a choice should ignore an accidental leading or trailing space for a specific placeholder, use `|trim` in that format string, for example `{{VALUE:project|trim}}`.
For [property captures](/docs/Choices/CaptureChoice/#property), `vars` preserves native numbers, checkboxes, and lists when the Capture format is one whole token:
```bash
obsidian vault=dev quickadd choice="Add project tags" \
vars='{"tags":["Research, writing","work"]}' verify=true
```
`verify=true` includes the engine’s [confirmed outcome](#verified-and-effect), so automation can distinguish a changed property from an unchanged capture.
For Template choices, passing `value` supplies the new note’s name. It does not select an existing note from the discovery picker. The generated path follows the choice’s file-exists behavior. To use **When selecting an existing note**, run interactively and select the offered note in the discovery prompt.
### Names the CLI reserves
[Section titled “Names the CLI reserves”](#reserved-flag-names)
The bare `key=value` form (pattern 2) ignores names that a command already uses as flags or selectors: `choice`, `id`, `vars`, `ui`, `verify`, `date`, `current` (on `quickadd` / `quickadd:run`), `fields` (on `quickadd:check`), and `path` (on `quickadd:run-template`). If a choice has a variable named after one of these (for example `{{VALUE:verify}}`), pass it with the `value-` prefix or via `vars` instead - neither is ever treated as a flag:
```bash
obsidian vault=dev quickadd choice="My choice" value-verify="a value"
obsidian vault=dev quickadd choice="My choice" vars='{"verify":"a value"}'
```
## What happens when inputs are missing
[Section titled “What happens when inputs are missing”](#non-interactive-behavior)
By default, `quickadd` and `quickadd:run` are non-interactive. If QuickAdd finds missing inputs, it returns a JSON payload with `missing` fields and `missingFlags` suggestions instead of opening prompts.
Pass a returned `missingFlags` entry back exactly as shown. Some generated flags fill internal runtime selections, such as a preselected capture target file.
Add `ui` to allow interactive prompts:
```bash
obsidian vault=dev quickadd choice="Daily log" ui
```
In a [scheduled job](/docs/Advanced/TriggerQuickAddFromOutsideObsidian/#run-quickadd-on-a-schedule), only add `ui` when the job runs while you are logged in and able to answer the prompts.
## Knowing whether anything actually landed
[Section titled “Knowing whether anything actually landed”](#verified-and-effect)
`ok:true` means the choice ran without aborting. It does **not** mean your vault changed. Two more keys answer the questions an automation actually asks:
| Key | Question it answers | Values |
| ---------- | ----------------------------------------- | -------------------------------------------------------------------------------------------------- |
| `verified` | Did QuickAdd confirm what the engine did? | `true` on the outcome path (`verify` on a Template/Capture choice), `false` when it could not look |
| `effect` | What did the run do to the vault? | `created`, `changed`, `unchanged`, `unknown` |
```bash
obsidian vault=dev quickadd:run choice="Inbox" value-value=" " verify=true
# -> {"ok":true,"choice":{…},"file":"Inbox.md","verified":true,"effect":"unchanged","durationMs":6}
```
That run is working exactly as designed: the capture’s payload was empty, so QuickAdd deliberately left `Inbox.md` alone rather than writing a blank line, and said so in a notice. A Template set to **Keep existing file** when the file already exists reports the same `effect`. If you are counting captures, writing an idempotency marker, or deciding whether to retry, key off `effect`, not `ok`.
`effect` is present on every **success** payload (`ok:true`), and `unknown` is stated rather than omitted - a missing key reads as `false` in both `jq` and JavaScript, which would turn “QuickAdd did not look” into “nothing happened”. A failed or cancelled run carries `error` instead and no `effect`, because there is no outcome to describe. `verified:false` still means only *“not confirmed - go look”*; it never means *“confirmed that nothing changed”*.
The `obsidian://quickadd` [x-callback](/docs/Advanced/TriggerQuickAddFromOutsideObsidian/) success callback carries the same `effect` value.
## Answer run-time prompts from outside: `quickadd:interactive`
[Section titled “Answer run-time prompts from outside: quickadd:interactive”](#interactive-runs-quickaddinteractive)
Some choices prompt at *run time* for inputs that can’t be gathered up front - a macro’s `quickAddApi.suggester` over data it just fetched, an `inputPrompt`, `yesNoPrompt`, `checkboxPrompt`, and so on. `quickadd:interactive` runs a choice and **forwards those prompts to you over a local HTTP bridge**, so an external front end (Raycast, a script) can render them and send back answers, instead of the prompts opening in Obsidian.
```bash
obsidian vault=dev quickadd:interactive choice="Import from Readwise"
# -> {"ok":true,"host":"127.0.0.1","port":51789,"sessionId":"…","token":"…","capabilities":["abort","outcome-effect"]}
```
The command returns connection details immediately and runs the choice in the background. Attach to the session and drive it:
* `GET http://127.0.0.1:/poll?session=&token=` - long-polls for the next event: `{"kind":"prompt","requestId":…,"prompt":{…}}`, `{"kind":"done","result":…}`, `{"kind":"error","error":…}`, or a periodic `{"kind":"idle"}` keepalive (just poll again).
* `POST http://127.0.0.1:/reply?session=&token=` with body `{"requestId":…,"value":…}` to answer, or `{"requestId":…,"cancelled":true}` to cancel (which ends the run - except on an `info` panel, see below).
* `POST http://127.0.0.1:/abort?session=&token=` - end the run. Answers `{"ok":true,"interrupted":}`, where `n` is how many pending prompts it rejected; `409` if the run had already finished (benign - poll for the terminal event); `404` for an unknown session or token, or for any method other than `POST`.
Prompts a Template or Capture run opens itself - the “file already exists” chooser, the folder picker, the note-discovery picker, the heading picker, the capture-target picker - are forwarded like any other. (The AI assistant’s tool-confirmation dialog is the one that is not: run such a choice at the desktop, or set tool confirmation to “never”.)
They arrive as `suggester` prompts, and because the engine controls the list, a reply that is not one of the offered `value` tokens is refused rather than acted on (unless the prompt sets `allowCustomInput`, as the folder and discovery pickers do so you can create something new).
Prompt `type`s and the `value` you reply with: `suggester`/`input`/`date` → string, `confirm` → boolean, `checkbox` → string array, `info` → acknowledgement, `form` → an object mapping each field’s `id` to its value. Ordinary and date fields use strings (dates use the `@date:ISO` format), while multi-select fields use string arrays. Use the array form for multi-selects so values containing commas remain unambiguous.
A `form` field that picks notes (a Capture target, a `{{FILE:...}}` field) has `"type":"suggester"` like any other pick list, plus `"picker":"file"` (QuickAdd 2.31.0 and later); other fields omit `picker`. QuickAdd’s own form starts a note picker empty unless the field has a `defaultValue`, and does not submit while a required single-note picker (not `optional`, not `multiSelect`) has no pick. Other pick lists have no such rule.
The run’s outcome arrives as the `done`/`error` poll event: `done` carries the same `verified` and `effect` keys described under [Knowing whether anything actually landed](#verified-and-effect).
### Cancelling, and ending a run
[Section titled “Cancelling, and ending a run”](#cancelling-and-ending-a-run)
`{"cancelled":true}` is how you say *the user dismissed this prompt*. It ends the run exactly as pressing Escape on the in-app dialog does.
`info` is the exception, because the in-app dialog is: `GenericInfoDialog` resolves on every close path and has no way to abort anything, so the same choice run in Obsidian continues past the panel. Escape is the only gesture an info panel affords, so cancelling one just closes it and the run carries on - matching the app.
To end a run deliberately, `POST /abort`. It rejects whatever the run is blocked on and makes its next prompt fail too, so the run unwinds and delivers its **real** outcome - usually `{"kind":"error","error":"Input cancelled by user"}`, but `done` if it had nothing left to interrupt and simply finished. `/abort` never fabricates a terminal event; keep polling until one arrives. The `interrupted` count tells you whether it stopped anything.
What `/abort` cannot reach
`/abort` interrupts prompts that were routed **to you**. A run that is mid-work between prompts keeps going, so `"interrupted":0` means nothing was waiting on you and the run may still finish and commit its side effects. Keep polling for the terminal event either way.
### When a reply is rejected
[Section titled “When a reply is rejected”](#when-a-reply-is-rejected)
`/reply` answers `400` and leaves the prompt **pending** when it cannot honour what you sent, so you can correct the reply and POST again. Two cases:
* `cancelled` is present but is not a boolean (`"true"`, `1`, `"no"`). QuickAdd will neither abort on a flag it does not recognise nor quietly answer the prompt on the user’s behalf, so it asks you to fix the flag. Use the literal `true`; `false` and omitting it both mean “this is a real answer”.
* a `confirm` reply whose `value` is not `true`/`false`. The user never answered, and QuickAdd will not invent a “No” for them.
Every other prompt type accepts whatever you send, including an empty answer: `""` and `[]` are things a user genuinely submits in the app (the Skip buttons, optional fields), so they must stay legal here too.
A `409` from `/reply` means nothing was waiting on that `requestId`.
Good to know:
* **Desktop only.** The bridge binds to `127.0.0.1`, is gated by the per-session `token`, rejects browser (`Origin`/`Referer`) and non-loopback `Host` requests, and the server is ephemeral - it starts on the first session and stops when the last one ends.
* **Concurrency.** Each run gets its own `sessionId` + `token`; many can run at once without interfering.
* If no client attaches within \~30s the run is aborted so a prompt can’t hang forever.
# Open QuickAdd from a URI
> Trigger QuickAdd choices with the obsidian://quickadd URI, pass named values, and get the created note's path back via x-callback-url
A special link, `obsidian://quickadd`, runs a QuickAdd choice from outside Obsidian - from an Apple Shortcut, a launcher, another app, or a Markdown link in a note. You give it the name of the choice to run and, optionally, the values to fill in, and QuickAdd runs it just as if you had triggered it yourself.
This is the shape of the link:
```plaintext
obsidian://quickadd?choice=[&value-VALUE_NAME=...]
```
Encode everything
Every parameter name and value has to be [URL encoded](https://en.wikipedia.org/wiki/Percent-encoding) to work. An online tool like [urlencoder.org](https://www.urlencoder.org/) makes it easy to encode parts of the link.
The only required part is `choice`, which picks the choice to run **by its name**. The name has to match exactly, or QuickAdd cannot find it.
If you would rather script this from a shell than build links, see [QuickAdd CLI](/docs/Advanced/CLI/) for the native Obsidian CLI commands.
## Pass values into the choice
[Section titled “Pass values into the choice”](#pass-values-into-the-choice)
Add a `value-` parameter for each [named value](/docs/FormatSyntax/) the choice asks for. A capture asking for `{{VALUE:contents}}` is filled by `value-contents=...`.
If a variable name has a space in it, encode the space as `%20` like everything else. A variable named `log notes` is passed as `value-log%20notes=...`.
Values are used exactly as they are encoded in the link. If a format should ignore an accidental leading or trailing space for one placeholder, add `|trim` to it, for example `{{VALUE:log notes|trim}}`.
Unnamed values - a bare `{{VALUE}}`/`{{NAME}}`, or `{{MVALUE}}` - cannot be filled from the link. QuickAdd prompts for them inside Obsidian as usual.
## Choose which vault: `vault=`
[Section titled “Choose which vault: vault=”](#vault-parameter)
Like every Obsidian URI, you can add a `vault` parameter to say which vault to run QuickAdd in. Leave it out and Obsidian uses your most recent vault.
```plaintext
obsidian://quickadd?vault=My%20Vault&choice=Daily%20log&value-contents=Lorem%20ipsum.
```
## Get a result back: x-callback-url
[Section titled “Get a result back: x-callback-url”](#getting-a-result-back-x-callback-url)
QuickAdd can open a callback link once a choice finishes, so whatever triggered it (an Apple Shortcut, say) can react to the result and receive the path of the affected note. This follows the [x-callback-url](http://x-callback-url.com/) convention.
Off by default
This is opt-in. Turn on **Settings → QuickAdd → Advanced → Allow URI x-callback-url** (QuickAdd 2.30.0 or later; earlier versions show it on the main QuickAdd tab) first. It is off by default because the callback link is controlled by whoever creates the `obsidian://` link, and the callback can carry your note’s vault path.
Template and Capture only
Callbacks work for **Template** and **Capture** choices. Triggering a Macro or Multi choice with a callback fires `x-error` with `errorCode=unsupported-choice-type` instead. (You can still trigger Macro and Multi choices from the URI without a callback.)
### Which callback fires when
[Section titled “Which callback fires when”](#callback-parameters)
| Parameter | Fired when |
| ---------------- | ----------------------------------------------------------------------------------------------------------------------- |
| `x-success` | the choice completed successfully |
| `x-error` | the choice failed, was aborted, was not found, or is unsupported |
| `x-cancel` | you cancelled a prompt while the choice was running |
| `x-callback-url` | legacy shorthand - used only when none of the above are present; it then fires for **success and cancel** (never error) |
If you do not provide a slot, nothing opens for that outcome (there is no fallback - a cancel with no `x-cancel` opens nothing).
Only `shortcuts:` and `obsidian:` callback links are allowed. Any other scheme (such as `https:`, `file:`, or `javascript:`) is rejected and the choice does not run.
### What QuickAdd sends back
[Section titled “What QuickAdd sends back”](#result-parameters)
QuickAdd appends these query parameters to your callback link:
* On `x-success`: `status=success`, `effect=` (what the run did to the vault, as the [CLI reports it](/docs/Advanced/CLI/#verified-and-effect)), and - for Template/Capture - `path=` and `url=` pointing at the affected note.
* On `x-error`: `status=error` and a stable `errorCode` (one of `choice-not-found`, `unsupported-choice-type`, `execution-failed`, `execution-aborted`, `bad-callback-url`). The detailed error message stays in Obsidian’s log and is never sent to the callback.
* On `x-cancel`: `status=cancel`.
### Encode your callback link twice
[Section titled “Encode your callback link twice”](#encoding-your-callback-url-important)
Your callback link is itself a value inside the `obsidian://` link, so it **must be fully percent-encoded** (double-encoded). If you leave a `=` or `&` un-encoded, Obsidian’s URI parser silently cuts the callback off before QuickAdd ever sees it.
For example, this looks reasonable but is **broken** - the `=My%20Cool%20Shortcut` part is dropped, leaving `shortcuts://run-shortcut?name`:
```text
obsidian://quickadd?choice=Daily%20log&x-success=shortcuts://run-shortcut?name=My%20Cool%20Shortcut
```
The **correct** form encodes the entire `x-success` value:
```text
obsidian://quickadd?choice=Daily%20log&x-success=shortcuts%3A%2F%2Frun-shortcut%3Fname%3DMy%2520Cool%2520Shortcut
```
(Note the `%2520` - the spaces inside the shortcut name are encoded twice because the value is decoded once by Obsidian and once by Shortcuts.)
### Full example
[Section titled “Full example”](#example)
Trigger a capture, run a shortcut on success, and pass along the created note’s path:
```text
obsidian://quickadd?vault=My%20Vault&choice=Daily%20log&value-contents=Lorem%20ipsum&x-success=shortcuts%3A%2F%2Frun-shortcut%3Fname%3DLog%2520Saved
```
On success QuickAdd opens your `x-success` link with these extra query parameters appended (shown here decoded - they are percent-encoded on the wire):
* `status` = `success`
* `effect` = `changed`
* `path` = `Daily/2026-06-14.md`
* `url` = `obsidian://open?vault=My Vault&file=Daily/2026-06-14.md`
Your shortcut reads them from the link it was opened with.
Mobile
QuickAdd opens callbacks with `window.open`, exactly like Obsidian’s own x-callback support. Whether a custom scheme such as `shortcuts:` launches reliably on iOS is a platform behaviour shared with Obsidian core - verify on your device.
## Watch out for sync services
[Section titled “Watch out for sync services”](#important-sync-service-limitations)
Caution
When you use QuickAdd via URI with a sync service (Obsidian Sync, iCloud, Dropbox, and so on), there is a limitation to be aware of.
**If Obsidian hasn’t been opened on a device**, files created on other devices haven’t synced to it yet. QuickAdd can then create a duplicate file that overwrites the synced version when it finally arrives.
### How this goes wrong
[Section titled “How this goes wrong”](#example-scenario)
1. You create a Daily Note on your laptop.
2. Without opening Obsidian on your phone, you trigger a Capture via URI.
3. QuickAdd checks whether the Daily Note exists (it doesn’t, locally).
4. QuickAdd creates a new Daily Note.
5. When sync runs, the new file overwrites the one from your laptop.
### How to avoid it
[Section titled “How to avoid it”](#workarounds)
* **Open Obsidian first**: always open Obsidian and wait for sync before using URIs.
* **Use device-specific names**: configure different filename formats per device (for example `{{DATE}}-mobile`).
* **Capture to active file**: use an already-open note to avoid creating a file at all.
* **Include timestamps**: add `{{TIME}}` to filenames so each one is unique.
This is a fundamental limitation of file-based sync services and cannot be fully resolved without sync-status APIs.
# One-page Inputs
> Collect every input a choice needs in a single form, filled once, instead of one prompt at a time
Normally QuickAdd asks for inputs one prompt at a time. Turn on one-page inputs and it gathers everything a choice needs into a single form you fill once, then runs. This is nicer when a choice asks for several things at once - a title, a date, and a status, say - and you would rather see them all together than click through them one by one.
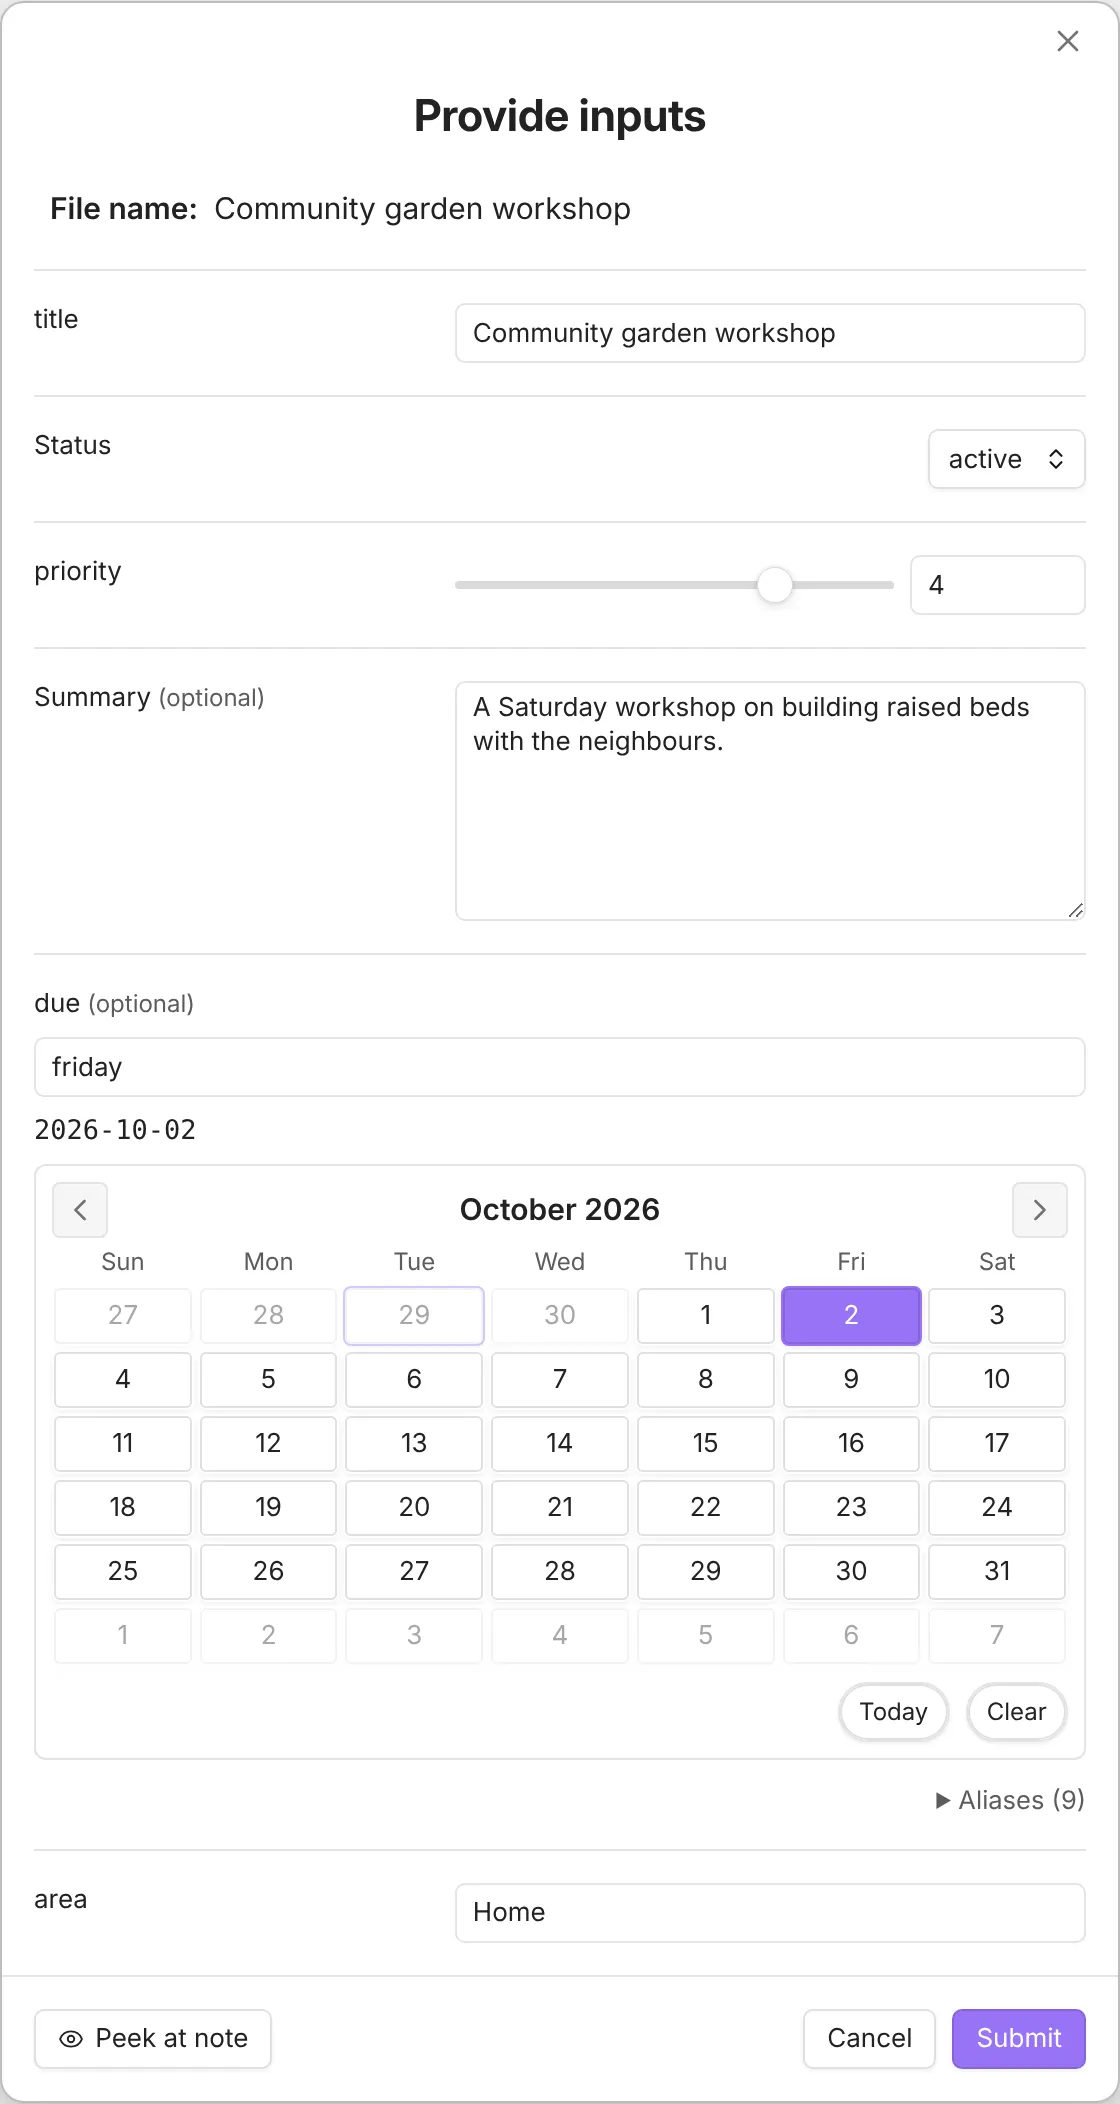
For a task-oriented overview of prompts in general, see [Controlling Prompts](/docs/ControllingPrompts/).
## Turn it on
[Section titled “Turn it on”](#enable)
Go to **Settings → QuickAdd** and toggle **One-page input for choices**.
It works with Template, Capture, and Macro choices.
When you run a Macro, the Templates and Captures you added to it share one form.
Fields appear in the order the choice uses them: the day first when [Which day](/docs/Choices/TemplateChoice/#date-origin) is **Ask each time**, then a Capture’s note picker (when it captures to a folder or a tag), a Template’s template path, folder and file name before the note content, a Macro’s steps in turn, and within each, the order they have in the format. Step-by-step prompts group one text’s fields by kind instead; see [The order prompts appear in](/docs/ControllingPrompts/#prompt-order).
The form stops at the first step that might fill in or skip later answers: another Macro, a Multi, a Conditional, a user script, or an AI command. Anything after that step is asked later. Another Macro gets its own form. QuickAdd does not guess which side of a Conditional will run.
Two Captures in a row share one form. A Capture, then a user script, then another Capture do not share a form. You fill the first Capture now, and the second Capture later. If the user script lists its own inputs, those still appear on this form. See [User scripts](#user-scripts-declare-inputs-optional).
To keep one Template or Capture off the form, set its **One-page input override** to **Never**.
## Turn it on or off for one choice
[Section titled “Turn it on or off for one choice”](#per-choice-override)
Template, Capture, and Macro choice builders have a **One-page input override** dropdown that overrides the global setting for that one choice:
* **Follow global setting** - inherit the enclosing Macro’s override, or use the global toggle (default).
* **Always** - force the one-page form for this choice even when it is off globally.
* **Never** - use step-by-step prompts for this choice even when it is on globally.
### Macro overrides
[Section titled “Macro overrides”](#macro-overrides)
A Macro’s override also applies to its steps, including steps that ask for inputs later. A step’s explicit **Always** or **Never** takes precedence over its Macro. Nested Macros inherit the enclosing Macro’s override unless they have their own.
### Choose or create a note
[Section titled “Choose or create a note”](#choose-or-create-a-note)
When a Template searches existing notes before creating, the one-page form includes its note picker alongside the Macro’s Capture fields. Choose an existing note or create a new one. With **Open note**, Template fields appear only when creating. With an [existing-note update action](/docs/Choices/TemplateChoice/#search-existing), inputs needed by the template remain visible for the selected note. Inputs used only in the new note’s name or folder stay hidden. Switching between notes keeps your drafts. Each Capture’s anonymous `{{VALUE}}` has its own answer, separate from the note title. Named inputs such as `{{VALUE:details}}` remain shared.
If that Template’s override is **Never**, QuickAdd shows its note picker first. After the Template finishes, remaining eligible Capture inputs appear together in one form. Scripts and conditional steps retain their execution boundaries.
## What ends up in the form
[Section titled “What ends up in the form”](#what-gets-collected)
QuickAdd scans the choice for placeholders and turns each one into a field:
* Placeholders in file names, templates, capture content, and capture property names: `{{VALUE}}`, `{{VALUE:name}}`, `{{VDATE:name, YYYY-MM-DD}}`, `{{FIELD:name|...}}`, and `{{FILE:folder|...}}`.
* Nested `{{TEMPLATE:path}}` includes are scanned recursively, so their prompts show up too.
* `{{VALUE|type:multiline}}` and `{{VALUE:name|type:multiline}}` become textareas.
* `{{VALUE:name|type:number|min:1|max:10}}` becomes a bounded numeric input, and `{{VALUE:name|type:slider|min:0|max:100|step:5}}` becomes a slider plus numeric input.
* The capture target file, when you are capturing to a folder or a tag. It is a searchable picker like a [FILE input](#file-ux), and it also finds notes by their aliases. With **Create file if it doesn’t exist**, typing a new name offers **Create new note: name**, as the run’s picker does, and the capture creates that note. A note’s name or alias picks the note instead. The picker starts empty, and the form waits for a note before it submits (QuickAdd 2.30.0 or later; earlier versions picked the first note for you).
* Inputs declared by a user script inside a macro, if the script provides them.
For [property captures](/docs/Choices/CaptureChoice/#property), a plain `VALUE` input uses the property’s Number or Checkbox widget when its type is known. If the property or its type is not known yet, QuickAdd asks for that value after resolving the target note and property. **Choose when capturing** also opens its property picker at runtime.
Text and textarea fields support `[[` file links and `#` tags. **Peek at note** hides the whole form while you read or select text in the open note. **Insert selection** returns text to the last text field you focused, or the first text field if you have not focused one.
### How dates behave in the form
[Section titled “How dates behave in the form”](#date-ux)
* Date fields accept natural language, like `today` or `next friday`.
* Short aliases work and are configurable in settings: `t` (today), `tm` (tomorrow), `yd` (yesterday).
* The field shows a formatted preview and stores a normalized `@date:ISO` value internally.
### How FIELD inputs behave
[Section titled “How FIELD inputs behave”](#field-ux)
* `{{FIELD:...}}` inputs suggest the values the property already has in your notes’ frontmatter (plus inline `key:: value` fields with `|inline:true`).
* The field is named after the property, or after its [`|label:`](/docs/FormatSyntax/#field-label) when it has one.
* `{{FIELD:...|multi}}` is not shown inline in the form, because vault field values can contain commas. QuickAdd collects the rest of the form first, then opens the regular multi-select for that field.
### How FILE inputs behave
[Section titled “How FILE inputs behave”](#file-ux)
* `{{FILE:folder}}` appears as a searchable picker in the form. Search matches the friendly note title, file name, and full vault path.
* The selected file is shown above the search field and can be removed or replaced.
* A single-select picker starts empty. Until a required one has a file, **Submit** and **Ctrl/Cmd+Enter** don’t submit: a notice names the field, and the form takes you to it. Where the field accepts a typed value, picking **Create new note: name** or **Use “name”** counts as its file. QuickAdd 2.30.0 or later; earlier versions picked the first file, so an untouched form used it.
* `{{FILE:folder|multi}}` stays in the same form. Pick several files without opening a second modal, and remove the last pick by pressing Backspace in an empty search field.
* Multi-select results keep the folder’s file order. File names and friendly labels containing commas are handled as complete values.
*Inline FILE pickers introduced in QuickAdd 2.21.0.*
## Fields you can leave empty
[Section titled “Fields you can leave empty”](#optional-fields)
A field marked with the [`|optional` flag](/docs/FormatSyntax/#optional-fields) shows an **(optional)** badge and may be left blank. Leaving it blank stores an intentional empty value, so the step-by-step prompt will not ask for it again later.
Good to know:
* A field counts as optional only when **every** occurrence of that variable across the scanned formats is flagged.
* Optional dropdowns get a **Skip (leave empty)** entry; the first real option stays preselected.
* An optional single-file picker starts empty and submits empty unless you pick a file, like **Skip** in the step-by-step picker (QuickAdd 2.30.0 or later).
* An optional date field left blank resolves to empty. If what you typed cannot be read as a date, the field is handed to the regular step-by-step date prompt after you submit, instead of silently becoming empty.
## When the form is skipped
[Section titled “When the form is skipped”](#skipping-the-modal)
The form only opens when it has something to ask:
* If every required input already has a value (for example, prefilled by an earlier macro step), the form does not open.
* An empty string counts as an intentional value and will not prompt again. This applies to `{{VDATE}}` too: a script-set `""` renders empty instead of re-prompting.
* For Capture choices, a non-empty editor selection prefills `{{VALUE}}` during preflight when selection-as-value is enabled.
Required date fields
A **required** date field with a default applies the default automatically when you leave it blank. A **required** date field left blank with no usable default is re-asked by the step-by-step date prompt after you submit. Optional date fields left blank stay empty.
### What Cancel does
[Section titled “What Cancel does”](#cancel-behavior)
* Cancelling the form (Cancel button or Esc) cancels the whole run. QuickAdd does not fall back to the step-by-step prompts.
* If the form fails to open for some other reason (for example, a requirement could not be collected), QuickAdd logs a warning and runs the choice with the standard step-by-step prompts instead.
### Reserved internal variables
[Section titled “Reserved internal variables”](#internals-and-reserved-variables)
QuickAdd uses reserved variable ids prefixed with `__qa.` for internal wiring during preflight and runtime. Capture-target flags are scoped by choice id (`__qa.captureTargetFilePath.`) so two captures in one macro get two distinct fields. The unscoped `value-__qa.captureTargetFilePath=…` flag still satisfies a collection that has exactly one capture-target field (a lone Capture, or a macro with one folder/tag capture). It does not satisfy two capture-target fields at once.
These internal keys will not collide with your own variables. Avoid using the `__qa.` prefix in your scripts.
***
## User scripts: declare inputs (optional)
[Section titled “User scripts: declare inputs (optional)”](#user-scripts-declare-inputs-optional)
To have a user script’s inputs appear in the one-page form during preflight, export a static `quickadd.inputs` spec alongside your default export. This is optional and non-executing.
Example (function default export):
```js
export default async function entry(params, settings) {
// ... your script ...
}
export const quickadd = {
inputs: [
{ id: "project", label: "Project", type: "text", defaultValue: "Inbox" },
{ id: "due", label: "Due date", type: "date", dateFormat: "YYYY-MM-DD" },
{ id: "confidence", label: "Confidence", type: "slider", defaultValue: "50", sliderConfig: { min: 0, max: 100, step: 5 } },
{ id: "status", label: "Status", type: "dropdown", options: ["Todo","Doing","Done"] }
]
};
```
Example (object default export):
```js
export default {
async entry(params, settings) {
// ... your script ...
}
};
export const quickadd = {
inputs: [ { id: "topic", type: "text" } ]
};
```
Supported input fields:
* `id` (string, required)
* `label` (string)
* `type` (“text” | “number” | “textarea” | “dropdown” | “date” | “field-suggest” | “suggester” | “slider”)
* `placeholder` (string)
* `defaultValue` (string)
* `options` (string\[] for dropdown and suggester)
* `numericConfig` (object for number: `{ min?: number, max?: number, step?: number }`)
* `sliderConfig` (object for slider: `{ min: number, max: number, step?: number }`; `min` and `max` are required, `step` defaults to `1`)
* `dateFormat` (string for date)
* `description` (string)
* `optional` (boolean - field may be left empty; shows an “(optional)” badge)
* `suggesterConfig` (object for suggester: `{ allowCustomInput?: boolean, caseSensitive?: boolean, multiSelect?: boolean }`)
Field type details:
* `text`: single-line text input
* `number`: numeric input, optionally bounded by `numericConfig`
* `textarea`: multi-line text input
* `dropdown`: fixed dropdown menu (no search, must select from list)
* `date`: date input with natural language support
* `field-suggest`: vault field suggestions (uses `{{FIELD:...}}` syntax). Matches are ranked like `suggester` options.
* `slider`: bounded numeric input with a slider and editable number field. Requires `sliderConfig.min` and `sliderConfig.max`; invalid configs fall back to `number`.
* `suggester`: searchable autocomplete with custom options (allows typing custom values)
* Matches are ranked the way Obsidian’s quick switcher ranks them: an exact match first, then options that start with what you typed, then options with a word that starts with it, then options that contain it anywhere, and finally fuzzy matches. Within a group, shorter options come first. With `caseSensitive`, only options that contain the typed text in the same case are listed. Ranking needs QuickAdd 2.28.0 or later; earlier versions list matches in the order of `options`.
* Supports multi-select mode via `suggesterConfig.multiSelect: true`
* Multi-select: select multiple items, separated by commas. Suggestions stay open after each selection. The text after the last comma is what gets ranked.
## Scripts: request inputs at runtime (API)
[Section titled “Scripts: request inputs at runtime (API)”](#scripts-request-inputs-at-runtime-api)
From within a script, you can open one form that collects several inputs at once using the QuickAdd API.
```js
export default async function entry({ quickAddApi }) {
const values = await quickAddApi.requestInputs([
{ id: "project", label: "Project", type: "text", defaultValue: "Inbox" },
{ id: "due", label: "Due", type: "date", dateFormat: "YYYY-MM-DD" },
{ id: "confidence", label: "Confidence", type: "slider", defaultValue: "50", sliderConfig: { min: 0, max: 100, step: 5 } },
{ id: "status", label: "Status", type: "dropdown", options: ["Todo","Doing","Done"] },
{
id: "tags",
label: "Tags",
type: "suggester",
options: ["work", "personal", "urgent"],
placeholder: "Type to search tags..."
},
]);
// Access collected values
const { project, due, status, tags } = values;
}
```
Example with dynamic options (from Dataview):
```js
export default async function entry({ quickAddApi, app }) {
// Get dynamic options from Dataview
const dv = app.plugins.plugins.dataview?.api;
const projectNames = dv?.pages()
.where(p => p.type === "project")
.map(p => p.file.name)
.array() ?? ["Inbox"];
const values = await quickAddApi.requestInputs([
{
id: "project",
label: "Select Project",
type: "suggester",
options: projectNames,
placeholder: "Start typing project name..."
},
]);
const { project } = values;
}
```
Example with multi-select:
```js
export default async function entry({ quickAddApi }) {
const values = await quickAddApi.requestInputs([
{
id: "tags",
label: "Select Tags",
type: "suggester",
options: ["#work", "#personal", "#project", "#urgent", "#review"],
suggesterConfig: {
multiSelect: true,
caseSensitive: false
},
placeholder: "Type or select multiple tags..."
},
]);
// Result: values.tags = "#work, #project, #urgent"
const { tags } = values;
// Split into array if needed
const tagArray = tags.split(', ').filter(Boolean);
}
```
Behavior:
* Values already present in variables are used and not re-asked.
* Only missing inputs are prompted in the form.
* Returned values are also stored into `variables` for later steps in the macro.
***
## Good to know
[Section titled “Good to know”](#notes)
* Macro support is best-effort: user scripts can declare inputs via `quickadd.inputs`.
* Preflight may import user script modules to statically read `quickadd.inputs`. This can execute module top-level code.
* Inline scripts aren’t scanned for input declarations yet.
* You can still prompt ad-hoc (for example with `inputPrompt` or a suggester); those values are treated as prefilled and skip future one-page prompts.
* Closing the `requestInputs` form without submitting rejects with `MacroAbortError("Input cancelled by user")`, which stops the macro unless you catch it.
# Raycast extension
> Run QuickAdd choices from Raycast on macOS, answer their prompts in Raycast forms, and capture typed, selected, or copied text into your vault
The QuickAdd extension for [Raycast](https://www.raycast.com) runs your choices from Raycast on macOS and shows their prompts as Raycast forms and lists. It drives QuickAdd through the [Obsidian CLI](/docs/Advanced/CLI/), so the choices you already have work from Raycast without changes.
## Install
[Section titled “Install”](#install)
1. In Obsidian, turn on **Settings → General → Command line interface**, then restart Obsidian.
2. Install [QuickAdd for Obsidian](https://www.raycast.com/christian_bager_bach_houmann/quickadd) from the Raycast Store.
3. In Raycast, search for **Run QuickAdd Choice**.
## Run a choice
[Section titled “Run a choice”](#run-a-choice)
1. Open Raycast and run **Run QuickAdd Choice**.
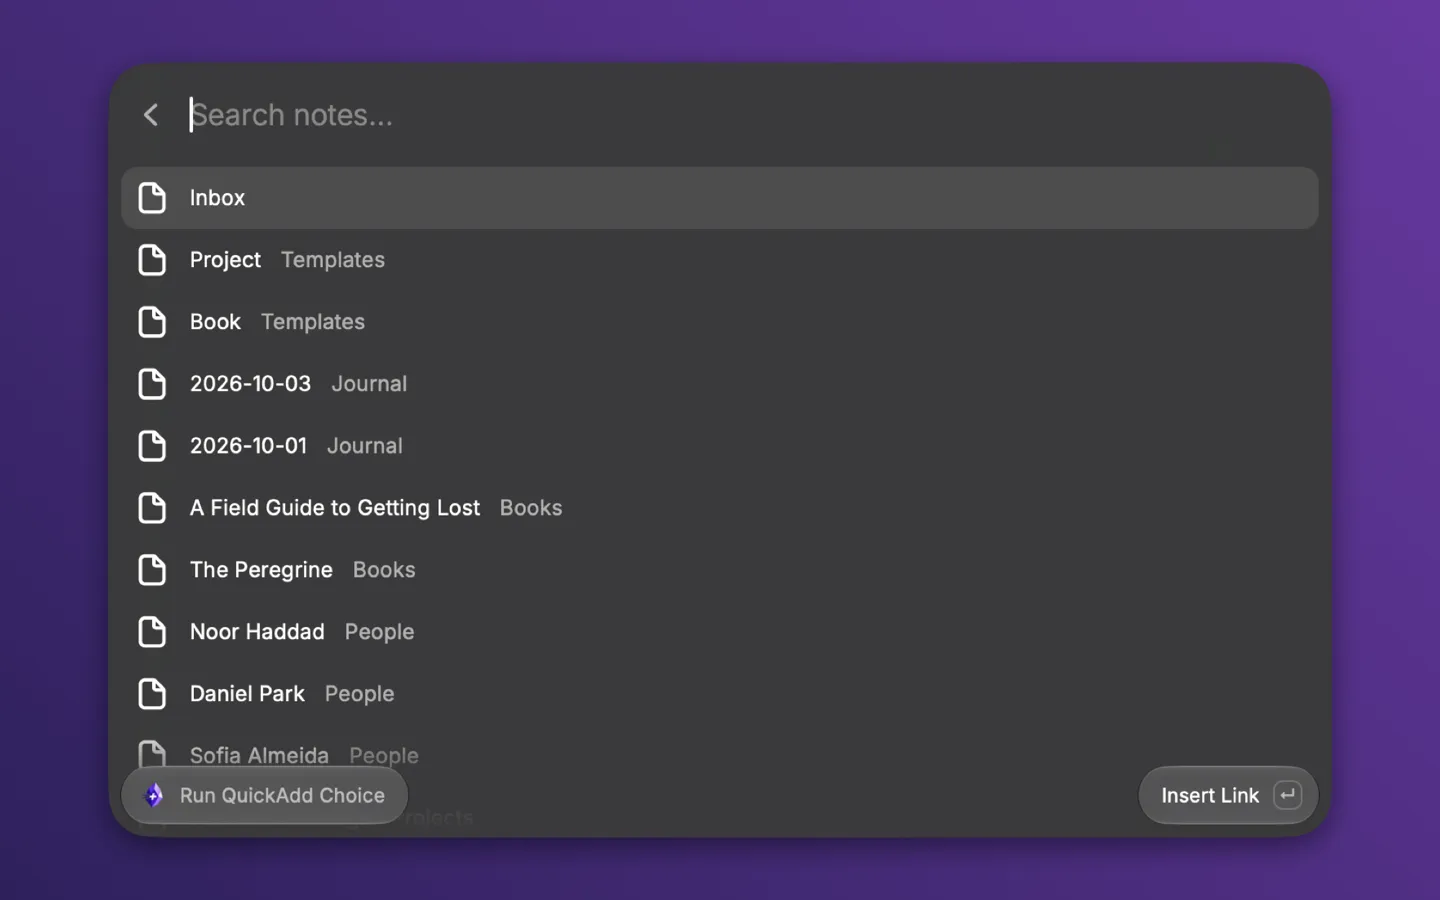
2. Pick a choice. The list groups choices by their Multi folder. Up to five choices you ran often and recently sit under **Recent** at the top.
3. Press Enter. QuickAdd runs the choice inside Obsidian and sends each prompt to Raycast.
A choice that uses the current note, such as a capture to the active file or an appended link, first asks which note that is, since Raycast cannot see the tab open in Obsidian.
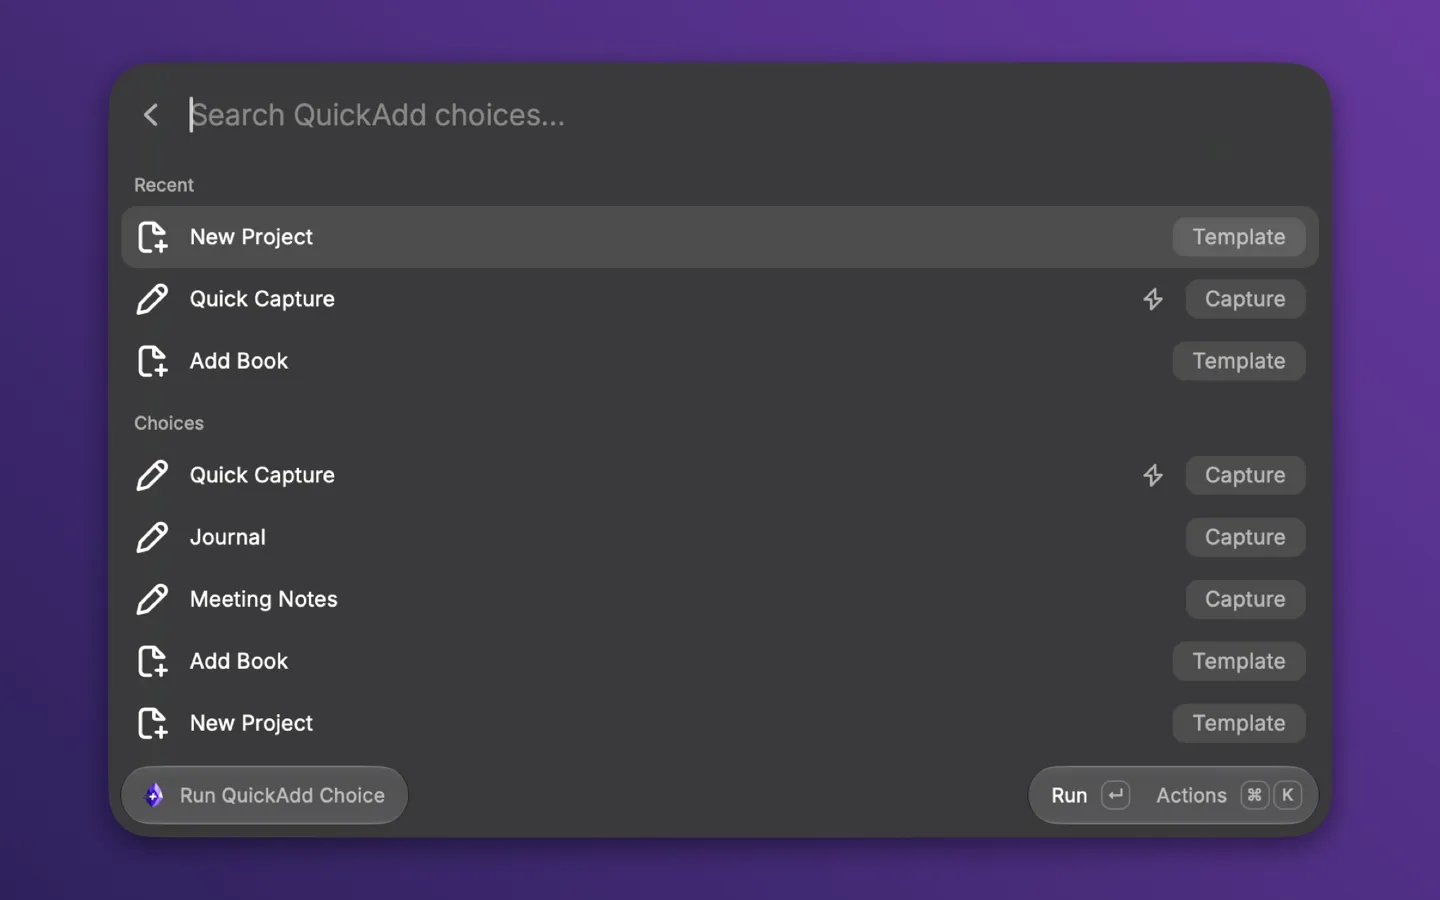
Every prompt QuickAdd raises appears in Raycast:
* A choice’s own inputs, such as `{{VALUE:title}}`, `{{VDATE:due,YYYY-MM-DD}}`, and a `{{FILE:People}}` note picker, arrive together as one form.
* Prompts a macro script raises, such as `inputPrompt`, `suggester`, `yesNoPrompt`, `checkboxPrompt`, and `requestInputs`, arrive one at a time. A suggester is a searchable list, and an info panel is a page with a **Continue** action.
* A date field gets a time picker when its format has a time part.
* A multi-select field is a tag picker. A value declared multi-line in QuickAdd, such as `{{VALUE:notes|type:multiline}}`, is a text area with room to dictate.
* A note picker starts empty, as in QuickAdd’s own form, and a required one must have a pick before the form submits.
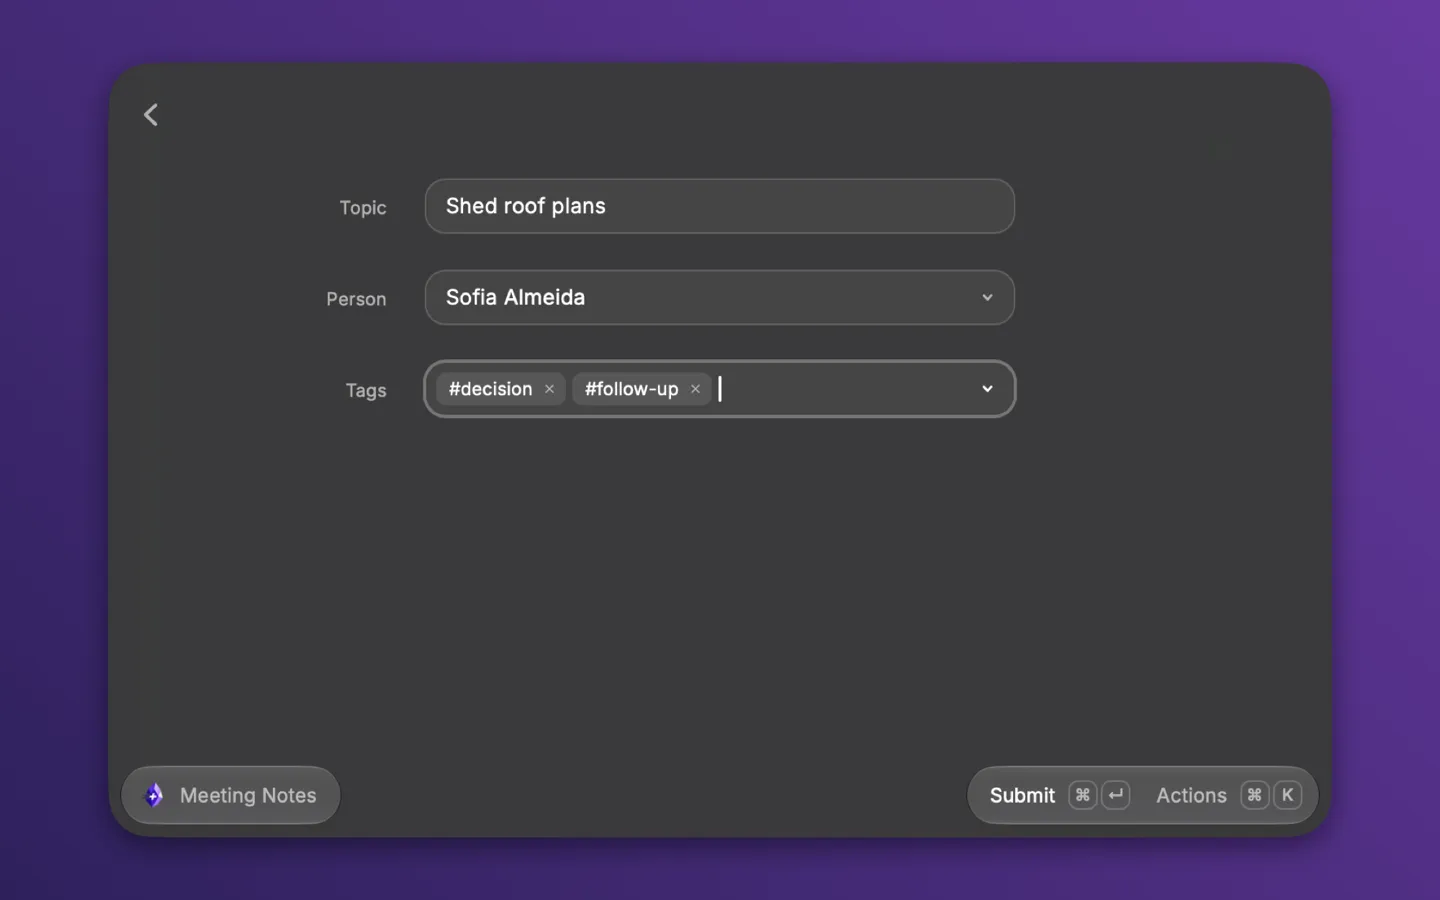
In a text field, type `[[` to pick a note or alias, or type `#` at the start of a word to pick a tag, most used first. The lists come from QuickAdd’s [`quickadd:suggest`](/docs/Advanced/CLI/#quickaddsuggest), so they match what the editor offers. Picking an item inserts the link or tag where you typed.
When the run finishes, a toast reads **Created** or **Added to** with the file name and offers **Open in Obsidian**. A choice with no prompts finishes with the toast alone.
To stop a run, choose **Cancel Run** (`Cmd+Shift+Backspace`) from the actions. QuickAdd ends the run in Obsidian.
To run a choice with QuickAdd’s own dialogs instead, open the actions (`Cmd+K`) and choose **Run in Obsidian**. Use it for a choice whose prompts Raycast cannot show, such as a Templater prompt.
## Capture from anywhere
[Section titled “Capture from anywhere”](#capture-from-anywhere)
Three commands send text to a Capture choice without opening a list:
| Command | Sends |
| --------------------- | ------------------------------------------- |
| **Quick Capture** | The text you type as the command’s argument |
| **Capture Selection** | The text selected in the frontmost app |
| **Capture Clipboard** | The text on the clipboard |
Set each command’s **Capture Choice** preference to the name of a Capture choice, as shown in **Run QuickAdd Choice**. The text runs as the choice’s `{{VALUE}}`. The command runs without prompts, so pick a choice that needs nothing else, such as a capture whose target file exists or that creates it. If several vaults have QuickAdd, also set the **Vault** preference.
Give each command a hotkey in Raycast’s extension settings. Capture Selection reports **No text selected** and Capture Clipboard reports **Clipboard is empty** when there is nothing to send.
## Hotkeys and Quicklinks
[Section titled “Hotkeys and Quicklinks”](#hotkeys-and-quicklinks)
To put one choice in Raycast’s root search, select it in **Run QuickAdd Choice**, open the actions (`Cmd+K`), and choose **Pin as Quicklink**. Raycast creates a Quicklink named after the choice. Search for it by name, or give it a hotkey or an alias in Raycast’s settings. A pinned choice runs in the vault it was pinned from and opens its prompts at once.
**Pin as Quicklink with Argument** makes a Quicklink that takes text inline. Type the Quicklink’s name, press Tab, type the text, and press Enter. The text runs as the choice’s `{{VALUE}}`, so a pinned capture with a plain `{{VALUE}}` works like Quick Capture for that one choice. Any other prompt still opens in Raycast. A choice without a plain `{{VALUE}}` ignores the text.
A choice with its command toggle on in QuickAdd shows a bolt icon in the list. Those are the choices you reach for by hotkey, so they are good candidates to pin.
## Multiple vaults
[Section titled “Multiple vaults”](#multiple-vaults)
The extension reads Obsidian’s vault list and uses the one vault that has QuickAdd enabled. When several vaults have it, **Run QuickAdd Choice** asks which vault to use, and the capture commands stop with a message until you set the **Vault** preference. A set **Vault** preference wins over detection. A pinned Quicklink always runs in the vault it was pinned from.
When the vault is closed, the extension opens it, which starts Obsidian when needed, and waits about 20 seconds for QuickAdd to answer. **Run QuickAdd Choice** reopens itself once the vault is ready, so Raycast comes back if Obsidian took the focus.
Obsidian addresses a vault by its folder name. When two registered vaults share a folder name, the extension refuses to run in either of them, because the CLI could reach the wrong one. Rename one of the folders.
## What you need
[Section titled “What you need”](#requirements)
| Feature | Needs |
| ------------------------------------------------------------------------------------------ | --------------------------------------------------------------------------------------------------------------------------------------------------------------------- |
| Everything | macOS, Raycast, and Obsidian 1.12 or later installed with the 1.12 installer, with **Command line interface** turned on. The in-app update alone does not add the CLI |
| Quick Capture, Capture Selection, Capture Clipboard | QuickAdd 2.15 or later |
| Run QuickAdd Choice, with a choice’s inputs on one form | QuickAdd 2.17.2 or later |
| Cancel Run stops the run in Obsidian, and the **Created** and **Added to** finish messages | QuickAdd 2.20 or later |
| Note pickers that start empty, `[[` and `#` completion, and Escape ending the run | QuickAdd 2.31 or later |
| Asking which note a choice should use as the current note | QuickAdd 2.32 or later |
## Limitations
[Section titled “Limitations”](#limitations)
* Templater’s own prompts, such as `tp.system.prompt`, open in Obsidian. When a run waits a few seconds with no prompt, Raycast says that QuickAdd may be asking something in Obsidian and offers **Open Obsidian** (`Cmd+O`).
* [`{{SELECTED}}`](/docs/FormatSyntax/#selected) inside a choice reads the selection in Obsidian’s editor, not the text selected on your Mac. Use **Capture Selection** for the Mac selection.
* Escape does not go back to the previous prompt. It leaves the run, and QuickAdd ends the run in Obsidian.
## Troubleshooting
[Section titled “Troubleshooting”](#troubleshooting)
* **“Turn on Obsidian’s command line interface” or “Obsidian CLI not found”**: turn on **Settings → General → Command line interface** in Obsidian and restart Obsidian. If the `obsidian` command lives somewhere other than `/opt/homebrew/bin`, `/usr/local/bin`, or inside `Obsidian.app`, set **Obsidian CLI Path** in the extension preferences.
* **“Another vault is also named …”**: two registered vaults share a folder name. Rename one of the folders. See [Multiple vaults](#multiple-vaults).
* **“Several vaults have QuickAdd”** from a capture command: set the **Vault** preference to the vault to capture into.
* **“Obsidian does not know …”**: the **Vault** preference points at a folder Obsidian has not opened. Open it once with **Open folder as vault**.
* **“Obsidian did not open … with QuickAdd ready within 20 seconds”**: open the vault in Obsidian yourself, check that QuickAdd is enabled there, and run the command again.
* **“Link and tag completion needs QuickAdd 2.31 or later”**: update QuickAdd from **Settings → Community plugins** in Obsidian. The form still submits without completion.
* **“Could not capture” with missing inputs**: the capture choice asks for more than `{{VALUE}}`. Pick a choice that runs without prompts, or run it from **Run QuickAdd Choice**, which shows the prompts.
* **“Update the extension”**: QuickAdd sent a prompt type this version of the extension does not know. Update the extension in Raycast.
# Scripting Overview
> Choose between user scripts, inline scripts, and macros, and see how values move through a macro run via the shared variables object
QuickAdd scripts are JavaScript files that run inside Obsidian. They can ask you for input, call Obsidian’s own APIs, read data from other plugins, and hand values back to a Macro. This page helps you pick which kind of script to write, then points you at the detailed guides.
You don’t need to be a programmer to use scripting, but you do need to be comfortable pasting and lightly editing JavaScript.
## Which one do I want?
[Section titled “Which one do I want?”](#which-scripting-feature-should-i-use)
| Need | Use | Why |
| --------------------------------------------------- | -------------------- | -------------------------------------------------------- |
| A reusable script with settings | User script | Best for larger workflows and shared code |
| A small transformation inside a template or capture | Inline script | Keeps tiny logic close to the format using it |
| Several script and choice steps in sequence | Macro choice | Coordinates order, variables, and abort behavior |
| A script users can configure from the QuickAdd UI | Script with settings | Lets non-coders change values without editing JavaScript |
## What a user script looks like
[Section titled “What a user script looks like”](#basic-user-script-shape)
Every user script exports one function. QuickAdd calls it with a `params` object and waits for it to finish:
```javascript
module.exports = async (params) => {
const { app, quickAddApi, variables } = params;
const title = await quickAddApi.inputPrompt("Title");
variables.title = title;
return title;
};
```
The `params` object is how your script reaches everything it needs:
* `app`: the Obsidian app instance
* `quickAddApi`: QuickAdd’s prompt, utility, AI, and execution helpers
* `variables`: values shared across macro steps
## How a value travels through a macro
[Section titled “How a value travels through a macro”](#how-values-move-through-a-macro)
When a macro runs several steps, they pass values to each other through the shared `variables` object:
1. A choice or script asks for a value.
2. QuickAdd stores that value in `variables`.
3. Later template, capture, and script steps can reuse it.
4. If a prompt is cancelled, QuickAdd aborts the macro unless your script handles the cancellation.
Use named values like `{{VALUE:project}}` when several macro steps should share one prompt.
## A good order to learn this in
[Section titled “A good order to learn this in”](#suggested-learning-order)
1. [Macro Choices](/docs/Choices/MacroChoice/) for how macro steps are assembled.
2. [User Scripts](/docs/UserScripts/) for complete scripting patterns.
3. [Scripts with Settings](/docs/Advanced/scriptsWithSettings/) for configurable scripts.
4. [QuickAdd API Reference](/docs/QuickAddAPI/) for exact method details.
## Debugging
[Section titled “Debugging”](#debugging)
Sprinkle `console.log` through a script while you build it, then read the output in Obsidian’s developer console. Keep each script small enough that you can test one step at a time before wiring it into a longer macro.
# Scripts with user settings
> Give a user script configurable fields - text, secret, checkbox, dropdown, and format - so anyone can set it up from the QuickAdd UI without touching the code
A script with settings puts configurable fields right in QuickAdd’s UI, so anyone can set it up - an API key, a folder path, an on/off toggle - without editing the JavaScript. You write the script once and expose the parts that should change; everyone else fills in a form.
Any script with settings gets a gear (⚙️) button next to its name in a macro. Click it to open that script’s settings menu. For a real-world example, see the [Movies](/docs/Examples/Macro_MovieAndSeriesScript/) macro.
## Add settings to a script
[Section titled “Add settings to a script”](#creating-a-script-with-settings)
Instead of exporting a plain function, export an **object** with two properties: `entry` (the function that runs) and `settings` (what to show in the UI).
```js
const TEXT_FIELD = "Text field";
module.exports = {
entry: async (QuickAdd, settings) => {
// Logic here
const textFieldSettingValue = settings[TEXT_FIELD];
},
settings: {
name: "Demo",
author: "Christian B. B. Houmann",
options: {
[TEXT_FIELD]: {
type: "text",
defaultValue: "",
placeholder: "Placeholder",
description: "Description here.",
},
"API Key": {
type: "secret",
id: "api-key",
placeholder: "Paste API key",
description: "Stored securely with Obsidian SecretStorage.",
},
"Checkbox": {
type: "checkbox",
defaultValue: false,
},
"Dropdown": {
type: "dropdown",
defaultValue: "Option 1",
options: [
"Option 1",
"Option 2",
"Option 3",
],
},
"Format": {
type: "format",
defaultValue: "{{DATE:YYYY-MM-DD}}",
placeholder: "Placeholder",
},
}
},
};
```
This script’s settings menu shows a text field, a secret API-key field, a checkbox, a dropdown, and a format field - one per entry in `options`:
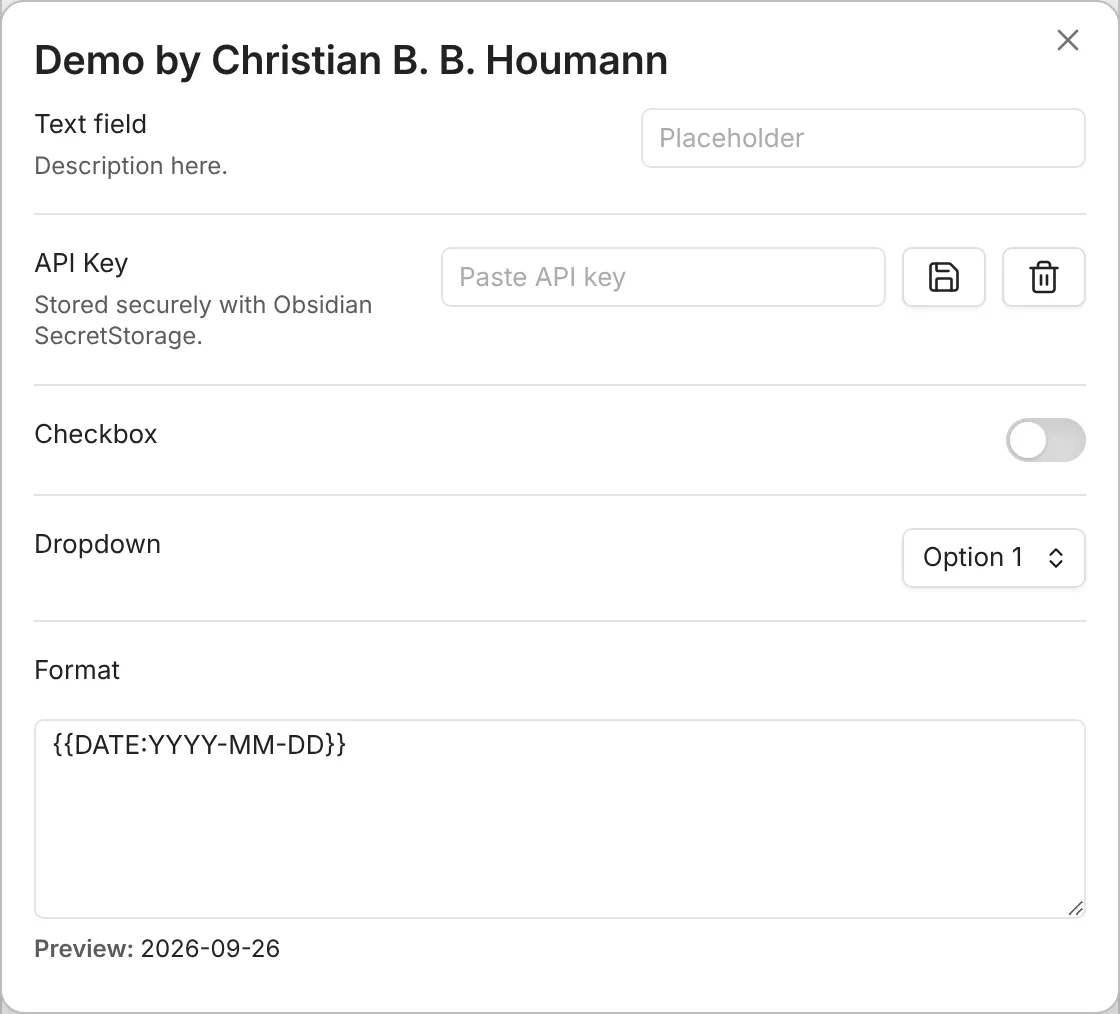
How the pieces fit together:
* **`entry`** runs when the script executes. It receives two arguments: the `QuickAdd` object (the same thing passed to any [script in a macro](/docs/Choices/MacroChoice/)) and `settings`, an object holding the values the user set. The argument names are up to you.
* **`settings.name`** and **`settings.author`** are shown in the settings menu.
* **`settings.options`** defines the fields. Each key is the setting’s name (and how you read its value back, like `settings["Text field"]`); each value is an object describing the field. Add a `description` to any field to show help text beneath it.
### Scripts with several exports
[Section titled “Scripts with several exports”](#settings-with-member-access)
A script can export more functions next to `entry` and `settings`. A macro command named with `::`, such as `my-script::otherExport`, runs that export instead of `entry`. The export still receives `settings` as its second argument, and the gear still shows the script’s settings. QuickAdd looks for `settings` on the selected export first, then on each parent up to `module.exports`, and uses the nearest one it finds - so an export without its own `settings` uses the script’s. Settings are saved per macro command, so two commands for the same script keep separate values.
## The field types
[Section titled “The field types”](#setting-types)
Set each field’s `type` to one of these:
* `text` and `input`: A text field.
* `secret`: A password-style input stored with Obsidian SecretStorage. QuickAdd stores only a reference in `data.json`; package exports omit secret values and local secret references. Add an optional `id` to give the stored secret a stable key if the visible setting label changes later. The older `text` / `input` plus `secret: true` form is still treated as a secret setting.
* `textarea`: A multi-line text area.
* `checkbox` and `toggle`: A checkbox.
* `dropdown` and `select`: A dropdown.
* `format`: A format field, adhering to [format syntax](/docs/FormatSyntax/).
# Trigger QuickAdd from outside Obsidian
> Launch QuickAdd choices from launchers, desktop and phone shortcuts, and schedulers using the obsidian://quickadd URI or the Obsidian CLI, no extra plugins
You can run a QuickAdd choice from a launcher, a phone shortcut, a script, a scheduled job, or a link in a note - without opening Obsidian and clicking around, and without any extra plugins. There are two built-in ways in:
* The `obsidian://quickadd` link, for anything that can open a URL.
* The Obsidian CLI, for anything that runs a shell command, like a scheduled job.
You do not need the Advanced URI plugin for this. QuickAdd has its own handler.
## Get the choice ready
[Section titled “Get the choice ready”](#prepare-the-choice)
Before you automate a choice:
1. Give it a unique name. Triggers select by choice name, and if two choices share a name, QuickAdd runs the first match it finds.
2. Use [named values](/docs/FormatSyntax/#named-value) for anything you want to pass in from outside, for example `{{VALUE:entry}}` or `{{VALUE:project}}`.
3. Keep prompts out of scheduled jobs where you can. A scheduled job works best when every required value is passed up front.
You can list your choices from the CLI to confirm names and ids:
```bash
obsidian vault="My Vault" quickadd:list
```
## Build the link
[Section titled “Build the link”](#native-uri-syntax)
The shortcut and in-note recipes below all open the same link shape - the `vault` to run in, the `choice` to run, plus a `value-` parameter for each named value you want to pass (everything URL-encoded). Scheduled jobs use the [CLI](#run-quickadd-on-a-schedule) instead of a link.
```text
obsidian://quickadd?vault=My%20Vault&choice=Daily%20log&value-entry=Finished%20review
```
The full link reference - the parameter breakdown, passing values, `|trim`, which placeholders can’t be filled from a link, and the opt-in callback links like `x-success` - is on [Open QuickAdd from a URI](/docs/Advanced/ObsidianUri/).
## Trigger from a desktop shortcut
[Section titled “Trigger from a desktop shortcut”](#desktop-shortcuts)
Any desktop shortcut or launcher that can open a URL can open `obsidian://quickadd`. On a Mac with Raycast, the [Raycast extension](/docs/Advanced/RaycastExtension/) runs a choice and answers its prompts in Raycast, with no link to build.
### macOS
[Section titled “macOS”](#macos)
Use Shortcuts with an **Open URLs** action, or run:
```bash
/usr/bin/open 'obsidian://quickadd?vault=My%20Vault&choice=Daily%20log'
```
If you use a shell command, quote the whole link. The `&` character has special meaning in shells unless it is quoted.
### Windows
[Section titled “Windows”](#windows)
For a desktop shortcut target or launcher command, use:
```bat
cmd.exe /c start "" "obsidian://quickadd?vault=My%20Vault&choice=Daily%20log"
```
The empty `""` is intentional. In `cmd.exe start`, the first quoted string is the window title, not the command to run.
### Linux
[Section titled “Linux”](#linux)
Use `xdg-open` from a desktop session:
```bash
xdg-open 'obsidian://quickadd?vault=My%20Vault&choice=Daily%20log'
```
For a `.desktop` launcher, put the command in a small shell script and point `Exec` at that script. This avoids desktop-file escaping problems with the percent signs in URL-encoded values:
```sh
#!/usr/bin/env sh
xdg-open 'obsidian://quickadd?vault=My%20Vault&choice=Daily%20log'
```
```ini
[Desktop Entry]
Type=Application
Name=Daily log
Exec=/home/alice/bin/quickadd-daily-log
Terminal=false
```
## Trigger from your phone
[Section titled “Trigger from your phone”](#phone-shortcuts)
The same link works on iPhone, iPad, and Android. Opening it starts Obsidian if it isn’t running, waits for your vault to load, and runs the choice.
Let your phone sync first
If your phone hasn’t synced since you last opened Obsidian, a capture to today’s daily note can create a second copy of that note that later replaces the one from your computer. See [Watch out for sync services](/docs/Advanced/ObsidianUri/#important-sync-service-limitations).
To capture by voice, let your phone turn speech into text and pass the text in as a value. QuickAdd does not record or transcribe audio.
Just adding text to a note?
Obsidian for iOS can add text to a note without waiting for your vault to load, through its own Shortcuts capture action and Quick Capture widgets. Use QuickAdd when you need what a Capture choice adds, like inserting under a heading or shaping the entry with QuickAdd’s format syntax.
### iPhone and iPad
[Section titled “iPhone and iPad”](#ios)
In the Shortcuts app, create a shortcut with these actions:
1. **Dictate Text**. Use **Ask for Input** instead if you want to type.
2. **URL Encode**, which encodes the text from step 1.
3. **URL**, with this link, followed by the **URL Encoded Text** variable from step 2:
```text
obsidian://quickadd?vault=My%20Vault&choice=Daily%20log&value-entry=
```
4. **Open URLs**.
Run the shortcut from the Home Screen, the Action button, Back Tap, or by saying its name to Siri.
### Android
[Section titled “Android”](#android)
Any automation app that can open a link can run a choice, for example Tasker or MacroDroid. URL-encode the text you pass in, then open the link.
## Run QuickAdd on a schedule
[Section titled “Run QuickAdd on a schedule”](#run-quickadd-on-a-schedule)
QuickAdd has no built-in background scheduler. Use your operating system’s scheduler to run Obsidian’s native CLI command:
```bash
obsidian vault="My Vault" quickadd:run choice="Daily log" value-entry="Scheduled check"
```
`quickadd:run` is non-interactive by default - a choice that still needs input returns JSON with `missingFlags` instead of opening prompts, and `quickadd:check` tells you up front what to pass. Those semantics, the `ui` flag for runs that may prompt, and the rest of the commands are covered in the [QuickAdd CLI reference](/docs/Advanced/CLI/); this section is about wiring the command into each platform’s scheduler.
Caution
Use full paths in schedulers. They usually do not load the same `PATH` as your terminal.
### macOS launchd
[Section titled “macOS launchd”](#macos-launchd)
Use the full path from `command -v obsidian`. In a launchd plist, pass each argument as its own string:
```xml
ProgramArguments
/opt/homebrew/bin/obsidian
vault=My Vault
quickadd:run
choice=Daily log
value-entry=Scheduled check
```
Depending on your install, the Obsidian CLI path may be `/usr/local/bin/obsidian` instead.
### Windows Task Scheduler
[Section titled “Windows Task Scheduler”](#windows-task-scheduler)
Use `Obsidian.com`, not `Obsidian.exe`, for CLI commands:
```text
Program/script:
C:\Users\alice\AppData\Local\Obsidian\Obsidian.com
Arguments:
vault="My Vault" quickadd:run choice="Daily log" value-entry="Scheduled check"
```
For a scheduled URI action instead, run:
```text
Program/script:
cmd.exe
Arguments:
/c start "" "obsidian://quickadd?vault=My%20Vault&choice=Daily%20log"
```
URI actions need a logged-in desktop session. In Task Scheduler, use “Run only when user is logged on” for URL-opening tasks.
### Linux cron or systemd user timers
[Section titled “Linux cron or systemd user timers”](#linux-cron-or-systemd-user-timers)
Use the full CLI path:
```text
0 9 * * * /home/alice/.local/bin/obsidian vault="My Vault" quickadd:run choice="Daily log" value-entry="Scheduled check"
```
Run GUI-related jobs only from your user desktop session. If a cron job cannot reach your desktop session, prefer a systemd user timer or run the command from your desktop environment’s scheduler.
## Add links and buttons to a note
[Section titled “Add links and buttons to a note”](#in-note-links-and-buttons)
Plain Markdown links work well for dashboard notes:
```markdown
[New idea](obsidian://quickadd?vault=My%20Vault&choice=New%20idea)
[Log work](obsidian://quickadd?vault=My%20Vault&choice=Work%20log&value-project=QuickAdd)
```
Clicking the link runs the choice.
If you use a button plugin for styling, point it at the same `obsidian://quickadd` link. Another QuickAdd-native option is to enable the command toggle on the choice, then configure the button to run the generated Obsidian command for that choice.
## Troubleshooting
[Section titled “Troubleshooting”](#troubleshooting)
* **Nothing happens**: make sure QuickAdd is enabled in the selected vault and that the choice name is encoded and spelled exactly.
* **The wrong choice runs**: rename choices so the externally triggered choice name is unique.
* **A scheduled run returns JSON instead of capturing**: the choice still needs input. Copy each entry from the returned `missingFlags` into your command and replace `` with the value you want to pass.
* **The command works in a terminal but not from a scheduler**: use the full path to the Obsidian CLI, and make sure the job runs in your user desktop session.
* **An older thread suggests `obsidian://advanced-uri?...`**: replace it with `obsidian://quickadd?...`. QuickAdd has its own URI handler.
# AI Assistant Reference
> Configure AI providers, send prompt templates from macros or scripts, and use structured output, tool calling, and token budgets
QuickAdd’s AI Assistant sends a prompt to an AI model and drops the reply back into your workflow. There are two ways to use it:
* **From a Macro command** - no code. You pick a prompt template, and QuickAdd stores the model’s reply as a variable that later steps can insert.
* **From a User Script** - for structured output, tool calling, or custom control flow.
By the end you have an AI step wired into a choice: generate a note title, summarize a selection, or answer a question from your vault.
Note
The AI Assistant settings and AI requests are available only when **Disable AI & online features** is turned off in QuickAdd settings.
## Setup
[Section titled “Setup”](#setup)
1. Create a folder for AI prompt templates, for example `AI prompts`.
2. Open **Settings → QuickAdd**, turn off **Disable AI & online features** (under **AI & online**), and open **AI Assistant** just below it. The **Configure AI Assistant** button in the choice list (the sparkles icon at the bottom of the list) and the **QuickAdd: Open AI Assistant settings** command open the same page.
3. Set **Prompt template folder** to the folder you created.
4. Under **Providers**, set up at least one provider. OpenAI and Gemini are already listed: open one, link an API key secret with **Link…**, and click **Sync now** to pull the provider’s current models. To add another provider, click **+**. See [Connect a provider](#providers-and-local-models).
5. Choose a **Default model**, or leave it as **Ask me** to pick a model each run.
Changes on these pages save as you make them. The settings pages need QuickAdd 2.28.0 or later; earlier versions edit providers in dialogs with **Save** and **Cancel**.

Prompt templates are Markdown notes in your prompt template folder. They can use QuickAdd [Format Syntax](/docs/FormatSyntax/), including values collected earlier in the same macro.
Prompt templates can run code
A prompt template goes through the **full** QuickAdd format pass every time the AI command fires - including [inline scripts](/docs/InlineScripts/) (`js quickadd` code fences), `{{MACRO:}}` and `{{TEMPLATE:}}`. That is the same trust model as a Template choice: a prompt template is not just text sent to the model, it is a note QuickAdd executes. Review prompt templates you did not write yourself - for example ones that arrive with an imported [package](/docs/Choices/Packages/) - exactly as you would review a script.
After setup, add an **AI Assistant** command to a Macro. The command formats the selected prompt template, sends it to the selected model, then stores the response as macro variables for later steps.
In the recording below, a `Summarize` prompt template (containing `{{SELECTED}}`) feeds the selected paragraph to the model, the command stores the reply as `summary`, and a Capture writes `{{VALUE:summary}}` to the bottom of the active note.
## What each setting does
[Section titled “What each setting does”](#settings-semantics)
Some of these settings are read live on every run; two of them are only a template for new commands. The difference matters, so it is called out per setting:
* **Prompt template folder** is the folder QuickAdd reads prompt-template notes from. Read live on every run.
* **Providers** is the list of model endpoints and model ids QuickAdd can use. Read live on every run.
* **Default model** and **Default system prompt** are the starting values for **new** AI Assistant Macro commands: they are copied into a command when you add it. Editing a default later does not change commands you already created - edit each command instead. Setting the default model to **Ask me** makes new commands open a model picker at run time.
* **Show assistant** controls QuickAdd’s AI progress notices. Read live on every run.
* **Confirm AI tool calls** controls script-agent tool confirmation. Read live on every run. See [Tool approval and safety](#tool-approval-and-safety).
The script APIs behave differently from Macro commands here: `quickAddApi.ai.prompt()`, `chunkedPrompt()`, and `ai.agent()` read the **live** default system prompt at call time when you pass no `systemPrompt`/`system` override (the model is always passed explicitly).
Each AI Assistant Macro command holds its own:
* **Prompt template**, which is a Markdown note in the prompt template folder, not raw prompt text.
* **Model**, the model this command uses. Copied from the default at creation; **Ask me** opens a model picker at run time.
* **Output variable name**, which controls the variable names written for later Macro steps.
* **System prompt**, sent with this command’s requests. Copied from the default at creation.
* Advanced model parameters, described in [Advanced sampling settings](#advanced-sampling-settings).
### System prompts are sent as written
[Section titled “System prompts are sent as written”](#system-prompt-is-literal)
QuickAdd resolves [Format Syntax](/docs/FormatSyntax/) in the **prompt template** only. The system prompt - both the default and a command’s own - goes to the model exactly as you typed it, so `{{DATE}}` in a system prompt arrives at the model as the eight characters `{{DATE}}`.
Put anything that needs a token in the prompt template instead.
## Connect a provider
[Section titled “Connect a provider”](#providers-and-local-models)
QuickAdd supports OpenAI-compatible providers, Google Gemini, and Anthropic. Custom or unknown providers use the OpenAI-compatible request shape by default.
Built-in provider cards are available for:
* OpenAI
* Gemini
* Anthropic
* Groq
* TogetherAI
* OpenRouter
* Hugging Face
* Mistral
* DeepSeek
Note
Provider API keys are stored through Obsidian SecretStorage. QuickAdd stores the secret reference in settings, not the key value. Older plaintext provider keys are migrated to SecretStorage.
### Add a provider
[Section titled “Add a provider”](#add-a-provider)
1. Open **Settings → QuickAdd → AI Assistant**.
2. Next to **Providers**, click **+** (on mobile, tap **Add provider** below the list).
3. Pick a provider card, select a SecretStorage entry for the API key, then click **Connect**.
Connecting a provider imports its current model list right away, so you can pick a working model immediately. If the live import fails (for example, while offline), the built-in providers fall back to a shipped model list and refresh automatically once the provider is reachable.
For a provider that is not listed, click **Add custom…** under **Custom provider**, then open the new provider in the list. Set its name, endpoint, API key secret if needed, model source, and models manually.
To check a key, open the provider and click **Test connection**. QuickAdd asks the provider’s own models endpoint with the linked key and shows either how many models it lists or the provider’s error.
The [Obsidian CLI](/docs/Advanced/CLI/#quickaddai-test-connection) runs the same check. Name the provider by its ID or its name:
```bash
obsidian vault=dev quickadd:ai-test-connection provider=openai
```
It prints `"ok":true` with `modelCount`, or `"ok":false` with the provider’s error. `apiKeyLinked` says whether a key is linked. The output never contains the key.
### Local models and Ollama
[Section titled “Local models and Ollama”](#local-models-and-ollama)
Use **Custom provider** for Ollama and most local OpenAI-compatible servers.
For Ollama:
```text
Name: Ollama
Endpoint: http://localhost:11434/v1
API key: leave blank
Model source: Provider models endpoint
Models: import from the running Ollama server, or add the model name manually
```
Leaving the API key blank works for Ollama. Model import from `/v1/models` sends no `Authorization` header when the key is blank. Regular OpenAI-compatible chat requests still include an empty `Bearer` header. If your local server rejects that, configure the server to allow it or select a SecretStorage entry with the token it expects.
When adding a model manually (the **+** next to **Models** on the provider’s page), the model name must match the id your server expects, such as `mistral` or `llama3.1`. The **Context window** value is the model’s context window in tokens. See [Model settings and token budgets](#model-settings-and-token-budgets).
### One name, two providers
[Section titled “One name, two providers”](#provider-ids-and-duplicate-model-names)
Every provider has a stable **ID** - a short slug like `openai` or `my-proxy`, shown under the provider’s **Name** on its settings page. The ID never changes, even if you rename the provider, and scripts use it to address a model on a specific provider.
Two providers can serve models with the same name - for example, the official OpenAI provider and an OpenAI-compatible proxy can both list `gpt-4o`. Model dropdowns group models by provider so you always pick a specific provider’s model, and QuickAdd remembers that choice. Reordering providers, renaming them, or auto-syncing new models never changes which endpoint an existing command talks to.
If the provider a command is pinned to is later deleted, QuickAdd falls back to the first provider that serves a model with that name and warns you about the switch. Re-select the model in the command to pin it again.
### Where QuickAdd gets the model list: Model source
[Section titled “Where QuickAdd gets the model list: Model source”](#model-source)
Each provider has a **Model source** setting:
* **Provider models endpoint** asks the provider for its model list. QuickAdd speaks each provider’s native protocol here: OpenAI-compatible `/v1/models`, Anthropic’s `/v1/models`, and Gemini’s `ListModels`. This is also the usual choice for local providers like Ollama when the server is running.
* **models.dev directory** imports from the public models.dev directory when that directory knows the provider.
* **Automatic** tries the provider first and falls back to models.dev when QuickAdd can map the endpoint.
Imports skip entries that cannot serve chat requests (image generators, text-to-speech voices, embedding models, realtime audio models) and pinned dated snapshots such as `gpt-4o-2024-11-20` when the undated id is listed. They carry each model’s context window, output limit, sampling support, and release date where the source reports them.
The model list shows the newest models first and has a filter box. Models the provider has deprecated carry a **Retired** badge and are listed last, the provider’s entry on the AI Assistant page shows a warning with the count, and **Remove retired** clears them in one step. QuickAdd never removes them on its own, because saved commands may still use them.
If model import fails, you can still add models manually. Use the provider’s exact model id and the model’s context-window token count.
### Keep model lists current: Auto-sync
[Section titled “Keep model lists current: Auto-sync”](#auto-sync)
Each provider has an **Auto-sync models** toggle. While it is on, QuickAdd imports new models and refreshed context limits from the provider’s model source once a day and whenever you open the provider’s page, so model lists stay current without plugin updates. Auto-sync only adds models and updates metadata - it never removes models you have configured, and it does not add models the directory already marks as deprecated. Use **Sync now** to refresh on demand. The line under the toggle shows when the provider last synced, or why the last sync failed. Models that arrive while the provider’s page is open appear in its list right away, and the **Sync now** notice counts every model added to the list you were looking at when you clicked it.
Auto-sync is on by default for the built-in OpenAI and Gemini providers and for providers added from a card. It does nothing while **Disable AI & online features** is on.
## Model settings and token budgets
[Section titled “Model settings and token budgets”](#model-settings-and-token-budgets)
### Max tokens is the context window
[Section titled “Max tokens is the context window”](#max-tokens)
In the provider’s model list, **Context** (stored as `maxTokens`) is the model’s context window. It is the total amount of prompt plus response context the model can handle, according to the configured provider metadata or the value you entered manually.
QuickAdd uses this value for local estimates, model lookup, and chunk sizing. It does not mean “make the answer this long”, and setting it higher than the provider actually supports does not increase the provider’s real limit.
QuickAdd’s token counts are local estimates. Providers enforce the exact limits. For single AI Assistant prompts, QuickAdd logs when the local prompt estimate is above the configured context value, but it still sends the request. The provider may accept it or reject it with a context-window error.
Use these rules when choosing a value:
* For `gpt-4o-mini`, enter `128000`, not a smaller output limit.
* For a local model, use the context window configured for that local model.
* If you do not know the value, import models from the provider if possible, or use the provider’s model documentation.
### Max chunk tokens
[Section titled “Max chunk tokens”](#max-chunk-tokens)
Chunk sizing has no setting of its own. It is the `maxChunkTokens` option of [`chunkedPrompt()`](/docs/QuickAddAPI/#max-chunk-tokens) in the script API.
### Output length
[Section titled “Output length”](#output-length)
The regular Macro AI Assistant command does not have a separate output-length field.
In scripts, `quickAddApi.ai.agent()` accepts `maxOutputTokens` in the agent config or per `generate()` call. QuickAdd maps that option to the provider-specific output field where the provider supports one.
Anthropic requests always require an output token budget. When no explicit `maxOutputTokens` is set, QuickAdd uses the model’s real output limit when the model list carries one (imported and auto-synced models do), and otherwise a conservative default of `4096`.
### Advanced sampling settings
[Section titled “Advanced sampling settings”](#advanced-sampling-settings)
AI Assistant commands expose advanced model parameters:
* **Temperature** controls randomness. Lower values are more focused. Higher values are more varied.
* **Top P** controls nucleus sampling.
* **Frequency penalty** reduces repeated wording on providers that support it.
* **Presence penalty** encourages new topics on providers that support it.
A parameter is only sent when you set it. Untouched settings use the provider’s defaults, and each slider has a reset button that returns it to that state.
Gemini and Anthropic requests use temperature and top P. QuickAdd does not send frequency or presence penalties to those providers.
Fixed-sampling models are handled for you
Many current models use fixed sampling and reject these parameters outright - OpenAI reasoning models and Anthropic’s current generation among them. When a model is known to use fixed sampling, the parameters are not sent. When a provider rejects one anyway, QuickAdd retries the request once without sampling parameters and shows a notice explaining what happened. A sampling slider never hard-fails a command.
## Get the reply into your notes: Macro output variables
[Section titled “Get the reply into your notes: Macro output variables”](#macro-output-variables)
An AI Assistant Macro command stores the model response in the command’s **Output variable name**. The default name is `output`.
If **Output variable name** is `summary`, QuickAdd writes:
* `summary`: the response text
* `summary-quoted`: the same response formatted as a Markdown blockquote, with each line prefixed by `>`
Later commands in the same Macro can use those values:
```markdown
{{VALUE:summary}}
{{VALUE:summary-quoted}}
```
The variables are scoped to that Macro run. A separate QuickAdd choice run does not receive them.
### Example: AI-generated note title
[Section titled “Example: AI-generated note title”](#example-ai-generated-note-title)
Create a prompt-template note named `Title Prompt.md` in your prompt template folder:
```markdown
Generate a short filename-safe title for this text. Reply with only the title.
Text: {{VALUE}}
```
Then use a Macro with two steps:
1. **AI Assistant** command
* Prompt template: `Title Prompt.md`
* Output variable name: `aiTitle`
* Use a low temperature if you want more repeatable titles.
2. **Template** command
* File name: `{{VALUE:aiTitle}}` (before QuickAdd 2.30.0, this is **File name format**; turn its toggle on first)
* Template body can also include `{{VALUE:aiTitle}}`.
The same pattern works with Capture choices and User Script commands that run after the AI step.
### Read the result in a script
[Section titled “Read the result in a script”](#read-the-result-in-a-script)
When a User Script runs later in the same Macro, read the same variable from `params.variables`:
```js
module.exports = async (params) => {
const description = params.variables.description;
console.log(description);
};
```
If this is empty, check the AI Assistant command’s **Output variable name**. It must be `description`, or your script must read the default `output`.
### Script API assignment is explicit
[Section titled “Script API assignment is explicit”](#script-api-assignment-is-explicit)
`quickAddApi.ai.prompt()` and `quickAddApi.ai.chunkedPrompt()` return an object with the response variables. They write those variables into later Macro steps only when you set `shouldAssignVariables: true` or `assignToVariable`.
```js
module.exports = async ({ quickAddApi }) => {
await quickAddApi.ai.prompt("Summarize the current selection.", "gpt-4o-mini", {
assignToVariable: "summary",
});
};
```
`assignToVariable` also writes `summary-quoted`. Avoid names that are reserved by the formatter or variable plumbing: `value`, `title`, `text`, `meta`, names ending in `-quoted`, names starting with `__qa.`, and names containing `|` or `,`.
## Structured JSON output
[Section titled “Structured JSON output”](#structured-json-output)
Use structured output when you want separate fields from one model response, such as title, summary, and tags. This is a User Script workflow, not the plain Macro AI Assistant command.
The pattern is:
1. User Script calls `quickAddApi.ai.agent().generate({ prompt, schema })`.
2. The script checks `result.object`.
3. The script assigns fields to `params.variables`.
4. A later Template or Capture step uses `{{VALUE:name}}` where each field belongs.
```js
module.exports = async ({ quickAddApi, variables }) => {
const selectedText = quickAddApi.utility.getSelection();
if (!selectedText) {
throw new Error("Select text before running this macro.");
}
const result = await quickAddApi.ai.agent({ model: "gpt-4o-mini" }).generate({
prompt: `Extract a title, a short summary, and up to five tags from this text:\n\n${selectedText}`,
schema: {
type: "object",
properties: {
title: { type: "string" },
summary: { type: "string" },
tags: {
type: "array",
items: { type: "string" },
},
},
required: ["title", "summary", "tags"],
},
});
const data = result.object;
if (!data || typeof data !== "object") {
throw new Error("The AI response did not match the expected JSON shape.");
}
variables.aiTitle = String(data.title ?? "");
variables.aiSummary = String(data.summary ?? "");
variables.aiTags = Array.isArray(data.tags)
? data.tags.map(String).join(", ")
: "";
};
```
Then use a Template step after the script:
```markdown
# {{VALUE:aiTitle}}
{{VALUE:aiSummary}}
Tags: {{VALUE:aiTags}}
```
Structured output supports a small JSON Schema subset: `type`, `properties`, `required`, `items`, `enum`, `const`, `description`, and `title`. Avoid provider-specific schema keywords such as `minLength`, `pattern`, `$ref`, `format`, `anyOf`, and `allOf` in QuickAdd examples.
If the model response does not parse or does not validate, QuickAdd makes one repair attempt. If that still fails, `result.object` is `undefined`, so scripts should handle that as shown above.
## Tool and function calling
[Section titled “Tool and function calling”](#tool-and-function-calling)
QuickAdd 2.14.0 added a script API for tool and function calling:
* `quickAddApi.ai.agent(config)` creates an agent.
* `agent.generate({ prompt })` runs a bounded multi-step loop.
* `quickAddApi.ai.tool(def)` declares a JavaScript function the model may call.
* `quickAddApi.ai.tools.vault()`, `workspace()`, and `system()` provide opt-in built-in tools.
Tools are available from User Scripts. They are JavaScript functions, so they do not live inside a stored AI Assistant Macro command.
```js
module.exports = async ({ quickAddApi }) => {
const agent = quickAddApi.ai.agent({
model: "gpt-4o-mini",
system: "Answer from the user's vault when possible.",
tools: {
...quickAddApi.ai.tools.vault({
only: ["read_note", "search_notes"],
}),
word_count: quickAddApi.ai.tool({
description: "Count words in a text string.",
inputSchema: {
type: "object",
properties: {
text: { type: "string" },
},
required: ["text"],
},
readOnly: true,
execute: ({ text }) => {
const words = String(text ?? "")
.trim()
.split(/\s+/)
.filter(Boolean);
return { count: words.length };
},
}),
},
maxSteps: 12,
});
const result = await agent.generate({
prompt: "What do my notes say about project planning?",
assignToVariable: "answer",
});
return result.text;
};
```
Agent results include:
* `text`: final assistant text
* `object`: structured result, only when `schema` was passed
* `steps`: tool-loop steps
* `toolCalls` and `toolResults`: calls and results from the last step
* `usage`: input, output, and total token counts
* `finishReason`: why the run stopped
By default, agents use up to 20 steps. `maxSteps` is capped at 100.
### Tool approval and safety
[Section titled “Tool approval and safety”](#tool-approval-and-safety)
The global **Confirm AI tool calls** setting defaults to **Destructive tools only (recommended)**:
* `readOnly: true` tools run automatically under the default setting.
* Tools that are not read-only ask for confirmation under the default setting.
* `needsApproval: true` always asks for confirmation.
* **Always confirm every tool** asks for every tool.
* **Never** defers to each tool’s own `needsApproval`.
Tool arguments come from the model - treat them as untrusted
Tool handlers run with the same privileges as your script, and the model chooses tool names and arguments. Validate paths and values, never pass tool input to `quickAddApi.format()`, `eval`, a shell, or a network request without your own checks, and do not put secrets in tool descriptions or arguments because those are sent to the provider.
For the full script API surface, see the [QuickAdd API reference](/docs/QuickAddAPI/#ai-module).
## Troubleshooting
[Section titled “Troubleshooting”](#troubleshooting)
### The AI settings button is missing
[Section titled “The AI settings button is missing”](#the-ai-settings-button-is-missing)
Turn off **Disable AI & online features** in QuickAdd settings. The **AI Assistant** page and its buttons are hidden while AI and online features are disabled. With no choices yet, the button is **Configure AI Assistant** below **New choice**; otherwise it is the sparkles icon in the bar under the choice list.
### My model is not listed
[Section titled “My model is not listed”](#my-model-is-not-listed)
Open **Settings → QuickAdd → AI Assistant** > your provider, then click **Sync now**. Providers with **Auto-sync models** on pick up new models automatically once a day. You can also browse and import models, or add the model manually - the model name must exactly match what the provider expects.
### A local provider does not respond
[Section titled “A local provider does not respond”](#a-local-provider-does-not-respond)
Check that the local server is running and that the endpoint includes the right base path. For Ollama, use:
```text
http://localhost:11434/v1
```
If the server requires auth, select an API key secret. If the API key is blank, model import sends no `Authorization` header, while OpenAI-compatible chat requests include an empty `Bearer` header.
### Max tokens is confusing
[Section titled “Max tokens is confusing”](#max-tokens-is-confusing)
Use the model’s context-window size. Do not use the model’s advertised output limit. If a request is rejected for context length, shorten the prompt, pick a model with a larger context window, or use chunked prompting.
### A later Macro step cannot read the AI result
[Section titled “A later Macro step cannot read the AI result”](#a-later-macro-step-cannot-read-the-ai-result)
Check these in order:
1. The AI Assistant command and the later command must be steps in the same Macro.
2. The later step must use the AI command’s **Output variable name**.
3. If you did not set a name, read `{{VALUE:output}}`.
4. In a script step, inspect `Object.keys(params.variables)` to see what arrived.
5. If you called `quickAddApi.ai.prompt()` from a script, set `shouldAssignVariables: true` or `assignToVariable`.
### My script does nothing
[Section titled “My script does nothing”](#my-script-does-nothing)
QuickAdd User Scripts must export a function. Put your code inside `module.exports`:
```js
module.exports = async ({ quickAddApi, variables }) => {
const result = await quickAddApi.ai.prompt("Say hello.", "gpt-4o-mini");
variables.output = result.output;
};
```
See the [User Scripts Reference](/docs/UserScripts/).
### Structured output returned no object
[Section titled “Structured output returned no object”](#structured-output-returned-no-object)
`result.object` can be `undefined` when the model fails to return JSON that matches the schema after QuickAdd’s repair attempt. Keep the schema simple, use a current model that supports structured output, and handle the missing object in your script.
### A tool run is waiting forever
[Section titled “A tool run is waiting forever”](#a-tool-run-is-waiting-forever)
The tool probably opened a confirmation modal. In unattended CLI runs, use only `readOnly: true` tools, change **Confirm AI tool calls** for that vault, or design your script so `needsApproval` is not required for that path.
## Workflow ideas
[Section titled “Workflow ideas”](#workflow-ideas)
* **Summarizer:** summarize selected text and capture it to a note.
* **Transform Selected:** rewrite the active selection with a prompt template.
* **AI title:** generate a filename-safe title, then use it in a Template step.
* **Structured note:** extract fields with `agent.generate({ schema })`, then place them in an output template.
* **Vault Q\&A:** use `ai.agent()` with read-only vault tools to answer from notes.
Caution
All provider usage may incur provider costs. Use provider-side spending limits where available.
# Apply Template to Note
> Apply a template to an existing note with insert, append, or replace modes, merging frontmatter and optionally moving the note to match
Created a note manually - with `Cmd/Ctrl+N`, the Quick Switcher, or by clicking a link to a file that didn’t exist yet - and only then realized you forgot to use your template? You don’t need to delete the note and start over. QuickAdd can apply a template to a note you already have.
There are two ways in:
* Run **QuickAdd: Apply template to active note** from the command palette to apply a template to the note currently open.
* Right-click a Markdown file (in the file explorer, a tab header, and so on) and pick **QuickAdd: Apply template to active note** to target that file directly.
Either way, you pick a template, choose how it should be added, and QuickAdd fills in the placeholders and merges the frontmatter for you.

## How it works
[Section titled “How it works”](#how-it-works)
1. Run the command while a Markdown note is active.
2. **Pick what to apply.** The picker lists your [Template choices](/docs/Choices/TemplateChoice/) first (including ones nested in Multi choices), followed by template files from your configured templates folder that aren’t already covered by a choice.
3. **Pick how to apply it** (skipped for empty notes - see [Smart behaviors](#smart-behaviors)):
* **Insert at cursor**: inserts the template at the cursor. Only offered when the note is open in the active editor.
* **Insert at top**: inserts the template below the note’s frontmatter, or at the very top if there is none.
* **Append to bottom**: adds the template content to the end of the note, after exactly one blank line.
* **Replace note content**: replaces the entire note with the template.
The template runs through the full QuickAdd [format syntax](/docs/FormatSyntax/) pipeline. Templater syntax is also processed when the Templater plugin is enabled.
Put [`{{CURSOR}}`](/docs/FormatSyntax/#cursor) in the template body to choose where typing continues after applying it. All four modes support the marker when the destination is focused in an editing mode. Insert and append modes leave existing literal markers in the destination note alone. **Replace note content** replaces the whole note, including any existing markers.
The [project update example](/docs/Examples/Template_MeetingNotes/#add-an-update-to-an-existing-project) shows how to append a dated section and keep typing in it.
Note
Only Markdown templates can be applied. Canvas (`.canvas`) and Base (`.base`) templates hold data for their own file types, so they’re left out of the picker
* use a regular [Template choice](/docs/Choices/TemplateChoice/) to create those. The target note must be Markdown too.
## Smart behaviors
[Section titled “Smart behaviors”](#smart-behaviors)
QuickAdd handles a few common situations for you so you don’t have to think about them:
* **Empty notes skip the prompt.** If the note is empty (or only whitespace), the “how to apply” step is skipped and the template becomes the note’s full content. The usual case is a freshly created blank note.
* **The title fills itself in.** The note already has a name, so `{{TITLE}}` and the unnamed `{{VALUE}}` / `{{NAME}}` resolve to the note’s file name instead of prompting. Named values like `{{VALUE:project}}` still prompt as usual.
* **Frontmatter merges instead of stacking.** For **Insert at top**, **Append to bottom**, and **Insert at cursor**, the template’s frontmatter is not added as a second `---` block. Missing or empty properties are filled from the template. If a property already contains one value, the note’s value wins. Properties that can contain multiple values, such as tags, aliases, and multi-text properties, keep their existing values and add any template values that are not already present. Reapplying the same template does not duplicate them. (**Replace note content** replaces the whole note, frontmatter included.)
* **The note can move to match the choice.** If you picked a Template choice with a folder and/or file name format, and the note’s current location or name doesn’t match what that choice would have produced, QuickAdd offers to move or rename the note to match. Links to the note are updated automatically. This is skipped when the choice’s folder settings need a runtime folder picker, or when a file already exists at the target path.
## From scripts and macros
[Section titled “From scripts and macros”](#from-scripts-and-macros)
The [QuickAdd API](/docs/QuickAddAPI/) does the same thing without any prompts:
```js
await quickAddApi.applyTemplateToActiveFile("templates/meeting.md", {
mode: "top", // "cursor" | "top" | "bottom" | "replace"
});
```
When `mode` is omitted, empty notes get `replace` and non-empty notes get `bottom`.
# Capture
> Capture to a note without opening it: add journal entries, update properties, save links, and capture to Canvas cards
A Capture choice adds text or updates a property **without opening the note**. Press a hotkey, type your entry, and QuickAdd files it exactly where it belongs - while you stay right where you are. Use it to:
* Add timestamped entries to your daily note
* Log work under the right heading of a project note
* Save interesting links for later reading
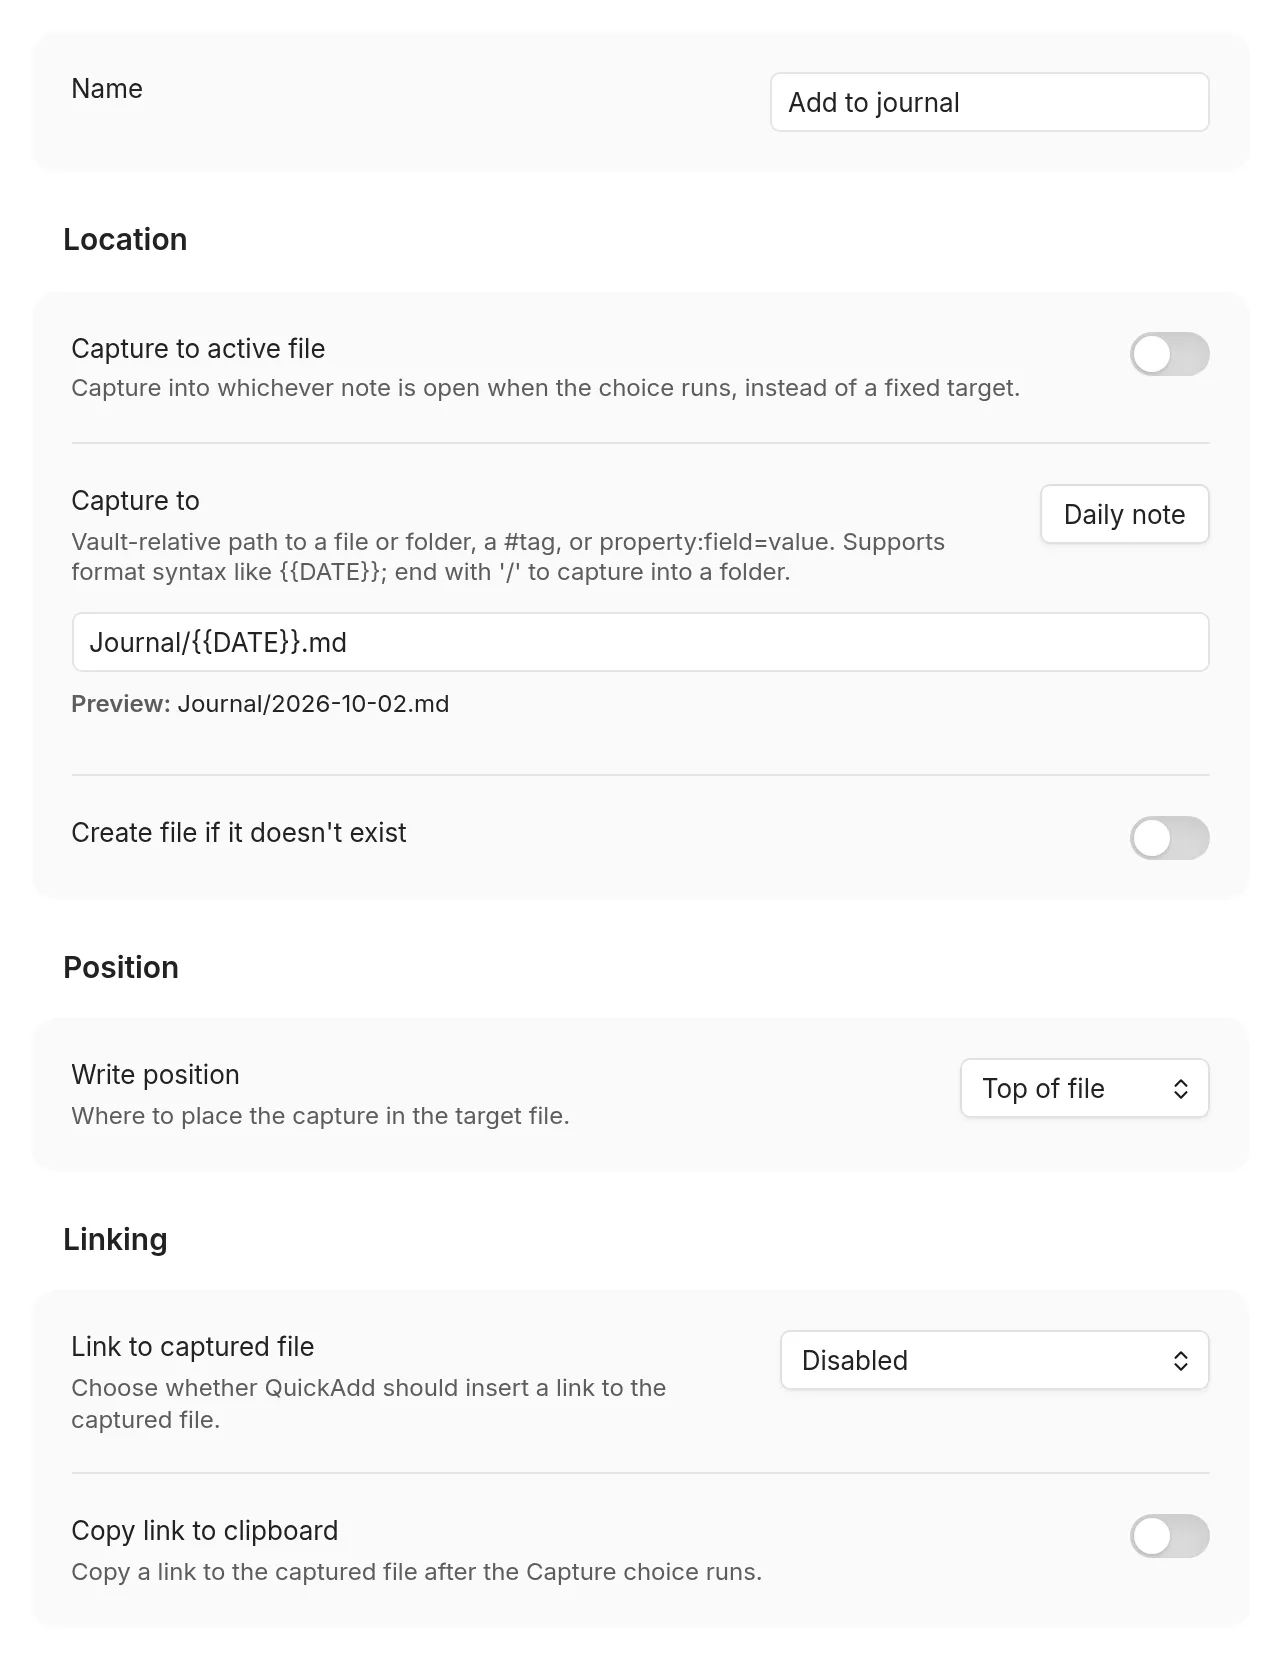
## Set up your first capture
[Section titled “Set up your first capture”](#set-up)
1. In **Settings → QuickAdd**, click **New choice** → **Capture**. The Capture builder opens as a page of the settings window; set **Name** to `Add to journal`. (Before QuickAdd 2.30.0, the builder is a dialog; click its name at the top to rename it.)
2. Set **Capture to** to where entries should land, for example `Journal/{{DATE}}.md`.
3. Turn on **Create file if it doesn’t exist**, so the first capture of the day creates today’s note instead of stopping with a “Target file missing” notice.
4. In **Capture format**, describe one entry, for example `- {{DATE:HH:mm}} {{VALUE}}`. (Before QuickAdd 2.30.0, turn on the **Capture format** toggle first.)
5. Run it: command palette → `QuickAdd: Run`, pick `Add to journal`, type your entry.
You now have this in today’s journal note:
```markdown
- 09:42 Standup moved to Wednesday
```
Assign the choice a hotkey (⚡ icon, or Obsidian’s Hotkeys settings) once it behaves the way you want.
## Choose where it goes: Capture To
[Section titled “Choose where it goes: Capture To”](#capture-to)
*Capture To* is the note you are capturing to. Either enable **Capture to active file** to write into the note you are currently in, or enter a file path.
The path supports [format syntax](/docs/FormatSyntax/), so it can be dynamic. A daily journal capture might use:
```text
Journal/{{DATE:YYYY-MM-DD - ddd MMM D}}.md
```
Every run finds today’s file, and your entry is captured to it.
For your daily note, click **Daily note** next to **Capture to** (QuickAdd 2.30.0 or later). It writes [`{{DAILY}}`](/docs/FormatSyntax/#daily) into the field and turns on **Create file if it doesn’t exist**. `{{DAILY}}` uses the folder, date format, and template from Obsidian’s **Daily notes** settings, or from Periodic Notes when it manages your daily notes, so the path always matches the note **Open today’s daily note** opens. [`{{WEEKLY}}`, `{{MONTHLY}}`, `{{QUARTERLY}}`, and `{{YEARLY}}`](/docs/FormatSyntax/#periodic-notes) do the same for Periodic Notes.
File names are Markdown-first:
* No extension means a Markdown file: `Inbox` targets `Inbox.md`.
* An explicit supported extension (`.md`, `.canvas`) is kept.
* `.base` files are not supported as capture targets - use a Template choice for `.base` workflows.
Note
If a value used in the file name contains a line break or another control character, QuickAdd folds it to a space and strips trailing spaces or periods from that path segment. The text inserted into the note is not changed.
### How QuickAdd picks the target
[Section titled “How QuickAdd picks the target”](#how-quickadd-picks-a-target)
When **Capture to active file** is off, the resolved *Capture to* value decides what happens:
| You write | What happens |
| ------------------------------------------ | ----------------------------------------------------------------------------------------------------- |
| `Inbox.md` (or any path with an extension) | Captures straight to that file |
| nothing, or `/` | Opens a picker with every Markdown note in the vault |
| `Projects/` (trailing slash) | Opens a picker confined to that folder |
| `Projects` (existing folder, no extension) | Same picker, unless `Projects.md` exists - then the file wins |
| `#people` | Picker with notes carrying that tag |
| `property:type=draft` | Picker with notes whose frontmatter matches - see [filtering by a property](#capturing-to-a-property) |
Paths are vault-relative; a leading `/` is ignored (except a lone `/`, which opens the whole-vault picker).
The picker is ordered like Obsidian’s Quick Switcher: notes you opened most recently come first, then everything else alphabetically. Ordering ignores modification time on purpose, so a sync that touches old notes doesn’t push them to the top. Files in Obsidian’s **Excluded files** list sink to the bottom but stay selectable.
You can also **type a new name** into the picker: with **Create file if it doesn’t exist** enabled, a **Create new note: \** row appears and QuickAdd creates the note for you. The create row is selected first, so press Enter to create the exact name you typed even when existing notes are fuzzy matches. The row hides when the typed name matches an existing note in scope, so typing an existing name selects it instead of offering a duplicate. The picker still opens for an empty folder, tag, property, or filtered scope so you can create the first note there.
In the [one-page input form](/docs/Advanced/onePageInputs/), this picker starts empty, and the form doesn’t submit until you choose a note or a new note name (QuickAdd 2.30.0 or later; earlier versions picked the first note for you).
### Capture to a folder
[Section titled “Capture to a folder”](#capturing-to-folders)
Type a folder name (like `CRM/people`) and QuickAdd asks which note in that folder to capture to - nested folders included. Format syntax works here too.
For example: you keep one note per person in `CRM/people`. Set *Capture To* to `CRM/people`, run the capture, and pick the person. Type `John Doe` instead and QuickAdd creates `CRM/people/John Doe.md` (with **Create file if it doesn’t exist** enabled).
### Capture to a tag
[Section titled “Capture to a tag”](#capturing-to-tags)
Type a tag (like `#people`) and QuickAdd asks which note carrying that tag to capture to.
### Filter by folders and tags together
[Section titled “Filter by folders and tags together”](#capturing-to-filtered-files)
Combine filters with `|` when the destination could live in several folders, or must match several tags:
| You write | The picker shows |
| -------------------------------------------------------- | ---------------------------------- |
| `folder:Goals\|folder:Projects` | Notes in either folder |
| `tag:active\|tag:work` | Notes with **both** tags |
| `folder:Goals\|folder:Projects\|tag:active` | Active notes in either folder |
| `folder:Goals\|exclude-folder:Archive\|exclude-tag:done` | Goals that aren’t archived or done |
Repeated `folder:` filters are OR filters. Repeated `tag:` filters are AND filters. Exclusions remove any matching file.
Capture still writes to **one** destination per run. To select several related notes for metadata, use the [`{{FILE:|multi}}`](/docs/FormatSyntax/#file) placeholder in the capture format instead.
### Capture to notes with a matching property
[Section titled “Capture to notes with a matching property”](#capturing-to-a-property)
Type `property:=` to limit the picker to notes whose frontmatter matches. If your notes have a `type` field, `property:type=draft` opens a picker containing only the notes whose `type` is `draft`.
This selects the destination note. [**Write position → Property**](#property) controls whether the capture updates one of that note’s properties.
* `property:type=draft` - notes whose `type` equals `draft`.
* `property:type` - notes that **have** a `type` field, whatever the value.
* Matching is case-insensitive and trimmed. For a list property (`type: [draft, idea]`), the note matches if **any** entry equals the value.
* The value supports [format syntax](/docs/FormatSyntax/): `property:status={{VALUE}}` asks when the capture runs.
Combine with the shared file filters using `|`, the same syntax as [`{{FIELD}}`](/docs/FormatSyntax/#field-filters):
* `property:type=draft|folder:Notes` - only drafts inside `Notes/`.
* `property:type=draft|exclude-folder:Archive` - drafts not in `Archive/`.
* `property:type=draft|exclude-tag:done` - drafts not tagged `#done`.
Good to know:
* Matches **YAML frontmatter** only, not inline Dataview `field:: value` fields.
* The field name matches case-insensitively (`property:type` matches a `Type:` field), and value matching is always case-insensitive.
* Only the `folder:` / `tag:` / `exclude-folder:` / `exclude-tag:` / `exclude-file:` pipe filters are applied here.
* Because `|` starts a filter, a property value cannot itself contain `|`.
* Typing a new note name (with **Create file if it doesn’t exist**) creates the note, but does not automatically give it the property.
### Send one entry to several notes
[Section titled “Send one entry to several notes”](#capturing-the-same-entry-to-multiple-files)
Capture writes to one destination per run. To write the same entry to several fixed notes, compose Capture choices with a [Macro](/docs/Choices/MacroChoice/):
1. Create one Capture choice per destination.
2. Give each the same named value, for example `- {{VALUE:entry}}`.
3. Create a Macro and add each Capture choice as a **Nested Choice** command.
4. Run the Macro: QuickAdd prompts for `entry` once and reuses the answer.
| Choice | Capture To | Format |
| --------------- | -------------------- | ------------------- |
| Log to Person A | `People/Person A.md` | `- {{VALUE:entry}}` |
| Log to Person B | `People/Person B.md` | `- {{VALUE:entry}}` |
If the destinations are dynamic, use one Capture choice with a formatted target and run it repeatedly from a [user script](/docs/UserScripts/):
| Setting | Value |
| ---------- | ---------------------------- |
| Capture To | `People/{{VALUE:person}}.md` |
| Format | `- {{VALUE:entry}}` |
```js
module.exports = async ({ quickAddApi }) => {
const entry = await quickAddApi.inputPrompt("Entry");
const people = await quickAddApi.checkboxPrompt([
"Person A",
"Person B",
"Person C",
]);
for (const person of people) {
await quickAddApi.executeChoice("Log event to person", {
entry,
person,
});
}
};
```
Pass the variables object on every `executeChoice` call - each call clears its temporary variables after the choice runs.
### Friendlier names in the picker
[Section titled “Friendlier names in the picker”](#file-picker-labels)
The picker shows a note’s file name. When the file name is an ID, the note shows its first level-1 heading instead. An ID is an unbroken timestamp of 12 or more digits, such as `202610061432`, a UUID, or a ULID. A date such as `2026-10-06` is not an ID, so a daily note shows its file name. A frontmatter `title` wins for every note. The selected destination is always the real file, so captures write to the same place even when the label is friendlier than the filename. Before QuickAdd 2.32.0, a note showed its first level-1 heading whenever it had one, whatever its file name.
You can also find a note by its `aliases`. A note found that way shows the alias with the note’s name beneath it, as in Obsidian’s quick switcher, and typing an alias exactly picks its note instead of offering to create a new one (QuickAdd 2.30.0 or later).
## Shape the entry: Capture format
[Section titled “Shape the entry: Capture format”](#capture-format)
*Capture format* is what actually gets written - think of it as a mini template for one entry. Left empty, QuickAdd writes `{{VALUE}}`: whatever you type in the prompt (or your editor selection, if selection-as-value is enabled). Before QuickAdd 2.30.0, the field has a toggle: it is hidden while the toggle is off, and off means `{{VALUE}}` on its own.
All of [format syntax](/docs/FormatSyntax/) works here:
Format
```markdown
- {{DATE:HH:mm}} {{VALUE}}
```
What gets written (after typing "Called the bank")
```markdown
- 09:42 Called the bank
```
To nest a line, press **Tab** in the box: once you have typed or clicked in it, Tab inserts a tab character (with a selection, it indents every touched line). Tabbing through the settings still passes the box by, and **Shift+Tab** moves focus out.
For a long format, keep it in a note and reference it:
```text
{{TEMPLATE:Templates/Capture Format.md}}
```
QuickAdd inserts the file’s contents, then processes the result like any capture format - the file can contain `{{VALUE}}`, `{{DATE}}`, `{{MACRO:...}}`, inline scripts, and further `{{TEMPLATE:...}}` includes (`.md`, `.canvas`, and `.base` files; include the extension). This lets you edit, version, and reuse a complete capture format as a normal note. The [one-page input form](/docs/Advanced/onePageInputs/) and `quickadd:check` scan referenced template files too, so their prompts appear up front.
Note
A capture into the note body inserts included content as-is. If the referenced template starts with its own `---` frontmatter block and the target note already has one, you get a literal second block - use [Apply Template to Note](/docs/ApplyTemplateToNote/) when frontmatter should merge.
Note
To insert `.base` content into your current note, keep **Capture to active file** enabled and use a `{{TEMPLATE:...}}` placeholder pointing at a `.base` file in the format - see [Capture: Insert a Related Notes Base into an MOC Note](/docs/Examples/Capture_InsertBaseTemplateIntoActiveFile/). To create a brand-new note that embeds a Base, use a Template choice - see [Template: Create an MOC Note with a Link Dashboard](/docs/Examples/Template_CreateMOCNoteWithLinkDashboard/).
If your format includes an inline `js quickadd` block and you need to transform input, read input in script code via `this.quickAddApi.inputPrompt(...)` and assign variables on `this.variables` - don’t put `{{VALUE}}` inside JavaScript string literals. See [Inline scripts](/docs/InlineScripts/#execution-order-and-value).
## The options, one by one
[Section titled “The options, one by one”](#capture-options)
The Capture builder groups its settings into **Location**, **Position**, **Linking**, **Content**, and **Behavior**.
### Create the note if it’s missing
[Section titled “Create the note if it’s missing”](#create-file-if-it-doesnt-exist)
*Create file if it doesn’t exist* does what it says. Optionally create the file **from a template** - an input for the template file appears below the setting.
### Format the entry as a task
[Section titled “Format the entry as a task”](#task)
*Task* formats your captured text as a task (`- [ ] ...`).
### One entry per line
[Section titled “One entry per line”](#one-entry-per-line)
*Requires QuickAdd 2.30.0 or later.*
*One entry per line* writes the capture format once for each line of `{{VALUE}}`. Paste, select, or type several lines, and each becomes its own entry:
Format (with Task on)
```markdown
{{VALUE}} 📅 {{VDATE:due,YYYY-MM-DD}}
```
You type three lines and answer "friday"
```markdown
- [ ] Book the venue 📅 2026-10-02
- [ ] Send the invites 📅 2026-10-02
- [ ] Order the cake 📅 2026-10-02
```
Good to know:
* Blank lines are skipped and each line is trimmed. If every line is blank, nothing is written, unless `{{VALUE}}` has a `|default:`, which is written once.
* Every other placeholder is asked once and reused for every line. Macros (`{{MACRO:...}}`), inline scripts, and included templates run once per capture, not once per line. `{{RANDOM:...}}` gives each line its own value.
* The `{{VALUE}}` prompt opens as a multi-line box, and so does its field in the [one-page input form](/docs/Advanced/onePageInputs/). A `|type:` on the token wins.
* A multi-line editor selection, or a value passed from a script, the URI, or the CLI, is split the same way.
* Only the `{{VALUE}}` written in the Capture format splits. A `{{VALUE}}` inside an included `{{TEMPLATE:...}}` is filled once, as a whole.
### Which day
[Section titled “Which day”](#date-origin)
Same [Which day](/docs/Choices/TemplateChoice/#date-origin) setting as a Template.
Imagine you capture into `Daily/{{DATE}}.md` at 3pm. The path picks the note. The line `- {{TIME}} bought milk` is 3pm, even if that note is yesterday. That’s the useful split: the note is the day, the stamp is when you wrote it.
`{{DATE:HH:mm}}` looks like it should print yesterday, but `HH:mm` only prints the clock, so you still get `15:00`. Put `{{DATE}}` on the line if you want the note’s day next to the text.
Most people leave this on Today and hold Shift in the QuickAdd menu for the days that aren’t today. If you’d rather have a hotkey for that, see [Command palette](#command-palette). Your existing hotkey still captures to today.
### Use your selection as the answer
[Section titled “Use your selection as the answer”](#use-editor-selection)
*Use editor selection as default value* controls whether selected text in the editor is used as `{{VALUE}}` instead of prompting: **Follow global setting**, **Use selection**, or **Ignore selection** (the global default lives in [**Settings → QuickAdd → Advanced**](/docs/Settings/#advanced-input), or on the main QuickAdd tab before QuickAdd 2.30.0). This does not affect `{{SELECTED}}`.
### Pick where in the note it lands: Write position
[Section titled “Pick where in the note it lands: Write position”](#write-position)
*Write position* controls where in the note the entry is written. The options depend on whether **Capture to active file** is enabled:
* **At cursor** (active file) / **Top of file** (target file) - the first option’s label changes with the mode
* **Top of file (after frontmatter)** (active file only)
* **New line above cursor** / **New line below cursor** (active file only)
* **After line…** - insert after a target line you specify, or pick a heading at run time. The workhorse for structured notes - see [Insert after](#insert-after).
* **Before line…** - see [Insert before](#insert-before)
* **Bottom of file** - starts the entry on a new line. For a blank line between entries, put one in the format, as in `{{VALUE}}\n\n`. Before QuickAdd 2.30.0, a format ending in `\n` also left a blank line before each new entry.
* **Property** - set a frontmatter value or add items to a list.
### Capture into a property
[Section titled “Capture into a property”](#property)
**Write position → Property** writes the Capture format to one frontmatter property in a Markdown note. The note’s body and unrelated property values stay intact. QuickAdd uses Obsidian’s frontmatter writer, so YAML formatting can change.
**Property** selects the key:
* **Named property** uses a fixed name such as `status`, or a formatted name such as `{{VALUE:property}}`.
* **Choose when capturing** opens a picker with the target note’s properties. With **Create property if missing** enabled, you can also enter a new name.
Property names match case-insensitively and keep the note’s existing spelling. An exact match wins. If several keys differ only in case and none matches exactly, QuickAdd stops the capture instead of choosing one.
**Action** controls the update:
* **Set value** replaces the property’s value. An empty value clears a list.
* **Add to list** adds new items below the existing ones. Exact duplicates are skipped. An existing text, number, or checkbox value causes an error.
For a list property, each line of the Capture format is one item, the same way Enter works in Obsidian’s List property editor. Lines are trimmed, blank lines are ignored, and a comma inside a line stays part of that item.
**Sort list** sets the order of the list QuickAdd writes. **Keep order** is the default and keeps the order described above. **Ascending** and **Descending** sort the whole list after new items are added and duplicates are removed. This applies to both actions and to formats with `{{PROPERTY}}`.
Items sort in natural text order, so `YYYY-MM-DD` dates sort chronologically and `item 2` comes before `item 10`. For example, with **Ascending**, adding `2026-10-11` to `[2026-10-10, 2026-10-12]` gives `[2026-10-10, 2026-10-11, 2026-10-12]`. Adding it again changes nothing.
#### Keep the current value with `{{PROPERTY}}`
[Section titled “Keep the current value with {{PROPERTY}}”](#keep-the-current-value-with-property)
In the format, `{{PROPERTY}}` is the property’s current value. Put it where that value should appear. When the format contains it, **Add to list** and **Set value** write the same list. QuickAdd drops duplicate items and keeps the first occurrence. An existing list item that contains a line break stops the capture. See [format syntax](/docs/FormatSyntax/#property) for examples.
Other useful patterns:
* Several fixed lines add several items in one run, with no prompt.
* `{{VALUE}}` on its own line adds whatever you type as one more item.
* A `{{VALUE:notes|type:multiline}}` prompt is a free-form “one item per line” box.
* Text, number, checkbox, date, and date-time properties never split on line breaks.
* A `|multi` picker or a script’s list on its own line adds one item per pick, next to any other lines. Its `|format:markdown` or `|format:yaml` adds no dashes or brackets. `|format:inline` or `|format:spaced` joins the picks into one item, and so does other text on the picker’s line. This needs QuickAdd 2.28.0 or later; earlier versions join the picks into one item when the format has other lines.
* A format that is only a `|multi` picker or a script’s list writes each item as it is, even one that contains a line break. Next to other lines, such an item stops the capture.
Neither action converts an existing text, number, or checkbox property into a list. An empty or whitespace-only text value or empty list with **Add to list** leaves the note unchanged. It does not create a missing note, write properties, insert links, or copy links.
Inline scripts read the current value through [Property Capture variables](/docs/InlineScripts/#property-capture-variables).
**Create property if missing** permits a new key. When disabled, a missing key stops the capture. **Create file if it doesn’t exist** separately controls whether QuickAdd can create the destination note.
The Capture format supplies the value. A format made entirely of one `VALUE`, `FIELD`, or `FILE` token preserves a typed number, checkbox, or list. Combining a token with other text produces text. An explicit multi-select output format, such as `|format:spaced`, also produces the requested text representation.
For a Number or Checkbox property, a plain `{{VALUE}}` or `{{VALUE:rating}}` automatically uses the matching input widget and value type. This also applies to a missing property whose type is already set in Obsidian. An explicit `|type:` option takes precedence.
| Property | Action | Capture format | Result |
| -------- | --------------- | ---------------------------------------------------------- | --------------------------------------------------- |
| `status` | **Set value** | `{{VALUE:status}}` | The entered text. |
| `rating` | **Set value** | `{{VALUE:rating\|type:number}}` | A Number property. |
| `done` | **Set value** | `{{VALUE:done\|type:checkbox}}` | A Checkbox property. |
| `tags` | **Add to list** | `work` and `personal` on two lines | Adds both tags without a prompt. |
| `tags` | **Add to list** | `{{VALUE:work,personal\|multi}}` | Adds the selected tags. |
| `tags` | **Add to list** | `{{VALUE:work,personal\|multi}}` then `inbox` on two lines | Adds the selected tags and `inbox`. |
| `tags` | **Add to list** | `work` then `{{PROPERTY}}` on two lines | Inserts `work` above the existing tags. |
| `status` | **Set value** | `{{PROPERTY}} → Ready` | Keeps the current text and appends `→ Ready`. |
| `people` | **Set value** | `{{FILE:People\|multi\|link}}` | Replaces the list with links to the selected notes. |
The value must match the property’s Obsidian type, or its existing value when no type is known. A Number property can receive a script value of `42` or the text `"42"` through a plain `VALUE` token. Literal formats and composite text are not parsed as YAML: `true` and `[work, personal]` remain text. Text properties also preserve values such as `001`. Commas in text remain part of one value. Objects and lists containing non-text values are rejected. **Set value** removes exact duplicate list items while preserving their order.
For a new property without a known type, the captured value determines the type. Date properties accept `YYYY-MM-DD`, and date-time properties accept ISO date-time text such as `2026-09-07T14:30`. An intentional empty text value or empty list clears a matching property with **Set value**. Use `|optional` to allow an empty prompt answer. Cancelling a prompt stops the capture.
Several lines of text are the one exception. **Set value** stops with an error instead of guessing, because several lines usually mean a list, and writing them as text would register the property as Text for the whole vault and block every later **Add to list**. Use **Add to list** to create it as a list, or set the property’s type in Obsidian first - choose Text to keep the lines as one value.
QuickAdd collects and validates the property inputs before writing or creating the note. **Task** and **Run Templater on entire destination file after capture** are hidden and do not apply to property captures.
Scripts can supply native values through `executeChoice`. With **Add to list**, property `tags`, and format `{{VALUE:tags}}`, this adds two complete items. The comma inside the first item stays part of that item:
```js
await quickAddApi.executeChoice("Add project tags", {
tags: ["Research, writing", "work"],
});
```
For a non-interactive CLI run, use **Named property**, optionally with a variable in its name, and pass typed values through [`vars`](/docs/Advanced/CLI/#passing-variables). **Choose when capturing** requires an interactive run.
### Link back to the captured note
[Section titled “Link back to the captured note”](#link-to-captured-file)
*Link to captured file* inserts a link to the note you captured to - useful for leaving a trail in the note you were in. Three modes:
* **Enabled (strict)** - require the configured link destination to be available
* **Enabled (skip if unavailable)** - insert the link when possible, silently skip when nothing is open
* **Disabled** - never insert a link
With either enabled mode, *Link destination* controls where the link goes:
* **Current note** - insert into the active editor
* **Specified note** - append to the bottom of a chosen note (an index or MOC, for example) without opening it. QuickAdd validates the destination before writing. It appends a plain link only: it won’t create the index file, insert under a heading, update properties, or dedupe links.
For **Current note**, strict mode requires a focused Markdown editor (except Canvas-triggered captures, which skip link insertion when no Markdown editor is available).
#### Where the link is placed
[Section titled “Where the link is placed”](#link-placement)
For the **Current note** destination, *Link placement* chooses the spot:
* **Replace selection** - replace any selected text with the link (default)
* **After selection** - keep the selected text, place the link after it
* **End of line** - at the end of the current line
* **New line** - on a new line below the cursor
* **In frontmatter property** - add the link to a named frontmatter property
For **In frontmatter property**, set the property name and how strictly to handle missing or non-list properties:
* **Create or convert** (default) - create the property if missing, or convert an existing scalar value into a list before appending. Object values still error.
* **Create if missing** - create the property if missing; existing scalar/object values error.
* **Require list** - append only to an existing list property. Empty/null count as empty lists; missing properties and scalar/object values error.
Note
If your cursor is in an editable Obsidian Properties field when the capture starts (and placement isn’t **In frontmatter property**), QuickAdd appends the link to that focused property instead of using the stale editor cursor behind the Properties panel. Text properties get the link at the end of the value; list properties get a new item.
#### Link or embed
[Section titled “Link or embed”](#link-type)
For the body placements (**Replace selection**, **After selection**, **End of line**, **New line**), a *Link type* dropdown chooses **Link** (`[[Note]]`) or **Embed** (`![[Note]]`). An embed transcludes the captured note’s contents at the placement position. **In frontmatter property** and the **Specified note** destination stay link-only.
#### What the link says
[Section titled “What the link says”](#link-display-text)
For the selection placements with the **Link** type, *Link display text* chooses the visible text. **Selected text** keeps your highlight as the display text: selecting `Meeting with Mark` and capturing to `20240101 Meeting with Mark` inserts `[[20240101 Meeting with Mark|Meeting with Mark]]`. With nothing selected (or a selection that can’t sit safely inside a link), the plain link is inserted. Multi-line selections collapse to one line, and vaults using Markdown-style links get `[Meeting with Mark](20240101%20Meeting%20with%20Mark.md)`.
### Copy a link to the clipboard
[Section titled “Copy a link to the clipboard”](#copy-link-to-clipboard)
*Copy link to clipboard* copies a link to the captured note after the capture runs - independent of *Link to captured file*, so you can copy without inserting, or do both. The copied link is a vault-path wikilink, ready to paste into another note.
### Open the captured note
[Section titled “Open the captured note”](#opening-the-captured-file)
When **Capture to active file** is off, the **Behavior** section shows an *Open* toggle. Enabling it reveals:
* *File opening location* - **Reuse current tab**, **New tab**, **Split pane**, **New window**, **Left sidebar**, or **Right sidebar**
* *Split direction* - **Split right** or **Split down** (shown for **Split pane**)
* *View mode* - **Source**, **Preview**, **Live Preview**, or **Default**
* *Focus new pane* - focus the opened tab immediately (shown for every location except **Reuse current tab**)
When QuickAdd opens and focuses a Markdown target in an editable mode after a body capture, it places the cursor at the end of the inserted text so you can keep typing. This is skipped for preview/unfocused opens and when Templater cursor markers take over.
Use [`{{CURSOR}}`](/docs/FormatSyntax/#cursor) in the Capture format to place the cursor within the inserted text. The marker also works when the destination is already focused in an editing mode and **Open** is off.
### Run it from a hotkey: Command palette
[Section titled “Run it from a hotkey: Command palette”](#command-palette)
**Add to command palette** registers the capture as an Obsidian command, the same switch as the lightning bolt in the choice list. Once it is on, and [Which day](#date-origin) isn’t **Ask each time**, **Also add “Name (pick a day)”** registers a second command that asks which day first. One hotkey captures to today, the other to whichever day you pick, from the same choice.
### Run Templater on the whole file afterwards
[Section titled “Run Templater on the whole file afterwards”](#run-templater-on-entire-destination-file-after-capture)
Deprecated
*Run Templater on entire destination file after capture* is deprecated and will be removed in a future release. QuickAdd already runs Templater in what it captures, so the option is no longer needed. In QuickAdd 2.30.0 or later, the builder only shows it on choices that already have it on, and a Capture that uses it shows a notice once per session. Turn it off.
The option executes any `<% %>` anywhere in the destination file, including inside code blocks. When that pass changes the note, QuickAdd skips placing the cursor at `{{CURSOR}}`, since the text under the marker may have moved.
### Templater and newly created notes
[Section titled “Templater and newly created notes”](#templater-and-newly-created-files)
Body captures have two Templater paths when they create a missing Markdown file:
* **Create file if it doesn’t exist** without a QuickAdd template: QuickAdd creates a blank file first. If Templater’s new-file trigger applies to that location, QuickAdd waits for Templater to finish before inserting the capture.
* **Create with template**: QuickAdd owns the initial content. It renders the selected QuickAdd template, suppresses Templater’s new-file/directory trigger for that creation, then runs Templater once on the content QuickAdd wrote.
So a blank Capture-created file can receive Templater’s directory template first, while a template-created file runs Templater on QuickAdd’s template content instead.
Property captures prepare the property value before creating the file. After a new-file Templater pass, QuickAdd applies the property update to the resulting frontmatter so the template does not discard the capture.
## Insert after
[Section titled “Insert after”](#insert-after)
**After line…** inserts the entry after a line with the text you specify - this is how entries land under the right heading. A journal capture might insert after `## What did I do today?`.
By default, QuickAdd preserves blank lines after headings to keep spacing intact. **Blank lines after match** controls this:
* **Auto (headings only)** - skip blank lines only when the matched line is a heading
* **Always skip** - skip all consecutive blank lines after the match
* **Never skip** - insert immediately after the matched line
Example (Auto, insert after `# H` with content `X`):
```markdown
# H
X
A
```
A new Capture starts with **Insert at end of section** on, so each entry lands below the previous one, and **Create line if not found** on at the **Top**. Turn **Insert at end of section** off to put the newest entry first. Before QuickAdd 2.30.0, both started off. **Consider subsections** is covered [below](#consider-subsections--option).
**Create line if not found** creates the target line when it doesn’t exist - useful when the heading might not be in the note yet. The created line can go at the **Top** or **Bottom** of the file, at your **Cursor**, or **Ordered** - sorted among same-level headings; see [Ordered section placement](#ordered-section-placement) for reverse-chronological logs and changelogs.
At the **Top** or **Bottom**, the created lines sit right against the note’s content, with no blank line between them. In QuickAdd 2.31.0 or later, the exception is two blockquote lines that would touch, such as a created callout opener right below a quote: QuickAdd puts one blank line between them, so the callout renders on its own instead of joining the quote.
The target may span several lines: type `\n` in the **Insert after** field to match a multi-line anchor (the preview shows it expanded). **Inline insertion** is the exception - it inserts on the same line, so its target must be a single line; a `\n` target there is rejected with a notice.
### Ordered section placement
[Section titled “Ordered section placement”](#ordered-section-placement)
When **Create line if not found** is set to **Ordered** (full label: `Ordered among siblings`), a missing “Insert after” heading is created at its **sorted position among same-level headings**. This is the building block for a reverse-chronological log: each new dated section is added above older ones, while a fixed title stays pinned at the top.
The classic “daily log, newest first” recipe (issue [#481](https://github.com/chhoumann/quickadd/issues/481)):
* **Capture to**: your log note (enable `Create file if it doesn't exist` to auto-create it)
* **Format**: the entry with a trailing newline, e.g. `- {{DATE:HH:mm}} {{VALUE}}\n` (task captures add their own newline)
* **Insert after**: the day heading, `## {{DATE:YYYY-MM-DD}}`
* **Insert at end of section**: off, so each entry lands directly under the day heading (newest first within the day)
* **Create line if not found**: on, location **Ordered**, **Sort sections by** = `Date`, **Section order** = `Newest / highest first`
Running it on consecutive days (and twice in one day) produces:
```markdown
# My Daily Log
A short intro that always stays at the top.
## 2026-06-16
- 09:40 reviewed the code
- 09:13 started the design
## 2026-06-14
- 09:00 older entry
```
The first capture of a day creates `## 2026-06-16` below the intro and above `## 2026-06-14`; later captures that day find the existing heading and add their entry on top. The `# My Daily Log` title stays put because only same-level headings (`##`) are sorted against each other, and YAML frontmatter is never treated as a heading.
#### Sort options
[Section titled “Sort options”](#sort-options)
With **Ordered** selected, these controls appear:
* **Sort sections by** - how the sort key is read from each heading:
* `Insertion order (no sorting)` - newest-first prepends the new section; oldest-first appends it. No parsing.
* `Text (A→Z)` - case-insensitive text compare.
* `Number` - the leading number in the heading (e.g. `## 12 Project X`).
* `Date` - parsed with a **Date format** (auto-detected from the `{{DATE:…}}` placeholder in your “Insert after” text, and editable). Trailing decoration like `## 2026-06-14 (Friday)` is ignored.
* `Version (semver)` - `major.minor.patch`, so `1.10.0` sorts above `1.9.0`. A leading `v` and the Keep-a-Changelog `## [1.10.0] - 2026-06-16` form are both understood.
* **Section order** - `Newest / highest first` or `Oldest / lowest first`.
* **Existing unparseable headings** (for `Date`, `Number`, `Version (semver)`) - where to rank headings that can’t be parsed for the chosen key (like `## Unreleased` in a changelog): sort to bottom (default) or top. A new heading that can’t be parsed is always appended at the end.
Use **Insert at end of section** to control order *within* each section: off = newest entry on top (date logs), on = entries appended at the end (changelogs).
#### More examples
[Section titled “More examples”](#more-examples)
A changelog with the newest version on top - **Insert after** `## {{VALUE:version}}`, **Format** `- {{VALUE:change}}\n`, **Insert at end of section** on, **Create line if not found** on → **Ordered**, **Sort by** `Version (semver)`, **Order** `Newest / highest first`:
```markdown
# Changelog
## 1.10.0
- new feature
- another fix in 1.10.0
## 1.9.0
- old fix
```
A “books read” note grouped by year - **Insert after** `## {{DATE:YYYY}}`, **Format** `- {{VALUE}}\n`, **Create line if not found** on → **Ordered**, **Sort by** `Date` with **Date format** `YYYY`, **Order** `Newest / highest first`.
#### Notes and limits
[Section titled “Notes and limits”](#notes-and-limits)
* The heading is created **once** and reused - every later capture finds it, so the section is never duplicated. This relies on the heading resolving to the **same text** each time: use a stable placeholder (`{{DATE:…}}`, a `{{VALUE:…}}` you supply), not a random one.
* Sorting covers **all same-level headings in the note**, not one parent section. For the layouts above (dated/versioned `##` sections under one `#` title) that’s exactly right - keep the fixed title at a different heading level so it’s never a sortable sibling.
* Ordered placement positions the **new** section only; it doesn’t re-sort existing ones.
* **Ordered** is for headings and can’t be combined with **Inline insertion**.
### Choose the heading when capturing
[Section titled “Choose the heading when capturing”](#choose-heading-when-capturing)
Instead of typing the target line when you build the choice, enable **Choose heading when capturing** to pick it **at run time**: QuickAdd reads the target note and shows a dropdown of its headings - pick one, and the entry is inserted under it. Useful when the heading varies between runs, or when you’d rather not remember it.
The picked heading simply becomes the insert-after target, so every placement control still applies: **Insert at end of section**, **Consider subsections**, **Blank lines after match**, and **Create line if not found** work exactly as usual.
Good to know:
* You can type a heading that doesn’t exist yet; enable `Create line if not found` to have QuickAdd create it (type it with its `#` markers, e.g. `## Tasks`).
* The dropdown lists ATX headings (lines starting with `#`). For a brand-new note created from a template, the picker can’t list the template’s headings (the note doesn’t exist at pick time) - type the heading and use `Create line if not found`.
* With the one-page input form, the heading dropdown still appears as a separate step after the form.
### Consider subsections
[Section titled “Consider subsections”](#consider-subsections--option)
Controls whether a section’s nested subsections count as part of it when using **Insert at end of section**.
Disabled - the section ends where its first subsection starts:
```markdown
## 1. First heading
**Insert after** comes here.
- content 1
- content 2
- content 3
**Insert at end** comes here.
### 1.1. Nested heading 1
Content
## 2. Another heading
Content
```
Enabled - subsections belong to the section, so “end of section” is after them:
```markdown
## 1. First heading
**Insert after** comes here
- content 1
- content 2
- content 3
### 1.1. Nested heading 1
Content
**Insert at end** comes here. Captures to after this, as it's considered part of the "1. First heading" section.
## 2. Another heading
Content
```
## Insert before
[Section titled “Insert before”](#insert-before)
**Before line…** inserts the capture before the first line matching the text you specify. The target accepts [format syntax](/docs/FormatSyntax/), so values like `{{TITLE}}` and `{{LINKCURRENT}}` work in the match text.
**Create line if not found** works here too: QuickAdd writes the captured content first, then creates the missing line below it. The created line can go at the start or end of the file, or at your cursor.
## Capture to Canvas
[Section titled “Capture to Canvas”](#canvas-capture-notes)
QuickAdd supports two Canvas capture workflows:
* Capture to the selected card in the active Canvas view
* Capture to a specific card in a specific `.canvas` file
### Capture to the selected card
[Section titled “Capture to the selected card”](#1-capture-to-selected-card-in-active-canvas)
Enabled when **Capture to active file** is on and the active view is a Canvas. Supported card targets:
* Text cards
* File cards that point to Markdown files
### Capture to a card in a specific file
[Section titled “Capture to a card in a specific file”](#2-capture-to-specific-card-in-specific-canvas-file)
Enabled when **Capture to active file** is off, the capture path resolves to a `.canvas` file, and **Target canvas node** is set. When the path is a `.canvas` file, QuickAdd shows a node picker so you can choose the card directly from that board.
### Write positions in Canvas
[Section titled “Write positions in Canvas”](#write-position-support-in-canvas)
* Text cards and file cards (Markdown targets) support: **Top of file**, **Bottom of file**, **After line…**, **Before line…**
* Cursor-based modes (**At cursor**, **New line above/below cursor**) don’t exist in Canvas. If **Capture to active file** is on and the write position is still the default **At cursor**, the capture aborts until you switch to a supported mode.
Selected-card mode needs exactly one selected card. If the selection is missing, multiple, or unsupported, QuickAdd aborts with a notice instead of writing to the wrong place.
When **Link to captured file** is **Enabled (strict)** and the capture runs from a Canvas card without a focused Markdown editor, the capture still writes and link insertion is skipped.
For a step-by-step setup, see [Capture: Canvas Capture](/docs/Examples/Capture_CanvasCapture/).
### Canvas capture FAQ
[Section titled “Canvas capture FAQ”](#canvas-capture-faq)
**Why did my capture abort in Canvas?** Most often: no card selected, more than one card selected, an unsupported card type, or a cursor-based write position.
**Can I target a specific card in a Canvas file?** Yes - set the capture path to a `.canvas` file and choose a **Target canvas node**.
**Does “At cursor” work in Canvas cards?** No. Use top, bottom, insert-after, or insert-before placement.
**Can I capture to a file card that points to a Canvas file?** No - file-card capture supports Markdown targets only.
**Can I still create new Canvas files from templates?** Yes. Template choices support `.canvas` templates.
# Macros
> Chain Obsidian commands, user scripts, nested choices, AI steps, and conditionals into one automated command that shares data between steps
A macro chains several QuickAdd actions into one command you can run from the palette or a hotkey. Instead of running a template, then a capture, then a script by hand, a macro runs them in order and passes data from one step to the next. Reach for a macro when a single choice isn’t enough. Use it to:
* Ask a question once and reuse the answer across several steps
* Run your own JavaScript to talk to the Obsidian API or another plugin
* Branch the workflow based on what you picked or what a script returns
* Kick off a routine automatically when Obsidian starts
Macros are QuickAdd’s most capable - and most technical - choice type. You don’t need to be a programmer to start: the walkthrough below uses no code at all. The deeper sections assume you’re comfortable with a little JavaScript.
Tip
Once you have a macro (or a whole collection of choices) that you love, use the [QuickAdd package exporter](/docs/Choices/Packages/) to bundle it with its dependencies and share the `.quickadd.json` file with other vaults.
## What is a macro?
[Section titled “What is a macro?”](#what-are-macros)
A **macro** is a list of commands that run one after another. Each macro is paired with a **macro choice**, the entry that shows up in the QuickAdd menu and gives you something to trigger.
### The pieces
[Section titled “The pieces”](#key-concepts)
* **Macro choice** - the trigger that appears in the QuickAdd menu.
* **Macro** - the actual sequence of commands that runs.
* **Commands** - the individual steps (Obsidian commands, scripts, AI prompts, and more).
* **Variables** - data that one command sets and a later command reads, all within a single run.
## Set up your first macro
[Section titled “Set up your first macro”](#creating-a-macro)
We’ll build a tiny macro with no code: it opens today’s daily note and drops your cursor at the end, ready to type. Three commands, run as one.
### Step 1: Create the macro choice
[Section titled “Step 1: Create the macro choice”](#step-1-create-a-macro-choice)
1. In **Settings → QuickAdd**, click **New choice** → **Macro**. The Macro Builder opens as a page of the settings window; set **Name** to `Open daily note`. To reopen the builder later, click the gear on the choice’s row (on a phone, **⋮** → **Configure**). Going back saves it. (Before QuickAdd 2.30.0, the builder is a dialog; click its name at the top to rename it.)
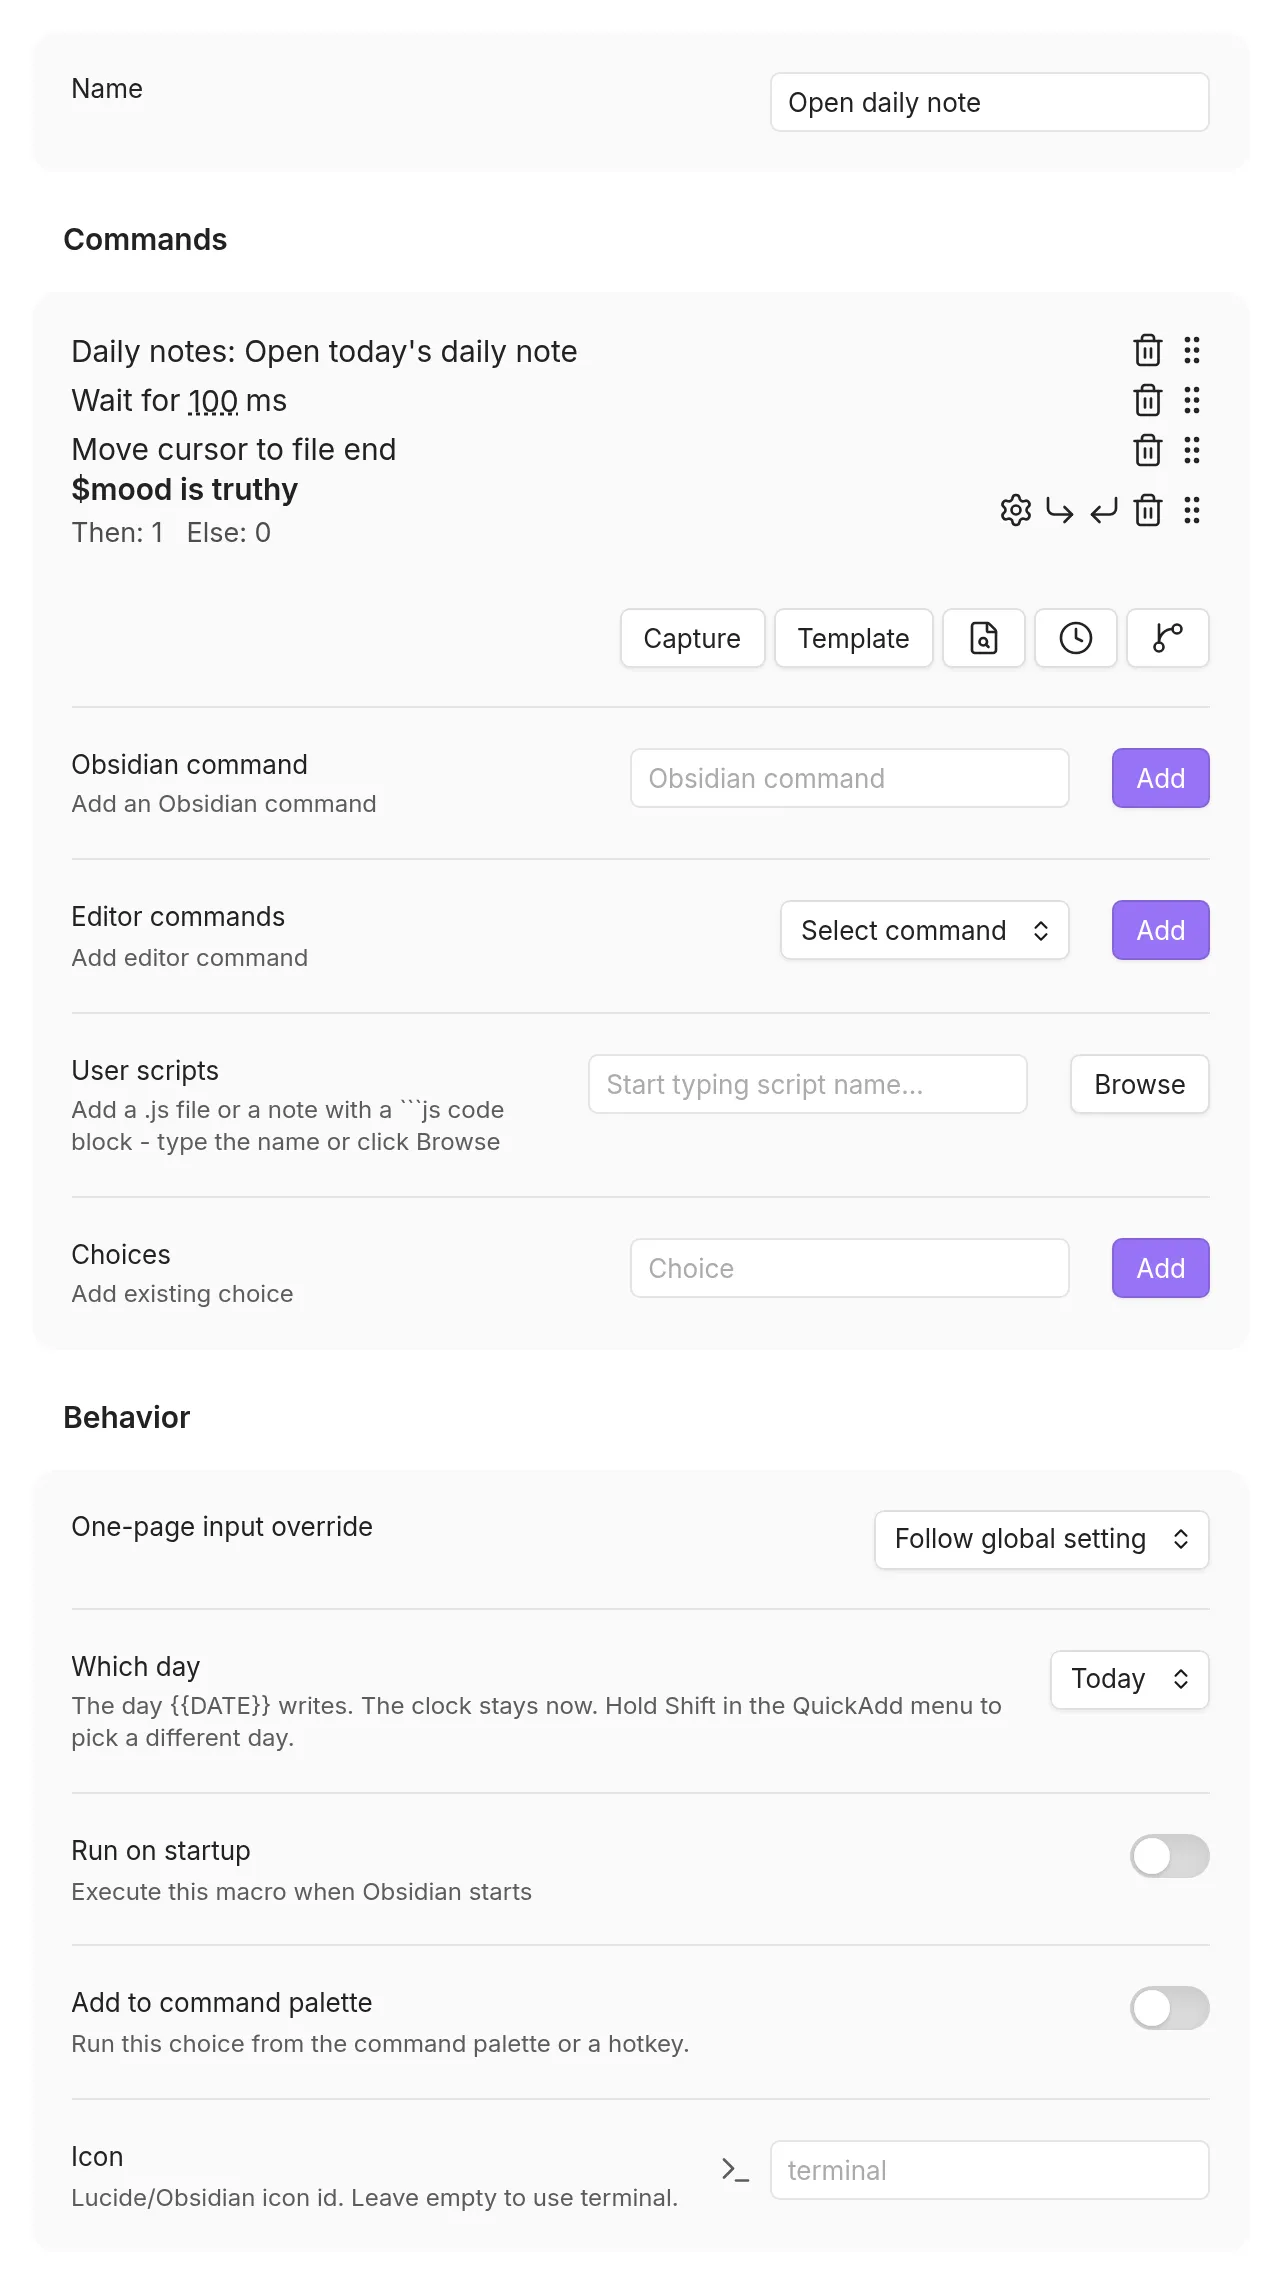
### Step 2: Build the macro
[Section titled “Step 2: Build the macro”](#step-2-build-your-macro)
1. In the Macro Builder, add an **Obsidian Command** and pick `Daily notes: Open today's daily note`.
2. Click the clock button (**Add wait command**) to add a **Wait** step of 100 ms. The command step doesn’t wait for the daily note to open, so without the pause the cursor moves before the note is there. If the cursor still ends up in the wrong note, click the number and wait longer.
3. Add an **Editor commands** entry and choose **Move cursor to file end**.
4. Close the builder, then run it: command palette → `QuickAdd: Run` → `Open daily note`.
Your daily note opens and the cursor sits at the end of the file, ready for the next line - all three steps in a single command. Assign the choice a hotkey (the ⚡ icon, or Obsidian’s Hotkeys settings) once it behaves the way you want.
## The commands you can add
[Section titled “The commands you can add”](#command-types)
The Macro Builder offers these command types. Add as many as you like, in any order.
| Command | What it does |
| -------------------- | --------------------------------------------------------------------------------------------------------------------------------------------------------------------------------------------------------------------------------------------------------------------------- |
| **Obsidian Command** | Run any Obsidian command, for example `Daily notes: Open today's daily note` or `Toggle reading view`. |
| **Editor commands** | Manipulate text in the active editor: copy, cut, paste, [paste with format](#paste-with-format), select the line or a link on it, and move the cursor. See [Editor commands](#editor-commands). |
| **User Script** | Run your own JavaScript to reach the Obsidian API, do complex work, or integrate with other plugins. See [Add a user script command](#add-a-user-script-command). |
| **Nested Choice** | Run another QuickAdd choice - a template, capture, or another macro - so you can reuse existing work and build modular workflows. |
| **Wait** | Pause for a set number of milliseconds, useful when a previous command needs time to finish. |
| **AI Assistant** | Run an AI prompt to generate or process content. Available once you’ve configured an AI provider. |
| **Open File** | Open an existing file at a formatted path. Supports all [format syntax](/docs/FormatSyntax/) (`{{DATE}}`, `{{VALUE}}`, and so on), with tab and split options. It opens in the default view mode with focus, and only opens files that already exist (it won’t create one). |
| **Conditional** | Branch the run based on live data. See [Branch with a conditional](#conditional-commands). |
### Add a user script command
[Section titled “Add a user script command”](#add-a-user-script-command)
Macros don’t contain JavaScript directly. Your code lives either in a `.js` file inside your vault **or** in a ` ```js ` code block inside a note, and the macro simply runs it. The note option is handy on mobile, where Obsidian cannot open `.js` files - see [User Scripts](/docs/UserScripts/#scripts-in-a-note-code-block).
Create a script file such as `scripts/my-macro.js`, or a note such as `Scripts/my-macro.md` with your code in a ` ```js ` (or ` ```javascript `) block. QuickAdd runs the **first** matching JavaScript block in a note and ignores the surrounding prose.
To add it, open the Macro Builder and add a **User Script** command. There are two ways to point it at your script:
* **Browse** opens QuickAdd’s script picker (not your operating system’s file picker). It lists the `.js` files and notes-with-a-code-block that Obsidian has already discovered, so it can’t reach files outside the vault or hidden from Obsidian’s index. Each entry shows its full path, and you can search by folder, so same-named scripts such as several `view.js` files are easy to tell apart.
* **Type it in.** For a `.js` file, type its basename - for `scripts/my-macro.js`, enter `my-macro`; if two `.js` files share that name, use its vault path instead. For a note, type its vault path, for example `Scripts/my-macro.md`. Then click **Add**. To run a specific exported function, append it with `::`, such as `my-macro::start`.
If the script exports more than one function and you don’t name one, QuickAdd asks which export to run. You can also set an output variable name so later commands can reuse the result.
Where to keep scripts
Keep the script inside your vault, but **not** inside `.obsidian` or any folder whose name starts with a dot. Obsidian may exclude hidden folders from its file index, and QuickAdd builds the picker from Obsidian’s indexed files, so a hidden script never shows up. Use a normal folder such as `scripts/`, or a visible underscore-prefixed folder such as `_quickadd/scripts/`. Full rules are in [User Scripts](/docs/UserScripts/#adding-scripts-to-macros).
Good to know:
* To **insert text into a note**, don’t write it in a script. Use a **Template** or **Capture** choice and run it from the macro as a **Nested Choice** command. That’s the intended way to write content, and no YAML frontmatter is required.
* If your script calls the API of another plugin, that plugin must be installed and enabled in your vault. You don’t need any extra plugin just to run user scripts.
### Branch with a conditional
[Section titled “Branch with a conditional”](#conditional-commands)
A conditional command lets your macro take one path or another without writing boilerplate JavaScript. Each conditional has:
* **Condition mode** - compare a macro variable, or run a script that returns `true`/`false`.
* **Variable comparisons** - test a variable with operators like equals, contains, less than, greater than, or a basic truthiness check. The value type (text, number, boolean) controls how the two sides are compared. A variable that nothing in the run has set counts as empty: **Is falsy** takes the Then branch, and every other operator takes the Else branch.
* **Script mode** - point to a JavaScript file in your vault (with an optional exported function) that returns a boolean. The script gets the same parameters as any user script, including your macro variables and `params.abort`.
* **Branch editors** - the commands that run when the condition passes (**Then**) or fails (**Else**). Each branch is a full command sequence, so you can nest more conditionals or reuse any command type.
To add one:
1. Click the branch icon in the command bar of the Macro Builder (or of any conditional branch editor).
2. Click the settings icon on the new command to define the condition.
3. Use the branch buttons to set the commands that run for the **Then** and **Else** outcomes. Each branch opens as a page over the macro; go back to return to it. (Before QuickAdd 2.30.0, a branch opens in a dialog with **Save** and **Cancel**.)
The macro runs the matching branch in order, then continues with the rest of the macro. Branch commands share the same variable map as the outer macro, so they can read or update variables for later steps.
## Editor commands
[Section titled “Editor commands”](#editor-commands)
Editor commands manipulate text in the active editor.
### Paste with format
[Section titled “Paste with format”](#paste-with-format)
**Paste with format** preserves rich formatting when you paste from an external source. Unlike the standard paste, which handles plain text only, it:
* **Detects HTML** in your clipboard
* **Converts it to Markdown** using Obsidian’s built-in conversion
* **Preserves formatting** like links, bold, italics, headers, and lists
* **Falls back gracefully** to plain text when no HTML is available
What that looks like in practice:
| You copy | You paste |
| ------------------------------- | ---------------------------------- |
| A formatted link from a webpage | `[Link Text](https://example.com)` |
| Text with bold/italic | **bold** and *italic* preserved |
| A bulleted list | A proper Markdown list |
| A table from a website | A Markdown table |
Note
Paste with format uses modern clipboard APIs, with an automatic fallback for older versions.
### The other editor commands
[Section titled “The other editor commands”](#other-editor-commands)
* **Copy / Cut / Paste** - standard clipboard operations.
* **Select active line** - select the whole line the cursor is on.
* **Select link on active line** - find and select a link on the current line.
* **Move cursor to file start / file end** - jump to the beginning or end of the file.
* **Move cursor to line start / line end** - jump to the beginning or end of the current line.
## User scripts
[Section titled “User scripts”](#user-scripts)
A user script extends a macro with custom JavaScript, written either in a `.js` file or in a ` ```js ` code block inside a note. Scripts have access to:
* The Obsidian `app` object
* The QuickAdd API
* A `variables` object for passing data between commands
[]()
The basic shape is an exported async function - QuickAdd calls it with a `params` object that carries everything you need:
```javascript
module.exports = async (params) => {
// Destructure the parameters
const { app, quickAddApi, variables } = params;
// Your code here
console.log("Hello from my macro!");
// Set a variable for use in later commands
variables.myResult = "Some value";
};
```
[]()[]()[]()[]()
Everything else about writing scripts lives in the [User Scripts reference](/docs/UserScripts/):
* [Where a script can live](/docs/UserScripts/#adding-scripts-to-macros) - `.js` file or note code block, and which folders QuickAdd’s picker can see.
* [Prompt the user](/docs/UserScripts/#user-input) - input prompts, suggesters, yes/no, and checkbox prompts via `quickAddApi`; the full method list is in the [QuickAdd API](/docs/QuickAddAPI/).
* [Read the editor selection](/docs/QuickAddAPI/#getselection-string) - `quickAddApi.utility.getSelection()`.
* [Reach into other plugins](/docs/UserScripts/#accessing-other-plugins) - talk to Templater, MetaEdit, or any plugin through `app.plugins.plugins`.
* [Offer several actions from one script](/docs/UserScripts/#multiple-entry-points) - export more than one function and pick at run time.
* [Configurable settings](/docs/UserScripts/#configurable-options), [error handling and `abort()`](/docs/UserScripts/#error-handling-and-macro-control), and a shelf of [copy-paste recipes](/docs/UserScripts/#common-patterns--recipes).
## Pass data between commands: variables
[Section titled “Pass data between commands: variables”](#variables-and-data-flow)
Every command in a macro shares one temporary variable map for the current run. A user script can write `params.variables.bookTitle`, and a later Template or Capture command can read it back as `{{VALUE:bookTitle}}`.
For the full rules - named `VALUE` prompts, empty values, AI Assistant output variables, and the `executeChoice` boundary - see [Variables and data flow](/docs/VariablesDataFlow/).
[]()
## Run one export directly: `Macro::member`
[Section titled “Run one export directly: Macro::member”](#direct-function-access)
When a script [exports several functions](/docs/UserScripts/#multiple-entry-points), QuickAdd normally asks which one to run. You can skip that prompt by naming the function:
* `{{MACRO:MyMacro::option1}}` runs `option1` directly.
* `{{MACRO:MyMacro::start}}` runs the `start` function.
When a macro has more than one user script, `Macro::member` picks the script that uniquely exports the requested member across all scripts in the macro. QuickAdd resolves it like this:
* If exactly one script exports the member, QuickAdd uses it.
* If no script exports the member, QuickAdd stops and shows an error.
* Exception: if the macro has no user-script commands at all, QuickAdd can’t satisfy member access - it logs a warning and returns an empty result instead of stopping the macro.
* If several scripts export the member, QuickAdd stops and lists the conflicting script names instead of guessing.
* Exception: the convention keys `settings`, `entry`, and `quickadd` (which many scripts export as metadata rather than entrypoints) resolve to the **first** script that exports them and show a one-time notice pointing at the selector form below, rather than stopping. Use the selector if you need a different script.
When there’s a conflict, target a specific script by name:
* `{{MACRO:MyMacro::Script 1::option1}}`
The selector uses the macro command name shown in the editor. If two user-script commands share the same name, rename one before using the selector form.
## Macro settings
[Section titled “Macro settings”](#macro-settings)

### Which day
[Section titled “Which day”](#date-origin)
Same [Which day](/docs/Choices/TemplateChoice/#date-origin) setting as a Template. Child choices in the macro inherit that day, so a weekly pack can ask once and then write every template for last week.
### Run on startup
[Section titled “Run on startup”](#run-on-startup)
Enable this to run a macro automatically when Obsidian starts. Handy for:
* Creating a daily note automatically
* Setting up your workspace
* Running maintenance tasks
### Command palette
[Section titled “Command palette”](#command-palette)
**Add to command palette** is the same switch as the lightning bolt in the choice list. Once it is on, and Which day isn’t **Ask each time**, **Also add “Name (pick a day)”** registers a second command that asks which day before the macro runs. See [Command palette](/docs/Choices/TemplateChoice/#command-palette) on the Template page.
## Practical examples
[Section titled “Practical examples”](#practical-examples)
### Example 1: Log a book to your daily note
[Section titled “Example 1: Log a book to your daily note”](#example-1-book-logging-macro)
Prompt for a book name and write it into today’s daily note (using the MetaEdit plugin):
```javascript
module.exports = async (params) => {
const { quickAddApi: { inputPrompt }, app } = params;
// Get book name from user
const bookName = await inputPrompt("📖 Book Name");
// Get MetaEdit plugin
const { update } = app.plugins.plugins["metaedit"].api;
// Format today's date
const date = window.moment().format("YYYY-MM-DD");
// Update the daily note
await update("Book", bookName, `Daily Notes/${date}.md`);
};
```
### Example 2: Create a task with priority
[Section titled “Example 2: Create a task with priority”](#example-2-task-management-macro)
Ask for a task and a priority, then hand them to a later Template command as variables:
```javascript
module.exports = async (params) => {
const { quickAddApi, app, variables } = params;
// Get task details
const task = await quickAddApi.inputPrompt("Task description:");
const priority = await quickAddApi.suggester(
["🔴 High", "🟡 Medium", "🟢 Low"],
["high", "medium", "low"]
);
// Set variables for use in template
variables.taskDescription = task;
variables.taskPriority = priority;
variables.taskCreated = new Date().toISOString();
// Create task note using template (in next macro command)
};
```
### Example 3: Scaffold a research workspace
[Section titled “Example 3: Scaffold a research workspace”](#example-3-research-workflow)
Chain several operations: create a folder structure for a topic, then set variables for a later template step to fill an overview note.
```javascript
module.exports = async (params) => {
const { quickAddApi, app, variables } = params;
// Get research topic
const topic = await quickAddApi.inputPrompt("Research topic:");
// Create folder structure
const vault = app.vault;
const researchFolder = `Research/${topic}`;
// Check if folder exists
if (!await vault.adapter.exists(researchFolder)) {
await vault.createFolder(researchFolder);
await vault.createFolder(`${researchFolder}/Sources`);
await vault.createFolder(`${researchFolder}/Notes`);
}
// Set variables for template
variables.researchTopic = topic;
variables.researchFolder = researchFolder;
// Next commands in macro will create the overview note
};
```
## When a macro stops
[Section titled “When a macro stops”](#macro-execution-control)
### What stops a macro
[Section titled “What stops a macro”](#automatic-abort-behavior)
A macro stops early in three situations:
1. **You cancel** - press Escape or click Cancel in any prompt.
2. **A script errors** - an unhandled error is thrown in a user script.
3. **A script aborts on purpose** - `params.abort()` is called.
When a macro stops:
* Every remaining command is skipped.
* A message is logged explaining why.
* For your own cancel and for explicit aborts, no error dialog appears.
* For a script error, the full error and stack trace are kept for debugging.
## Best practices
[Section titled “Best practices”](#best-practices)
### 1. Handle errors
[Section titled “1. Handle errors”](#1-error-handling)
Wrap script work in `try`/`catch` so a failure is visible and stops the rest of the macro:
```javascript
module.exports = async (params) => {
try {
// Your code here
} catch (error) {
console.error("Macro error:", error);
new Notice(`Macro failed: ${error.message}`);
throw error; // Re-throw to stop remaining macro commands
}
};
```
### 2. Check for plugin dependencies
[Section titled “2. Check for plugin dependencies”](#2-check-for-plugin-dependencies)
Confirm a required plugin is present before you use it:
```javascript
module.exports = async (params) => {
const { app } = params;
const requiredPlugin = app.plugins.plugins["plugin-id"];
if (!requiredPlugin) {
new Notice("Required plugin not found!");
return;
}
// Continue with plugin operations
};
```
### 3. Use meaningful variable names
[Section titled “3. Use meaningful variable names”](#3-use-meaningful-variable-names)
Descriptive names keep a macro readable:
* ✅ `variables.projectName`
* ✅ `variables.meetingDate`
* ❌ `variables.var1`
* ❌ `variables.temp`
### 4. Keep it modular
[Section titled “4. Keep it modular”](#4-modular-design)
Break a complex macro into smaller, reusable parts:
* Put distinct operations in separate scripts.
* Reuse existing choices with **Nested Choice** commands.
* Keep each script focused on a single purpose.
## Troubleshooting
[Section titled “Troubleshooting”](#troubleshooting)
### Common issues
[Section titled “Common issues”](#common-issues)
**“Syntax error: unexpected identifier”**
* Usually a JavaScript syntax error in your script.
* Check for a missing semicolon, bracket, or quote.
* See [issue #417](https://github.com/chhoumann/quickadd/issues/417) for detailed solutions.
**“Cannot read property of undefined”**
* A plugin or API you’re reaching for doesn’t exist.
* Add a null check before you use a plugin’s API.
* Make sure the plugin is enabled before you run the macro.
**Variables not passing between commands**
* Use a named placeholder such as `{{VALUE:sharedName}}`, or set `params.variables.sharedName`, for values later steps need.
* Make sure the script runs *before* the command that reads its variables.
* See [Variables and data flow](/docs/VariablesDataFlow/) for the full model.
**Macro not appearing in command palette**
* Make sure the macro choice is enabled in settings.
* Restart Obsidian if you just created the macro.
* Check that QuickAdd is enabled in Community Plugins.
## Tips and tricks
[Section titled “Tips and tricks”](#tips-and-tricks)
1. **Test incrementally** - build the macro one command at a time, testing each.
2. **Use `console.log`** - log values to the developer console while debugging.
3. **Keep scripts in your vault** - so you can version and back them up.
4. **Share macros** - export and import macro configurations with other users.
5. **Combine with hotkeys** - assign a shortcut to a macro you run often.
## See also
[Section titled “See also”](#see-also)
* [Template Choices](/docs/Choices/TemplateChoice/) - for creating new notes
* [Capture Choices](/docs/Choices/CaptureChoice/) - for appending to existing notes
* [Format Syntax](/docs/FormatSyntax/) - available placeholders
* [QuickAdd API](/docs/QuickAddAPI/) - detailed API documentation
* [Examples](/docs/Examples/Macro_BookFinder/) - pre-built macro examples
# Multis
> Group choices into collapsible folders in the QuickAdd picker, with placeholder text, custom icons, and search across nested choices
A Multi is a **folder for your other choices**. Group related choices under one entry in the QuickAdd picker, then open it to see what’s inside - handy once your picker grows past a handful of items. In the settings list, a Multi is the entry you can fold and unfold. Create one with **New folder** in **Settings → QuickAdd**.
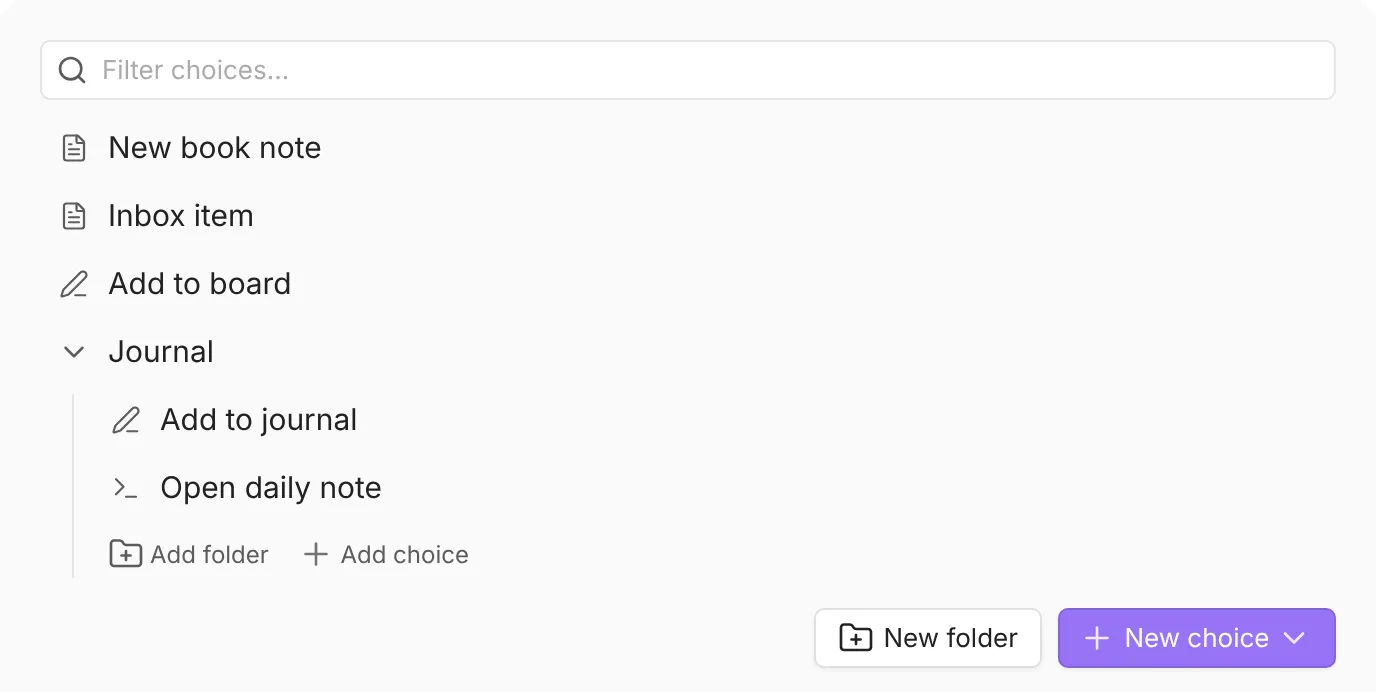
## Put choices inside a multi
[Section titled “Put choices inside a multi”](#add-choices)
To create a new choice inside a multi, unfold it and click its **Add choice** link. To move an existing choice in, **drag it in**. Make sure the multi is unfolded (as in the screenshot above), then grab the drag handle (⠿) at the right end of the choice’s row - it appears when you hover the row - and drop the choice onto the rows under the multi. When it works, the choice appears indented under the multi.
Tip
An empty multi shows a band that reads **Empty — add a choice or drag one here**. Drop your first choice onto that band; it highlights when the drop will land inside the multi. Once one choice is inside, drop the rest among the nested rows.
## Set the search box hint: Placeholder text
[Section titled “Set the search box hint: Placeholder text”](#placeholder-text)
Each multi can show its own hint in the choice picker’s search box when you open it - useful for labeling a complex menu or a grouped workflow. Leave it empty and the multi’s name is used instead.
Because [search reaches everything nested under the multi](#searching-nested-choices), word the hint for the whole group, not just the top level.
To set it, click the gear on the multi’s row to open its settings page, fill in **Placeholder**, and go back. (Before QuickAdd 2.30.0, the gear opens the **Edit folder** dialog; click **Save**.)
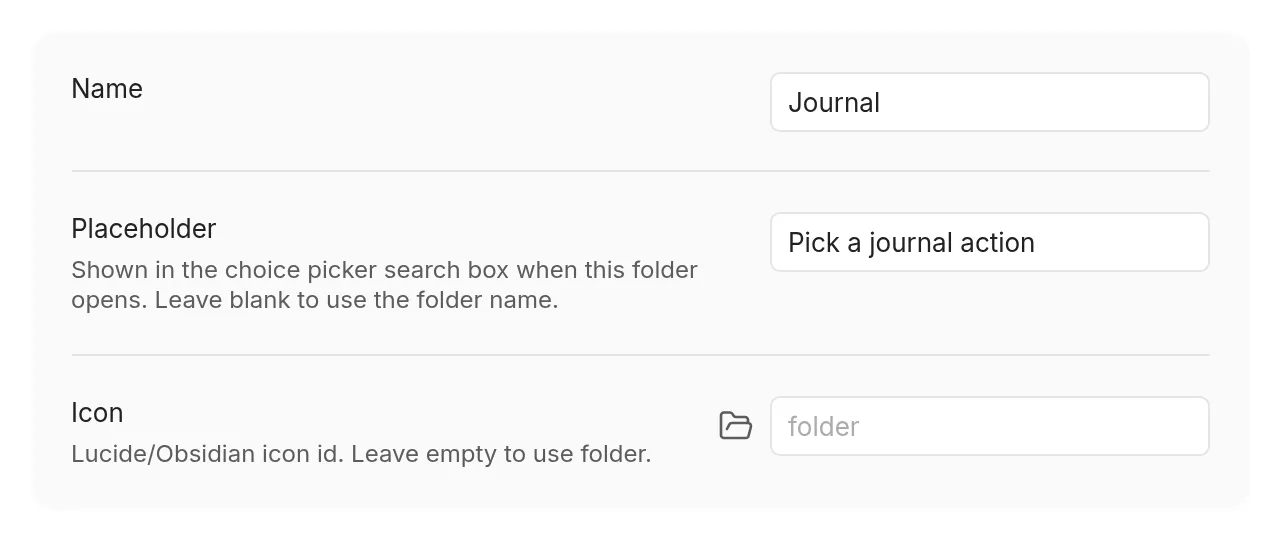
## Change a choice’s icon
[Section titled “Change a choice’s icon”](#icons)
Choices in the QuickAdd picker use the same Obsidian/Lucide icons as registered QuickAdd commands. Every choice type has a default icon, and you can override it from the choice’s **Icon** setting. Icons are monochrome and take on your active Obsidian theme color.
## Search across nested choices
[Section titled “Search across nested choices”](#searching-nested-choices)
Typing in the choice picker searches every choice nested inside the current level’s multis, not just the level you are looking at. A nested match shows its folder path (for example `Work / Meetings`) beneath the choice name. This also applies to the root picker opened by the **QuickAdd: Run** command or the ribbon icon.
Good to know:
* Browsing is unchanged: with an empty search box, you still see one level at a time.
* The search also matches the folder path, so `work meeting` finds `New meeting` inside `Work / Meetings`.
* Selecting a nested multi from the results opens it. Its **← Back** entry returns to the level you searched from, skipping any levels in between.
* Searching from inside a multi only covers that multi’s sub-choices. Go back (or open the root picker) to search more broadly.
To limit search to the level you have open, turn off **Settings → QuickAdd → Advanced → Search nested choices** (QuickAdd 2.30.0 or later; earlier versions show it on the main QuickAdd tab).
# Share QuickAdd Packages
> Bundle choices, macros, and scripts into a .quickadd.json file to move between vaults, with a capability review before importing
A package bundles choices, macros, and their supporting scripts into a single `.quickadd.json` file. Use one to move a workflow to another vault or share it with someone else - they import the file and get your choices without rebuilding anything by hand. Importing shows a full review of what the package can do first, so you always see the scripts and macros before they run.
## Export a package
[Section titled “Export a package”](#export-a-package)
1. Open **Settings → QuickAdd** and scroll to the choices list.
2. Click **Export package…** in the Packages setting.
3. Use the filter to find the choices you want to share, then tick their checkboxes. Any dependent choices or scripts are added automatically.
4. Review the summary panel to confirm how many choices and assets are included.
5. Choose **Copy JSON** (puts the package on your clipboard), or click **Save** in the **Save to file** row to write it to the path shown there. When saving, QuickAdd creates any missing folders inside your vault automatically.
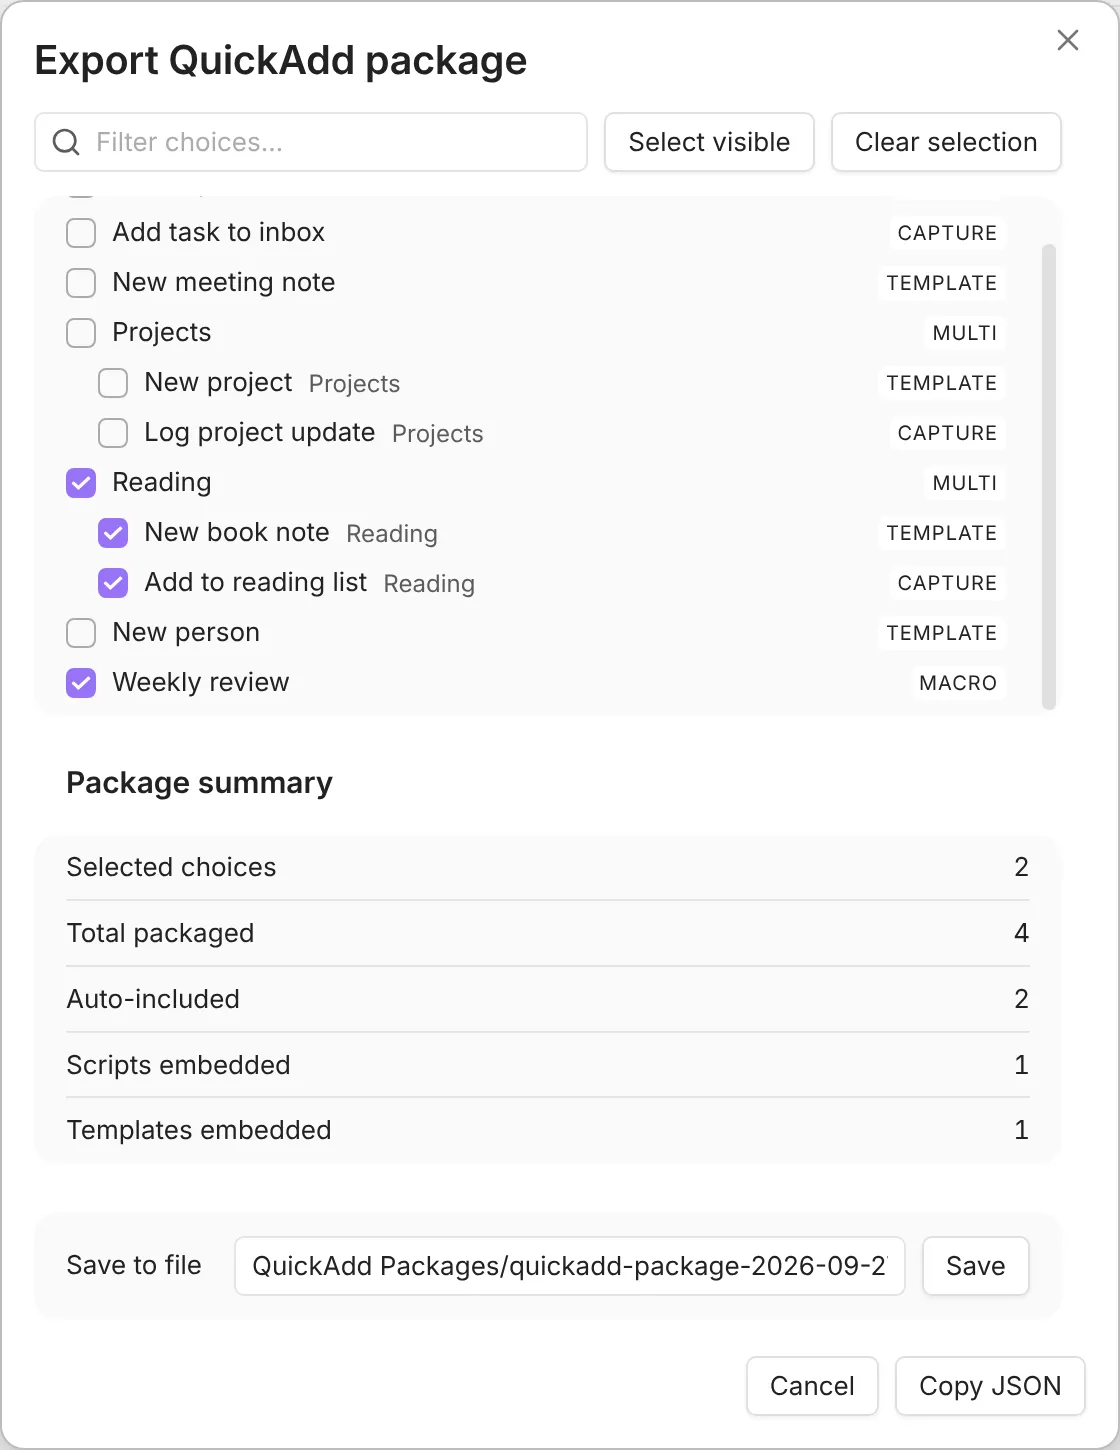
Caution
If a referenced script is missing from your vault, the exporter finishes with a warning so you can locate or recreate the file before you share the package.
## Install an example from the docs
[Section titled “Install an example from the docs”](#install-an-example)
Every [example](/docs/Examples/) page has a **Get this workflow** card at the top. It installs a ready-made copy of that workflow, so you can try it without building it by hand:
1. On the example’s page, check what the **Get this workflow** card says the package needs, such as another plugin or an API token, then click **Copy package**. If your browser blocks copying, the card shows the package in a text field; copy it from there, or open **View JSON**.
2. In Obsidian, open **Settings → QuickAdd**, scroll to **Packages**, and click **Import package…**.
3. Paste. QuickAdd shows the review described below. If any file under **Files** is marked **Executable**, open **View contents** on each one. If you trust the package, tick the acknowledgement, then click **Import package**.
4. Back on the example’s page, expand **How to install** in the card and follow **After importing** to finish setup and run the workflow.
Don’t see **Import package…**? Update QuickAdd, then reopen its settings.
The packages never contain keys or tokens. Where a workflow needs one, **After importing** says where to paste it. QuickAdd’s secret fields store it in Obsidian’s secret storage rather than in `data.json`; a token you enter in another plugin’s settings, such as Toggl Track integration, is that plugin’s to keep.
Importing the same package again offers **Overwrite** for the choices you imported before. Overwriting replaces those choices, including settings you changed; review any file overwrites too. Choose **Skip** for anything you want to keep as it is.
## Import a package
[Section titled “Import a package”](#import-a-package)
1. Open **Settings → QuickAdd** and click **Import package…**.
2. Paste the full contents of a `.quickadd.json` file into the text box.
3. QuickAdd analyses the JSON and shows a **review** of exactly what the package will add and run before you commit - see [Review what a package can do](#review-what-a-package-can-do).
4. Under **Choices**, pick an action for each choice:
* **Import** adds a choice that isn’t in your vault yet. It is offered only for those (QuickAdd 2.30.0 or later; earlier versions also offer it for a choice you already have, and it replaces that choice).
* **Overwrite** keeps the original ID and replaces the existing choice. It is offered only for choices already in your vault. Overwriting a folder keeps the choices inside it that you skipped or added yourself.
* **Duplicate** copies the choice with new IDs so you can keep both versions.
* **Skip** leaves the choice untouched.
5. Under **Files**, each bundled file is grouped as **Added** or **Will overwrite**. Choose **Write**, **Overwrite**, or **Skip** per file, and adjust the destination path if you want it saved elsewhere (templates default to your QuickAdd template folder when one is set). QuickAdd updates the imported choices to reference the new locations.
6. If the package runs code, tick the acknowledgement, then click **Import package**. The choices list updates immediately and a notice summarises what changed. The package’s commands are in the command palette right away, with no reload. Importing doesn’t run a startup macro; it first runs the next time Obsidian starts or you reload QuickAdd.
Note
QuickAdd rebuilds your choice hierarchy from the stored parent IDs and path hints. If it cannot find the original parent - for example, the destination vault does not contain the same multi-choice folder - the imported choice lands at the root and a warning is logged.
## Review what a package can do
[Section titled “Review what a package can do”](#review-what-a-package-can-do)
Importing a package can run scripts and macros that have full access to your vault and the network, so the import screen treats it as a trust decision: it makes everything visible **before** anything is written.
### What the package can do to your vault
[Section titled “What the package can do to your vault”](#capability-summary)
A **What this package can do** panel lists the package’s capabilities, ranked by how much they can affect your vault:
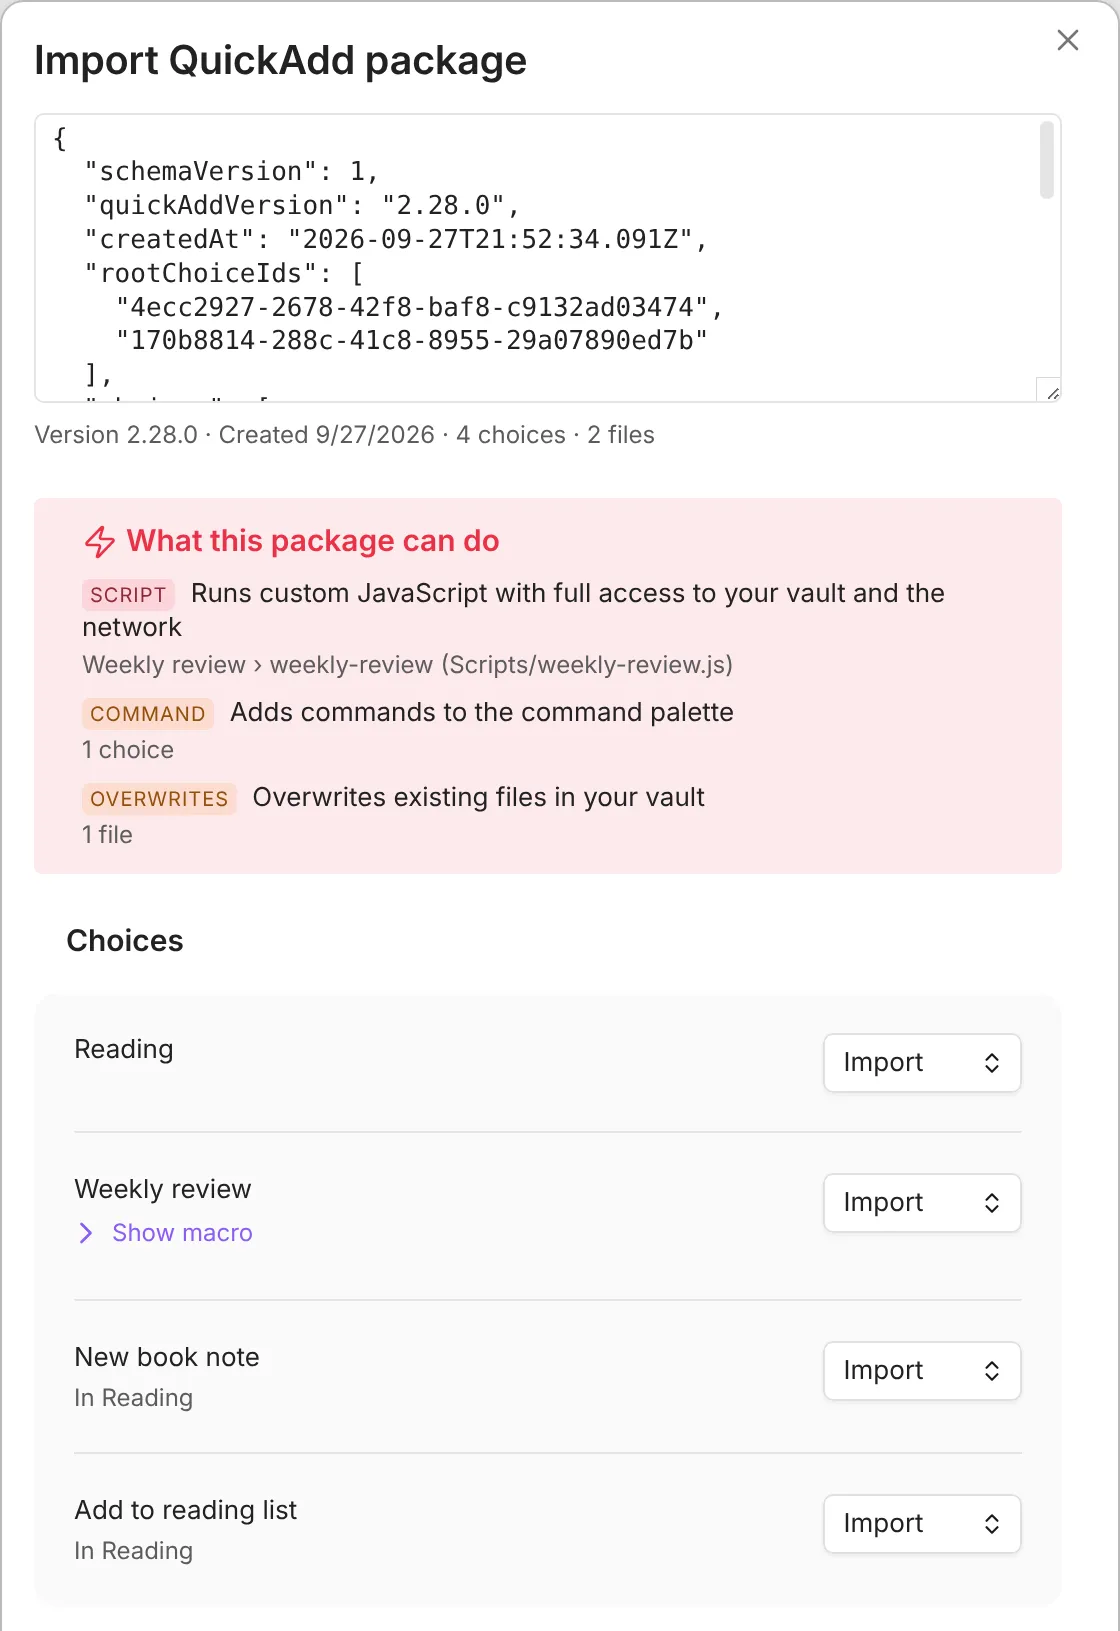
* **Runs custom JavaScript** - a user script, a script-mode condition, or an [inline `js quickadd` fence](/docs/InlineScripts/) written into a choice’s settings, such as a Capture format. Each runs arbitrary code; open **View code** on a choice to read the code in its settings.
* **Runs on startup** - a macro set to run automatically every time Obsidian launches, with no interaction.
* **Adds commands** - choices that register a command in the palette / hotkeys.
* **Overwrites existing choices or files**, **sends content to an AI provider**, **triggers other Obsidian commands**, and similar.
Each row names the choice it comes from. Hover any badge for a plain-language explanation of what it means.
### Read the files before you trust them
[Section titled “Read the files before you trust them”](#read-the-files-before-you-trust-them)
Every bundled file appears under **Files** with its destination and size. Click **View contents** to read a script or template exactly as it will be written. Files that are run as code are marked **Executable** (regardless of their declared type), and very long or minified scripts are flagged as not fully reviewable.
Besides JavaScript files (`.js`, `.cjs`, `.mjs`), a note, canvas, or Base can carry runnable code too. One that contains a JavaScript code fence is flagged with a critical **can be run as code** capability row and counts toward the acknowledgement gate below, because it executes when something uses it: a user-script step runs a note’s first `js` fence as its script, and [inline `js quickadd` fences](/docs/InlineScripts/) run whenever the file is used as a template - **including as an AI Assistant prompt template**, where the fence runs on every AI call. Other files, such as a Base without code or an image, can’t run, so you don’t have to open them.
### Acknowledge the code before importing
[Section titled “Acknowledge the code before importing”](#acknowledgement-gate)
When a package can run code, the **Import package** button stays disabled until you have opened **View contents** on each bundled executable file and **View code** on each choice with JavaScript in its settings, then ticked the acknowledgement. The text beside the button says what is left, and reviewed files and choices are marked.
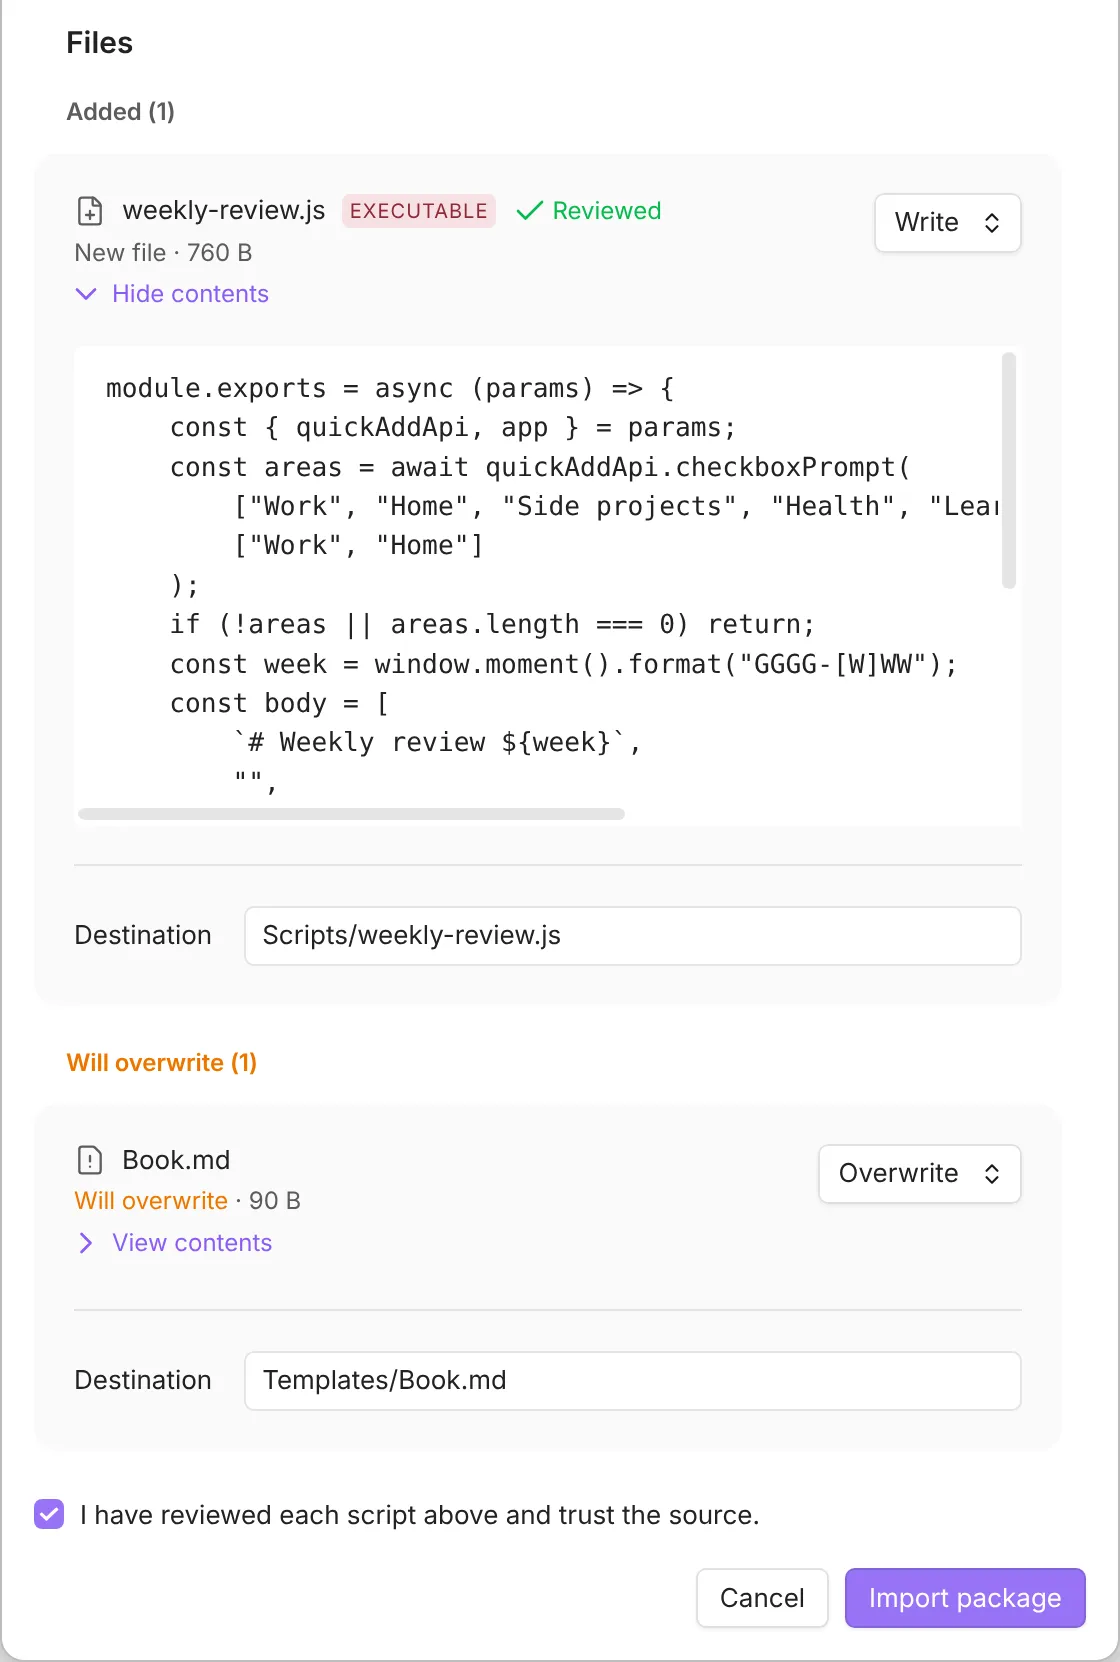
Caution
If a referenced script is **not** bundled, QuickAdd warns that it will run from whatever file already exists at that path after import.
### Preview a package from the command line
[Section titled “Preview a package from the command line”](#preview-from-the-command-line)
For scripting or CI, the `quickadd:package-preview` command returns the same review as JSON, without opening the modal:
```bash
obsidian quickadd:package-preview path=path/to/package.quickadd.json
```
Add `decode=true` to inline the decoded contents of each bundled file.
`quickadd:package-import` installs a package the same way the modal does, with the modal’s default decisions: choices whose id already exists are overwritten, other choices are added, and templates go to your QuickAdd template folder when one is set. A package that runs code is refused until you pass `acknowledge=true`, which stands in for the modal’s review and acknowledgement.
```bash
obsidian quickadd:package-import path=path/to/package.quickadd.json acknowledge=true
```
Use `choices=import|overwrite|duplicate|skip` and `files=write|overwrite|skip` to force one mode for every choice or bundled file. `choices=import` never replaces a choice: if any of the package’s choices is already in your vault, the import is refused and nothing changes (QuickAdd 2.30.0 or later). Choose `overwrite`, `duplicate`, or `skip` for those instead.
## Check version compatibility
[Section titled “Check version compatibility”](#version-compatibility)
Packages record the QuickAdd version and a schema number, so future releases can warn you when a file needs a newer plugin. If you see a schema version error, upgrade QuickAdd in both vaults and export the package again.
# Template
> Create or update a note from a template file: dynamic paths and file names, a destination folder, linking, and actions for existing notes
A Template choice creates a **new note from a template file** or applies a template to an existing note. Press a hotkey, answer any prompts, and QuickAdd builds the note - filling in dates, your answers, and links as it goes. Use it to spin up a book note, a meeting note, or a project page from a layout you keep once and reuse everywhere.
Templates use QuickAdd’s own [format syntax](/docs/FormatSyntax/) - prompts, dates, and variables included - so no other plugin is required. If your templates come from the Templater plugin, see [Coming from Templater](/docs/ComingFromTemplater/) for the QuickAdd-native way to do each familiar job.
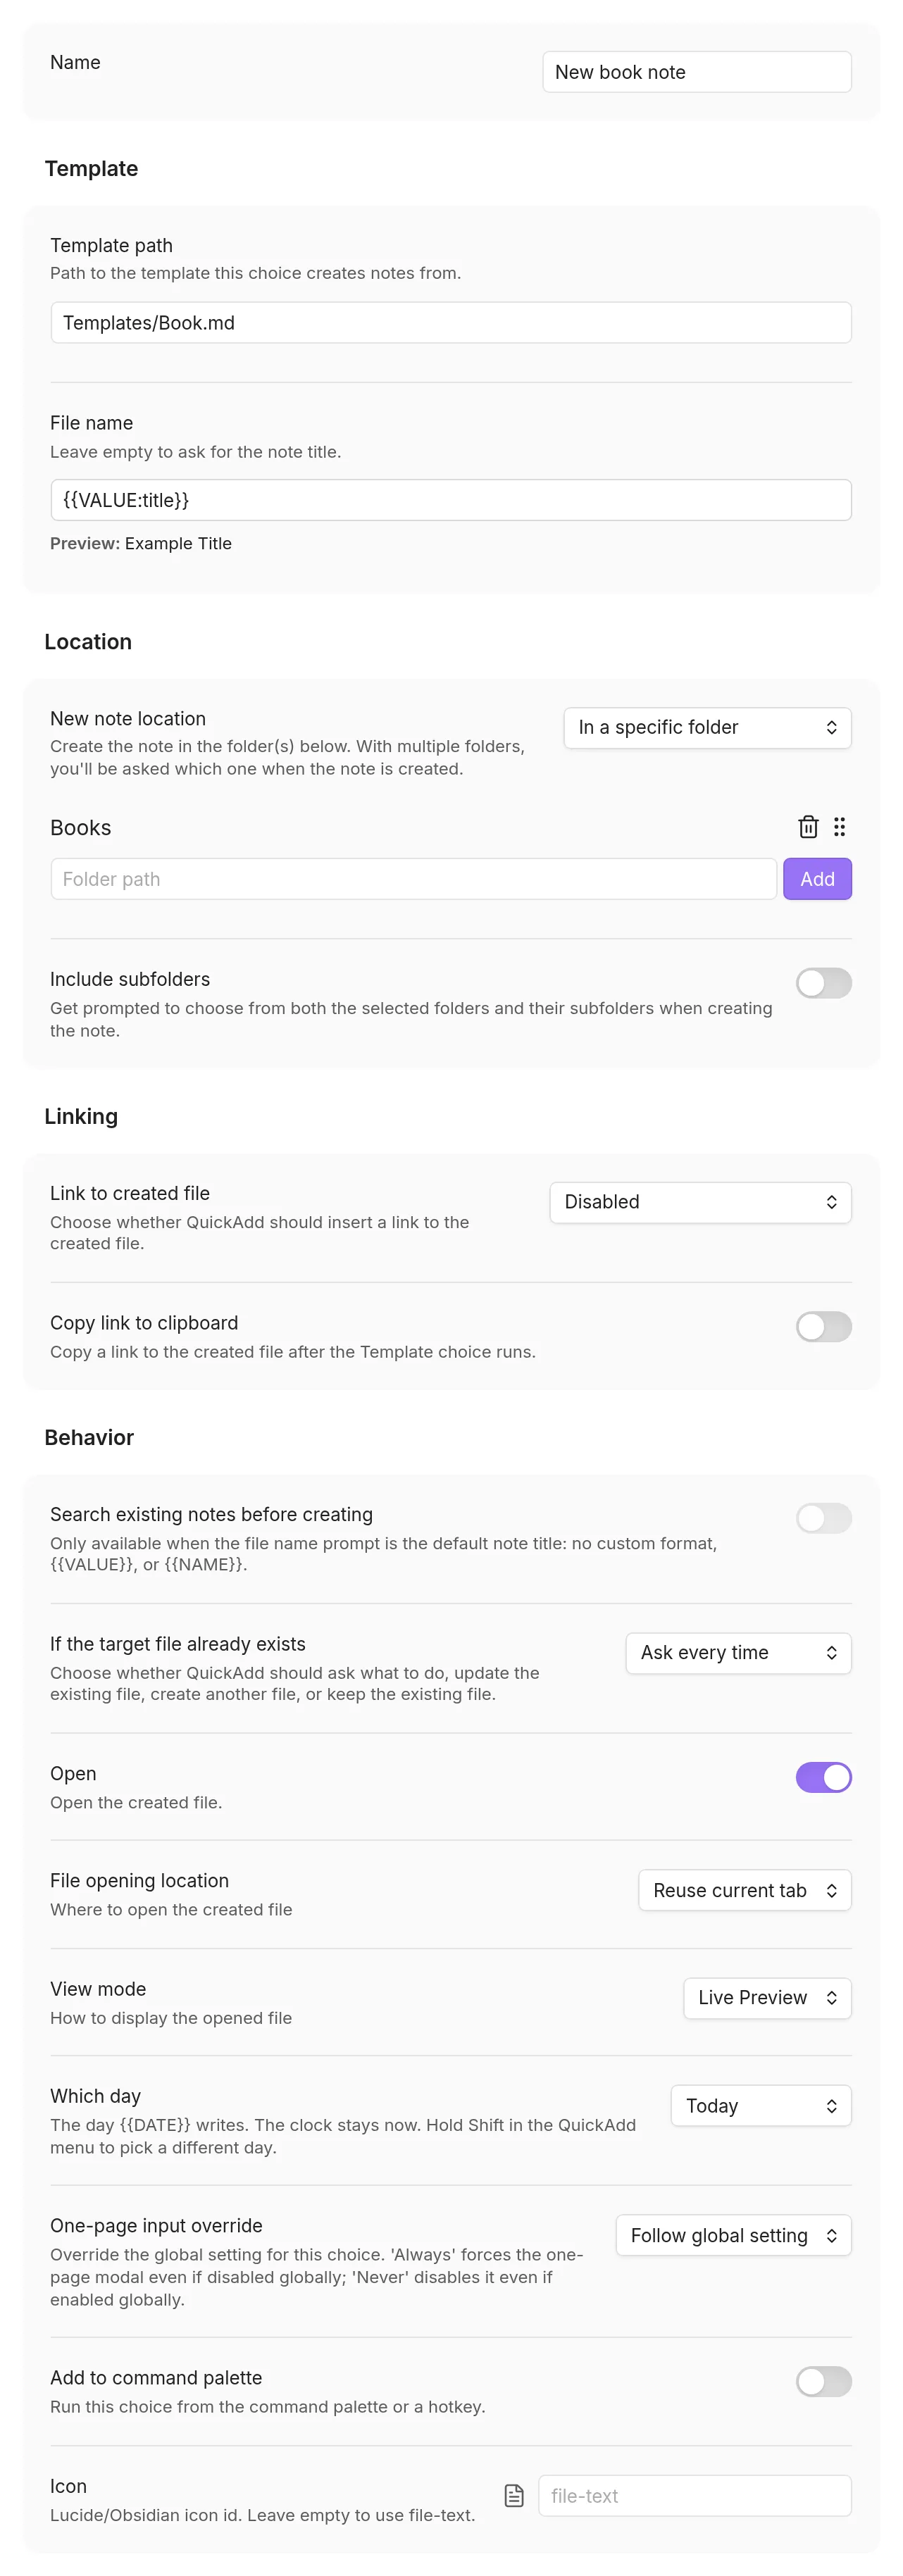
## Set up your first template choice
[Section titled “Set up your first template choice”](#set-up)
1. Create folders named `Templates` and `Books`, then create `Templates/Book.md`:
Templates/Book.md
```markdown
---
author:
status: reading
---
# {{VALUE:title}}
Started {{DATE}}
```
2. Open **Settings → QuickAdd** and choose **New choice → Template**.
3. The choice’s settings open as a page of the settings window. Set **Name** to `New book note`. (Before QuickAdd 2.30.0, they open in a dialog; click the name at the top to rename it.)
4. Set **Template path** to `Templates/Book.md`.
5. In **File name**, enter `{{VALUE:title}}`. (Before QuickAdd 2.30.0, this is **File name format**; turn its toggle on first.)
6. Set **New note location** to **In a specific folder**. Enter `Books` in **Folder path** and click **Add**.
7. Turn **Open** on. Set **File opening location** to **Reuse current tab** and **View mode** to **Live Preview**.
8. Close Settings. Leaving the page saves it. (Before QuickAdd 2.30.0, choose **Done** first.)
9. Run **QuickAdd: Run** from the command palette and pick `New book note`. Enter `Dune` for **title** and confirm with **Ok**.
QuickAdd creates `Books/Dune.md` from your template, with the title, date, and frontmatter filled in. Assign the choice a hotkey (⚡ icon, or Obsidian’s Hotkeys settings) once it behaves the way you want.
### Tokens in template properties
[Section titled “Tokens in template properties”](#tokens-in-properties)
A bare token in frontmatter, like `Title: {{VALUE:fileName}}`, is not valid YAML, so Obsidian logs a console warning when it indexes the template file itself. The warning is cosmetic - QuickAdd reads the template as text and the created note is fine - but if you want a quiet console, wrap the token in quotes:
```yaml
Title: "{{VALUE:fileName}}"
```
Two things to know about the quoted form:
* QuickAdd escapes the filled-in value for the surrounding quotes, so answers containing `"` or `'` can’t break the created note’s frontmatter.
* Quotes normally make the property a **string**. For a typed property, declare the type on the token and the quotes are consumed: `rating: "{{VALUE:rating|type:number}}"` writes `rating: 42`, which Obsidian reads as a Number (same for `|type:checkbox` and `|type:slider`).
## Run a template without making a choice
[Section titled “Run a template without making a choice”](#run-without-choice)
If you just want to spin up a note from a template in your [template folder](/docs/Settings/#template-folders) without maintaining a Template choice per file, use the **New note from template** command. It lists the templates in your configured folder, prompts for the new note’s name, and creates it in Obsidian’s default location.
**New note from template** uses a discovery-first title picker: as you type the new note name, QuickAdd shows matching existing notes and unresolved wikilink targets first. Choose an existing note to open it unchanged, or choose the **Create new note** row to create the note from the selected template.
Where the command shows up
When a template folder is configured, the same entry also appears in **Run QuickAdd** - at the bottom by default, or move it to the top / hide it under [Settings → QuickAdd → Advanced](/docs/Settings/#choice-picker) (QuickAdd 2.30.0 or later; earlier versions show it on the main QuickAdd tab) - and it’s scriptable via [`quickadd:run-template`](/docs/Advanced/CLI/#quickaddrun-template). Make a Template choice (below) when you need a fixed location, file-name format, linking, or a hotkey.
The builder groups a Template choice’s settings into four sections: **Template** (template path and file name format), **Location** (where the file is created), **Linking** (whether and how to link to the created file), and **Behavior** (what happens when the file already exists, and how the file is opened).
## Point to the template file: Template path
[Section titled “Point to the template file: Template path”](#mandatory)
**Template path** is the one required setting: the path to the template you want to insert. Paths are vault-relative; a leading `/` is ignored.
Template path
```text
Templates/Book.md
```
QuickAdd supports markdown (`.md`), canvas (`.canvas`), and base (`.base`) templates. The created file uses the same extension as the template. If you want a new markdown note to include a live embedded Base dashboard, see [Template: Create an MOC Note with a Link Dashboard](/docs/Examples/Template_CreateMOCNoteWithLinkDashboard/).
### Use a dynamic template path
[Section titled “Use a dynamic template path”](#dynamic-template-path)
The template path supports [format syntax](/docs/FormatSyntax/), so the path can change from run to run. Named values (`{{VALUE:client}}`), dates (`{{DATE:YYYY}}`), fields, and global variables all work in the path. The same applies to the Capture choice’s *Create file with template* path.
You configure
```text
Templates/{{VALUE:collectionName}} Template.md
```
Running the choice prompts for a collection name and resolves to a path like `Templates/Games Template.md`. The created file’s extension comes from the *resolved* path, so a placeholder that expands to `.canvas` or `.base` produces a canvas or base file.
A path is resolved with a **path-safe** subset of the format syntax:
* Macros, inline JavaScript, and `{{TEMPLATE:...}}` inclusion are **not** run while computing a path.
* `{{TITLE}}` cannot be used in a path (the title is derived from the created file, not the source template).
* The note-relative placeholders `{{FOLDER}}`, `{{FILENAMECURRENT}}`, `{{LINKCURRENT}}`, and `{{LINKSECTION}}` are left as-is in a template path, since they describe the runtime note/folder context (the target folder, or the active note and the cursor’s heading) rather than the source template. `{{FOLDER}}` is still available in file names and template bodies.
Note
A couple of things don’t apply to a *dynamic* template path: the path can’t be auto-bundled when exporting a QuickAdd package (it isn’t a literal file), and if you use the [one-page input](/docs/Advanced/onePageInputs/) form, prompts inside the resolved template’s body are gathered when the choice runs rather than in the up-front form.
## Name the new note: File name
[Section titled “Name the new note: File name”](#optional)
**File name** sets a format for the created file’s name, using [format syntax](/docs/FormatSyntax/) - so file names can be dynamic too.
You configure
```text
£ {{DATE}} {{NAME}}
```
You get (with a typed name of Manually-Written-File-Name)
```text
£ 2021-06-12 Manually-Written-File-Name
```
`{{NAME}}` is a value you enter when invoking the template. Leave **File name** empty and QuickAdd asks for the note title when you run the choice, the same as writing `{{VALUE}}`. Before QuickAdd 2.30.0, the field is **File name format**, with a toggle that hides it while off; off asks for the note title.
A slash in the format creates a folder, so the name can include a path. The file is created under [New note location](#new-note-location).
You configure
```text
{{DATE:YYYY}}/{{VALUE}}
```
You get (typing Kickoff)
```text
2026/Kickoff
```
`{{FILENAMECURRENT}}` names a folder after the note you are in, for example `{{FILENAMECURRENT}}/{{VALUE}}`.
Note
If a value used in the file name contains a line break or another control character, QuickAdd folds it to a space in the created path and strips trailing spaces or periods from that path segment. The original value is still available unchanged in the template body, so multi-line prompts can create readable note content without making the note hard to link.
### Search for an existing note first
[Section titled “Search for an existing note first”](#search-existing)
**Search existing notes before creating** applies to Template choices that use the default note-title prompt. It opens the same discovery-first picker used by **New note from template**: matching notes and unresolved wikilink targets appear while you type, so you can open an existing note instead of creating a duplicate.
**When selecting an existing note** controls what selecting a match does:
| Action | Result |
| ----------------------------- | --------------------------------------------------------------- |
| **Open note** | Opens the note unchanged. This is the default. |
| **Append template to bottom** | Adds the template at the end of the note, after one blank line. |
| **Insert template at top** | Adds the template below the note’s frontmatter. |
| **Replace entire note** | Replaces all content, including frontmatter, with the template. |
Append and insert use the same [frontmatter merging](#update-existing-file) as the other template update actions. Applying a template to a selected note requires a Markdown template. The picker names the action beside each existing note, so an update is visible before you select it.
The selected note keeps its path and name. QuickAdd skips **File name**, **New note location**, and the new-note collision setting. `{{TITLE}}` and the anonymous `{{VALUE}}` use the selected note’s basename, and `{{FOLDER}}` uses its folder. The template’s other inputs still appear, including in the [one-page form](/docs/Advanced/onePageInputs/#choose-or-create-a-note).
An update finishes before the next Macro step runs and follows the choice’s linking, clipboard, and **Open** settings. **Open note** always opens the selected note without applying the template, inserting links, or copying links. When the choice asks [which day](#date-origin) it is about, it asks after the picker, and not at all when it only opens the selected note.
Selecting **Create new note** or an unresolved wikilink target continues with normal Template creation. **If a new note’s path already exists** handles any collision at that generated path. The standalone **New note from template** command keeps the **Open note** behavior for existing matches.
## Which day `{{DATE}}` is about
[Section titled “Which day {{DATE}} is about”](#date-origin)
Most of the time you want today. That’s the default, and you can leave it alone.
Sometimes you don’t. Last week’s review, yesterday’s daily, the Friday you forgot to write. **Which day** is the calendar day `{{DATE}}` uses. The template file stays the same. `{{TIME}}` is still the time you ran the choice, so a “written at” stamp stays honest.
* **Today** is the default.
* **Ask each time** opens a date picker. **Picker starts on** is only the first value in that picker. You can still click another day.
* **Yesterday**, **Last week**, **Next week**, and **Last month** cover the usual jobs. A weekly note with `|startof:week` still lands in the right week.
* **Custom…** is any other jump from today, like three days back or last year.
* **A variable…** is for a `{{VDATE}}` or a script that already has the day.
When it isn’t today, hold Shift in the QuickAdd menu and the same choice asks for the day. If you want a hotkey for that, see [Command palette](#command-palette) below. You don’t need a second Daily Note choice.
Scripts and the CLI can pass a day too: `executeChoice("Weekly review", {}, { date: "last week" })`, or `date=ask` if you want the picker.
## Decide where the note is created: New note location
[Section titled “Decide where the note is created: New note location”](#new-note-location)
**New note location** is a dropdown that controls where the note is created. Pick one of four modes:
* **Obsidian default** - use Obsidian’s “Default location for new notes” setting.
* **In a specific folder** - create the note in the folder(s) you configure below. One folder creates the note there; several folders open a suggester asking which to use. Drag a folder’s handle, or focus the handle and press ArrowUp / ArrowDown, to change the suggester order. An **Include subfolders** toggle (shown only in this mode) lets the suggester offer the selected folders *and* their subfolders. In QuickAdd 2.30.0 or later, a folder you typed but didn’t **Add** is added when you close the builder; earlier versions drop it.
* **Same folder as current file** - create the note next to the currently active file (falls back to the vault root if no file is open).
* **Ask for folder each time** - prompt you to pick any folder in the vault each time the choice runs.
Switching modes hides the fields that don’t apply, but your configured folder list is kept - switching back restores it.
Folder paths support [format syntax](/docs/FormatSyntax/), including `{{VALUE}}`, named values such as `{{VALUE:client}}`, dates, and global variables:
In a specific folder
```text
Projects/{{VALUE:client}}/{{DATE:YYYY}}
```
This prompts for a client and creates the file under that client’s folder for the current year.
## Link to the new note: Link to created file
[Section titled “Link to the new note: Link to created file”](#link-to-created-file)
**Link to created file** controls whether QuickAdd inserts a link to the note it just created - handy for leaving a trail in the note you were in. Three modes:
* **Enabled (strict)** - require the configured link destination to be available
* **Enabled (skip if unavailable)** - insert the link when possible and skip silently when a current-note destination has no focused Markdown editor
* **Disabled** - never append a link
With either enabled mode, **Link destination** controls where the link is written:
* **Current note** - insert the link into the active Markdown editor
* **Specified note** - append the link to the bottom of an existing Markdown note, such as an index or MOC, without opening that note
For **Current note**, strict mode keeps the legacy behavior and requires a focused Markdown editor. For **Specified note**, QuickAdd validates the destination note before creating the new note. It appends a normal link at the bottom of that file; it does not create the index file, insert under a heading, update properties, or remove duplicate links.
### Where the link is placed
[Section titled “Where the link is placed”](#link-placement)
For the **Current note** destination, **Link placement** chooses the spot:
* **Replace selection** - replaces any selected text with the link (default)
* **After selection** - preserves the selected text and places the link after it
* **End of line** - places the link at the end of the current line
* **New line** - places the link on a new line below the cursor
* **In frontmatter property** - adds the link to a named frontmatter property
When **In frontmatter property** is selected, set the property name and choose how strictly QuickAdd should handle missing or non-list properties:
* **Create or convert** (default) - create the property if it is missing, or convert an existing scalar value into a list before appending the new link. Object values still throw an error.
* **Create if missing** - create the property if it is missing. Existing scalar/object values still throw an error.
* **Require list** - append only to an existing list property. Empty/null properties are treated as empty lists; missing properties and existing scalar/object values throw an error.
Note
If the cursor is in an editable Obsidian Properties field when the Template choice starts, and the placement is not **In frontmatter property**, QuickAdd appends the link to that focused property instead of using the stale editor cursor behind the Properties panel. Text properties receive the link at the end of the value, and list properties receive a new list item.
### Link or embed
[Section titled “Link or embed”](#link-type)
**Link type** is shown for any **Current note** body placement (**Replace selection**, **After selection**, **End of line**, and **New line**). Choose whether QuickAdd inserts a **Link** (`[[Note]]`) or an **Embed** (`![[Note]]`). An embed transcludes the linked note’s contents at the placement position, so for example **New line** + **Embed** drops `![[Note]]` on its own line. The inline placements (**After selection**, **End of line**) insert the embed inline on the same line. The **In frontmatter property** placement and the **Specified note** destination stay link-only.
### What the link says
[Section titled “What the link says”](#link-display-text)
**Link display text** is shown for the selection placements (**Replace selection**, **After selection**) with the **Link** type. It chooses what the inserted link displays. **Selected text** keeps your highlight as the link’s display text:
You do
```text
Select "Meeting with Mark", run a Template choice whose file name format is
20240101 {{SELECTED}}
```
You get
```text
[[20240101 Meeting with Mark|Meeting with Mark]]
```
With nothing selected (or when the selection can’t be represented safely inside a link), QuickAdd inserts the plain link instead. Multi-line selections are collapsed to a single line for the display text, and vaults using Markdown-style links get `[Meeting with Mark](20240101%20Meeting%20with%20Mark.md)`.
### Copy a link to the clipboard
[Section titled “Copy a link to the clipboard”](#copy-link-to-clipboard)
**Copy link to clipboard** copies a link to the created file after the Template choice runs. This works separately from **Link to created file**, so you can copy the link without inserting it into the current note, or do both. The copied link is a vault-path wikilink, ready to paste into another note.
## Open the note after creating: Open
[Section titled “Open the note after creating: Open”](#open-created-file)
**Open** opens the created file. When enabled, additional file-opening controls appear (these are shared with the Capture choice):
* **File opening location** - where to open the file: **Reuse current tab**, **New tab**, **Split pane**, **New window**, **Left sidebar**, or **Right sidebar**.
* **Split direction** - shown only when the location is **Split pane**. Arrange the new pane as **Split right** or **Split down**.
* **View mode** - how to display the opened file: **Source**, **Preview**, **Live Preview**, or **Default**.
* **Focus new pane** - shown for every location except **Reuse current tab**. Focus the opened tab immediately after opening.
Put [`{{CURSOR}}`](/docs/FormatSyntax/#cursor) in the template body to choose where typing starts. The marker works for new notes and existing-note updates. The destination must be focused in an editing mode, either already or through **Open**. Reading view and background panes keep their state.
Try the [meeting note example](/docs/Examples/Template_MeetingNotes/) to create a dated note and start typing under **Notes**.
## Run it from a hotkey: Command palette
[Section titled “Run it from a hotkey: Command palette”](#command-palette)
**Add to command palette** registers the choice as an Obsidian command, so you can bind a hotkey to it. It is the same switch as the lightning bolt in the choice list.
Once it is on, and [Which day](#date-origin) isn’t **Ask each time**, a second toggle appears: **Also add “Name (pick a day)”**. That registers one more command that asks which day before it runs, so you can have one hotkey for today’s note and another for any other day, from the same choice. Your main hotkey keeps using Which day.
## When the note already exists
[Section titled “When the note already exists”](#file-already-exists-behavior)
**If the target file already exists** decides what QuickAdd does when a note with the target name is already there. The setting works in two steps: first pick a high-level behavior, then a follow-up field appears for the two behaviors that need a detail.
With **Search existing notes before creating** enabled, this setting is called **If a new note’s path already exists**. It applies to new-note creation. [Selecting an existing match](#search-existing) has its own action.
* **If the target file already exists** - choose **Ask every time**, **Update existing file**, **Create another file**, or **Keep existing file**.
* **Update action** - shown only when you choose **Update existing file**.
* **New file naming** - shown only when you choose **Create another file**.
* **Keep action** - shown only when you choose **Keep existing file**.
### Let QuickAdd ask each time
[Section titled “Let QuickAdd ask each time”](#ask-every-time)
QuickAdd prompts you to choose one of these actions each time the target path already exists:
* **Append to bottom**
* **Append to top**
* **Overwrite file**
* **Increment trailing number**
* **Append duplicate suffix**
* **Open existing file**
### Update the existing note
[Section titled “Update the existing note”](#update-existing-file)
These options modify the existing markdown, canvas, or base file:
* **Append to bottom** - adds the template content to the end of the existing file, with exactly one blank line between the note and the template, however the note ends. An empty note gets the template with no blank line above it.
* **Append to top** - adds the template content to the beginning of the existing file.
* **Overwrite file** - replaces the existing file content with the template.
Note
For markdown files, **Append to bottom** and **Append to top** handle template frontmatter the same way as [Apply Template to Note](/docs/ApplyTemplateToNote/): the template’s frontmatter properties are merged into the existing note instead of inserting a second `---` block. Missing or empty properties are filled from the template. If a property already contains one value, the note’s value wins. Properties that can contain multiple values add any template values that are not already present. Canvas and base files can only be overwritten. QuickAdd stops and says so if you append to them, because raw template text would break their structure.
### Create a new note instead
[Section titled “Create a new note instead”](#create-another-file)
These options keep the existing file untouched and create a new file instead:
* **Increment trailing number** - changes trailing digits only while preserving zero padding when present. For example, `note009.md` becomes `note010.md`.
* **Append duplicate suffix** - keeps the full base name and adds `(1)`, `(2)`, and so on. For example, `note.md` becomes `note (1).md`.
### Keep the existing note
[Section titled “Keep the existing note”](#keep-existing-file)
These options leave the existing file unchanged:
* **Open existing file** - opens the existing file, even when **Open** is off.
* **Do nothing** - opens the existing file only when **Open** is on.
# Coming from Templater
> Migrate Templater workflows to QuickAdd - templates, prompts, dates, daily notes, folder workflows, cursor placement, and scripts, done the QuickAdd-native way.
If you built your note workflows around the Templater plugin, this page maps each familiar job to the QuickAdd-native way to do it. Every pattern below runs on QuickAdd alone: one engine owns your prompts, dates, and file creation, which is what keeps you clear of double prompts and half-rendered template syntax (see [common migration snags](#common-migration-snags)).
New to QuickAdd entirely? Start with [Getting Started](/docs/) for the choice types, then come back here for the mappings.
## Point QuickAdd at your template folder
[Section titled “Point QuickAdd at your template folder”](#point-quickadd-at-your-template-folder)
You don’t need to move or rewrite your template files to start. Add your existing template folder(s) under [Settings → QuickAdd → Template folders](/docs/Settings/#template-folders). That single step powers:
* the **QuickAdd: New note from template** command, which lists every template in those folders and prompts for the new note’s name - no per-template setup;
* the **QuickAdd: Apply template to active note** command, whose picker offers those template files too;
* template-path autocomplete when you configure choices.
Make a [Template choice](/docs/Choices/TemplateChoice/) for the templates that deserve their own hotkey, a fixed destination folder, or a file name format.
## The quick map
[Section titled “The quick map”](#the-quick-map)
The left column names the job; the middle names the Templater expression you may know it by (as a landmark only - the QuickAdd patterns don’t use or require it).
| The job | You may know it as | The QuickAdd way |
| ---------------------------------------- | --------------------------- | -------------------------------------------------------------------------------------------------------------------------------------------------------------------------------------------------------------------------------------------------------------------------------- |
| Insert the note’s title | `tp.file.title` | [`{{TITLE}}`](/docs/FormatSyntax/#title) |
| Today’s date, any format | `tp.date.now` | [`{{DATE:YYYY-MM-DD}}`](/docs/FormatSyntax/#date-format), offsets like `{{DATE+7}}` |
| Ask for a date in plain language | `tp.system.prompt` | [`{{VDATE:due,YYYY-MM-DD}}`](/docs/FormatSyntax/#vdate) - natural language built in |
| Prompt for text | `tp.system.prompt` | [`{{VALUE:name}}`](/docs/FormatSyntax/#named-value) |
| Pick from a list | `tp.system.suggester` | [`{{VALUE:Option A,Option B}}`](/docs/FormatSyntax/#named-value), [`{{FIELD:...}}`](/docs/FormatSyntax/#field), [`{{FILE:...}}`](/docs/FormatSyntax/#file) |
| Include one template in another | `tp.file.include` | [`{{TEMPLATE:Templates/Partial.md}}`](/docs/FormatSyntax/#template) |
| Apply a template to an existing note | the insert template command | [Apply template to active note](/docs/ApplyTemplateToNote/) |
| Insert the clipboard | `tp.system.clipboard` | [`{{CLIPBOARD}}`](/docs/FormatSyntax/#clipboard) |
| Insert the selected text | `tp.selection` | [`{{SELECTED}}`](/docs/FormatSyntax/#selected) |
| Reuse a property from the note you’re in | `tp.frontmatter` | [`{{FIELD:project\|default-from:active}}`](/docs/FormatSyntax/#field-default-from-active); to re-render a value you prompted for, just [repeat `{{VALUE:name}}`](#prompt-once-reuse-everywhere) |
| Link back to the note you came from | `tp.file.path` workarounds | [`{{LINKCURRENT}}`](/docs/FormatSyntax/#linkcurrent) (a link), [`{{FILENAMECURRENT}}`](/docs/FormatSyntax/#filenamecurrent) (raw name, for embeds like `![[{{FILENAMECURRENT}}#Heading]]`), [`{{LINKSECTION}}`](/docs/FormatSyntax/#linksection) (link to the heading you’re in) |
| Run JavaScript | `tp.user` | [Inline scripts](/docs/InlineScripts/), [user scripts in macros](/docs/Choices/MacroChoice/), [`{{MACRO:...}}`](/docs/FormatSyntax/#macro) |
| Folder templates | folder templates | No automatic equivalent - see [Templates chosen by folder](#templates-chosen-by-folder) |
| Cursor marker | `tp.file.cursor` | `{{CURSOR}}` in Template or Capture bodies - see [Where the cursor lands](#where-the-cursor-lands) |
## Create new notes from templates
[Section titled “Create new notes from templates”](#create-new-notes-from-templates)
A [Template choice](/docs/Choices/TemplateChoice/) creates a note from a template file, with a configurable destination folder, file name format, link insertion, and open behavior. QuickAdd resolves every token - prompts included - before the note is created, so the finished note is plain text from its first moment.
To position user input at an exact spot in the new note, put the token exactly where the text belongs. One named value can drive both the file name and the body:
File name: `{{VALUE:topic}}`
```markdown
---
type: meeting
---
# {{TITLE}}
Topic: {{VALUE:topic}}
Date: {{DATE:YYYY-MM-DD}}
```
You are asked for `topic` once; the answer becomes the file name and fills the body, and `{{TITLE}}` renders the final file name.
## Add to existing notes
[Section titled “Add to existing notes”](#add-to-existing-notes)
### Shared template content in new and existing notes
[Section titled “Shared template content in new and existing notes”](#shared-template-content-in-new-and-existing-notes)
Keep one template file and use it both ways - no parallel template sets:
* **New notes**: point a Template choice at it, or include it inside a bigger template with [`{{TEMPLATE:Templates/Partial.md}}`](/docs/FormatSyntax/#template).
* **Existing notes**: run **QuickAdd: Apply template to active note** (also in a file’s right-click menu). You pick the template and where it goes - cursor, top, bottom, or replace. For the insert modes, the template’s frontmatter is merged into the note’s existing frontmatter, with the note’s own values winning (replace overwrites the whole note, frontmatter included). See [Apply Template to Note](/docs/ApplyTemplateToNote/).
A [Capture choice](/docs/Choices/CaptureChoice/) whose format is `{{TEMPLATE:Templates/Partial.md}}` also inserts that shared content into a target note. Prefer it for body-only snippets: a capture inserts the template text as-is, so a template that starts with its own `---` frontmatter block ends up as a literal second block instead of being merged. When the shared content carries frontmatter, use **Apply template to active note**.
### Today’s daily note
[Section titled “Today’s daily note”](#todays-daily-note)
Appending to today’s note is a Capture choice that targets the daily note - the file doesn’t have to exist beforehand:
* **Capture to**: [`{{DAILY}}`](/docs/FormatSyntax/#daily), the note **Open today’s daily note** opens. Click **Daily note** next to the field to fill it in (QuickAdd 2.30.0 or later).
* **Create file if it doesn’t exist**, with **Create file with a template** set to your daily template, so QuickAdd fills in its tokens
* **Insert after**: `## Log`, with **Create line if not found**
* **Capture format**: `- {{VALUE}}`
Say today is 2026-07-06 and your daily notes live in `Daily`: running it and typing `did a thing` creates `Daily/2026-07-06.md` from the template on first capture and appends `- did a thing` under `## Log` - one hotkey, with or without an existing note. Before QuickAdd 2.30.0, set **Capture to** to a date-formatted path such as `Daily/{{DATE}}.md` instead. For a step-by-step walkthrough with variations, see [Capture: Add entries to your daily note](/docs/Examples/Capture_ToDailyNote/); [Capture choices](/docs/Choices/CaptureChoice/) covers every target and position option.
## Templates chosen by folder
[Section titled “Templates chosen by folder”](#templates-chosen-by-folder)
QuickAdd does not watch folders: nothing runs automatically when a note appears in a folder, no matter how it was created. What it offers instead is explicit and per-choice:
* **One Template choice per destination.** Set **New note location** to **In a specific folder** and name the choice after the destination (“New person”, “New project”). Each gets its own command and can get its own hotkey.
* **One choice, several folders.** List multiple folders on the choice (optionally **Include subfolders**) and QuickAdd asks which one at run time.
* **Dynamic paths.** Both the template path and the folder path accept [format syntax](/docs/FormatSyntax/), and one named value can drive both. A choice with template path `Templates/{{VALUE:kind}}.md` and folder path `{{VALUE:kind}}s` asks for `kind` once - answering `Person` creates the note from `Templates/Person.md` in the `Persons` folder, keeping the whole folder-to-template mapping in a single choice.
* **No setup at all**: the **New note from template** command picks any template from your template folder and creates the note in Obsidian’s default location.
## Dates without another plugin
[Section titled “Dates without another plugin”](#dates-without-another-plugin)
`{{DATE}}` renders today (`YYYY-MM-DD` by default), `{{DATE:}}` takes any [Moment format](https://momentjs.com/docs/#/displaying/format/), and offsets travel in days: `{{DATE+7}}`, `{{DATE:gggg-[W]WW+7}}`. Snap to period boundaries with [`|startof:` / `|endof:`](/docs/FormatSyntax/#date-snap), for example `{{DATE:YYYY-MM|startof:week}}` for weekly notes that file under the month the week belongs to.
For dates you enter, [`{{VDATE:name,format}}`](/docs/FormatSyntax/#vdate) understands natural language out of the box - no companion plugin. Type `tomorrow`, `next friday`, or `in two weeks`. Enter the date once, render it many times:
```markdown
Due: {{VDATE:due,YYYY-MM-DD}}
Week: {{VDATE:due,gggg-[W]WW}}
```
Typing `tomorrow` fills both lines from one prompt - with 2026-07-06 as today, that’s `Due: 2026-07-07` and `Week: 2026-W28`.
There is no token for a file’s creation or modification date - reach for a [script](#run-scripts) if you need those.
## Prompt once, reuse everywhere
[Section titled “Prompt once, reuse everywhere”](#prompt-once-reuse-everywhere)
Named values are shared across an entire run. `{{VALUE:topic}}` in the file name, the template body, and any other step of the same run all resolve from a single prompt - the mechanism behind the [Template choice example above](#create-new-notes-from-templates).
That sharing spans [Macro choice](/docs/Choices/MacroChoice/) steps too. A classic two-step flow - log a task in today’s daily note and create its note - is a macro of two choices sharing one name:
1. A Capture choice into `{{DAILY}}` (before QuickAdd 2.30.0, `Daily/{{DATE}}.md`) with the format `- [ ] [[{{VALUE:task}}]]`
2. A Template choice with file name format `{{VALUE:task}}` creating the note in your `Tasks` folder
You type the task name once. Scripts join the same pool: anything a script assigns to `params.variables.task` is what `{{VALUE:task}}` resolves to in later steps - see the [scripting guide](/docs/Advanced/ScriptingGuide/).
To gather every prompt on a single form up front instead of one dialog at a time, enable [one-page input](/docs/Advanced/onePageInputs/) - and see [Controlling Prompts](/docs/ControllingPrompts/) for everything about prompt order, labels, defaults, and skipping.
## Where the cursor lands
[Section titled “Where the cursor lands”](#where-the-cursor-lands)
Use [`{{CURSOR}}`](/docs/FormatSyntax/#cursor) to mark a position in a Template or Capture body. QuickAdd moves there if the target is already focused in an editing mode, or if **Open** opens and focuses it. Templater’s cursor jump takes precedence when both are present.
* Unmarked Captures keep their existing behavior. Inserting at the cursor or on an adjacent line leaves the cursor after the inserted text. Other body Captures place it at the end of the insertion when **Open** opens and focuses the target in an editing mode.
* **Apply template to active note** supports the marker in every mode, including **Insert at cursor**.
* Without a marker, a Template choice with **Open** keeps its usual cursor position, typically at the top of a new note. To move to the end instead, put `{{CURSOR}}` at the end of your template.
## Run scripts
[Section titled “Run scripts”](#run-scripts)
QuickAdd runs JavaScript in two shapes:
* **[Inline scripts](/docs/InlineScripts/)**: a fenced code block tagged `js quickadd` inside a template body or capture format. The block runs when the choice does, and a returned string is spliced into the output in its place.
* **[User scripts](/docs/Choices/MacroChoice/)**: a `.js` file in your vault, run as a step of a Macro choice. Scripts receive `app`, the [QuickAdd API](/docs/QuickAddAPI/) (`inputPrompt`, `suggester`, `executeChoice`, and more), the shared `variables` map, and the `obsidian` module - see the [scripting guide](/docs/Advanced/ScriptingGuide/).
`{{MACRO:My macro}}` embeds a macro’s return value anywhere format syntax is accepted, so a computed value can flow straight into a file name, template body, or capture line.
## Common migration snags
[Section titled “Common migration snags”](#common-migration-snags)
These are the classic symptoms of splitting one template between two engines - each has a QuickAdd-native fix:
* **You get prompted twice.** QuickAdd resolves all of its prompts before the file is created. If another engine prompts in the same template, you answer twice - once per engine. Let QuickAdd own the prompt with `{{VALUE:name}}` and reuse the answer everywhere it’s needed.
* **Template syntax shows up unrendered.** QuickAdd renders QuickAdd tokens; another engine’s syntax is only rendered by that engine. If it isn’t installed or doesn’t run on the file, its markup stays behind as literal text. Port the line to the matching token from [the map](#the-quick-map).
* **Templater code runs twice.** A macro that runs Templater’s **Replace templates in the active file** right after a QuickAdd Template or Capture step runs the templates a second time: QuickAdd already ran them when it wrote the note. That step is deprecated, and QuickAdd 2.30.0 or later shows a notice once per session when a macro runs it. Remove it from the macro.
* **Capturing into a note throws template errors.** A note that keeps live template syntax can re-execute or error whenever a plugin processes the file again. QuickAdd tokens like `{{DATE:YYYY-MM-DD}}` render once, at creation, into plain text - later captures find nothing to re-run. Migrate the offending line to a QuickAdd token and let QuickAdd create the note so the token renders - a Capture with **Create file if it doesn’t exist** plus that template does both (see [Today’s daily note](#todays-daily-note)).
# Controlling Prompts
> Everything you control about the questions QuickAdd asks - which ones appear, in what order, how they look, how to skip them, and which keys submit or cancel.
When a choice runs, every placeholder that needs input becomes a prompt: `{{VALUE:title}}` in a file name, `{{VDATE:due,YYYY-MM-DD}}` in a template, the target file of a Capture, and so on. This page covers everything you control about those prompts - which ones appear, the order they come in, how each one looks, how to make one skippable, the keys that submit or cancel, and the one-page form that asks everything at once.
For the full syntax of each placeholder and flag, see [Format Syntax](/docs/FormatSyntax/). For the one-page form in depth, see [One-page Inputs](/docs/Advanced/onePageInputs/).
## What QuickAdd asks you
[Section titled “What QuickAdd asks you”](#where-prompts-come-from)
QuickAdd prompts whenever it meets a placeholder it cannot fill on its own:
* [`{{VALUE}}` / `{{VALUE:name}}`](/docs/FormatSyntax/#value) ask for text, or show a pick list when you give them options.
* [`{{VDATE:name,format}}`](/docs/FormatSyntax/#vdate) asks for a date, and understands natural language like `tomorrow`.
* [`{{FIELD:name}}`](/docs/FormatSyntax/#field) suggests values a property already has in your vault.
* [`{{FILE:folder}}`](/docs/FormatSyntax/#file) asks you to pick a note from a folder.
* Template choices may also ask for a file name or folder; Capture choices may ask which file to capture to.
You are asked once per variable, per run. If `{{VALUE:title}}` appears in both the file name and the template body, you answer once and QuickAdd reuses it. A variable that already has a value never prompts: prefilled variables from a macro step, [the API](/docs/QuickAddAPI/), or the [CLI](/docs/Advanced/CLI/) skip their prompts, and even an empty string counts as an answer.
## The order prompts appear in
[Section titled “The order prompts appear in”](#prompt-order)
Prompts follow the structure of the choice, not where the placeholders sit in your text. Take this template:
```markdown
Attendees: {{VALUE:attendees}}
Due: {{VDATE:due,YYYY-MM-DD}}
```
The `due` prompt appears first, even though `attendees` comes first in the text. That is because dates are asked before named values within one piece of text. The full order:
1. **Template choices** resolve the template path first, then the folder, then the file name, and finally the template’s content. A placeholder in the file name always prompts before anything in the template body.
2. **Capture choices** resolve the capture target first, then the capture format.
3. **Within one piece of text** (a file name, a template, a capture format), included templates (`{{TEMPLATE:path}}`) ask their prompts first. The rest is grouped by kind, and only inside a kind do prompts follow the order they appear. The kinds run in this order: plain `{{VALUE}}`/`{{NAME}}` first, then dates (`{{VDATE}}`), then named values (`{{VALUE:name}}`), then fields (`{{FIELD}}`) and file pickers (`{{FILE}}`), with the math prompt (`{{MVALUE}}`) last. Dates come before named values so that a `{{VALUE:due}}` reusing a `{{VDATE:due,...}}` answer is asked once, as a date.
To be asked for one value first when prompts come one at a time, make it the plain `{{VALUE}}`, and name its prompt with [`|label:`](/docs/FormatSyntax/#value-label). This format asks for the body before the heading (the one-page form still lists the heading first, in format order):
```markdown
## {{VALUE:heading}}
{{VALUE|type:multiline|label:Body}}
```
In a Capture, a plain `{{VALUE}}` takes your [editor selection](/docs/Choices/CaptureChoice/#use-editor-selection) instead of asking, when text is selected and the Capture uses the selection.
No flag reorders individual prompts. If the sequence bothers you, switch on the [one-page input form](#one-form-instead-of-many-prompts): it lists every input in one form, in the order of the steps above (after the day, when **Which day** asks for one) with each text’s fields in the order they appear, and you fill them in whatever order you like.
Note
A pick list defined with [`|name:`](/docs/FormatSyntax/#value-name) and its reuses can appear in any order within one piece of text. When a reuse comes before the definition, QuickAdd resolves the definition early so you are still asked only once.
## Change how a prompt looks
[Section titled “Change how a prompt looks”](#shape-an-individual-prompt)
Each control is a flag you add to the placeholder. The most common ones:
| You want | Flag | Example |
| ----------------------------------------- | ----------------------------------------------------------------------- | ---------------------------------------------- |
| Your own wording for the prompt | [`\|label:`](/docs/FormatSyntax/#value-label) | `{{VALUE:attendees\|label:Who attended?}}` |
| A pre-filled default | [`\|default:`](/docs/FormatSyntax/#value-default-option) | `{{VALUE:status\|default:open}}` |
| A large, multi-line text box | [`\|type:multiline`](/docs/FormatSyntax/#value-multiline) | `{{VALUE:notes\|type:multiline}}` |
| A number, slider, or checkbox | [`\|type:number` and friends](/docs/FormatSyntax/#value-property-types) | `{{VALUE:rating\|type:slider\|min:0\|max:10}}` |
| A pick list | [comma-separated options](/docs/FormatSyntax/#named-value) | `{{VALUE:low,medium,high}}` |
| A pick list that also accepts custom text | [`\|custom`](/docs/FormatSyntax/#value-custom) | `{{VALUE:home,work\|custom}}` |
| Several selections at once | [`\|multi`](/docs/FormatSyntax/#value-multi) | `{{VALUE:a,b,c\|multi}}` |
The full reference for every flag lives in [Format Syntax](/docs/FormatSyntax/).
Good to know:
* `|label:` works on `{{VALUE}}` placeholders, [`{{VDATE:...}}`](/docs/FormatSyntax/#vdate-label) dates, [`{{FIELD:...}}`](/docs/FormatSyntax/#field-label) suggestions, and [`{{FILE:...}}`](/docs/FormatSyntax/#file) pickers. It names the prompt: it titles a text or date prompt in place of the variable name, names the field in the one-page form, and becomes a pick list’s placeholder. The variable name still identifies the answer for reuse. A FIELD label also titles the text prompt you get when the property has no values yet.
* `|type:multiline` upgrades a single placeholder to the large text box and overrides the global **Use multi-line input prompt** setting. There is no reverse flag: with the global setting on, every plain text prompt is already multi-line.
* `|type:` flags only work on single-value placeholders. A pick list ignores them.
* Date prompts and the one-page form’s date fields have a calendar button at the end of the text box. It hides or shows the calendar, and every later date prompt opens the same way.
## Make a prompt skippable
[Section titled “Make a prompt skippable”](#optional-prompts)
Add [`|optional`](/docs/FormatSyntax/#optional-fields) to let a prompt be left blank, in which case it resolves to nothing:
```markdown
- [ ] {{VALUE:task}} {{VDATE:due,[📅 ]YYYY-MM-DD|optional}}
```
An optional prompt gains a **Skip** button and treats an empty submission as the answer, so you are not asked again later in the run. `|optional` works on `{{VALUE}}` placeholders, option lists, `{{VDATE}}`, and `{{FILE}}`.
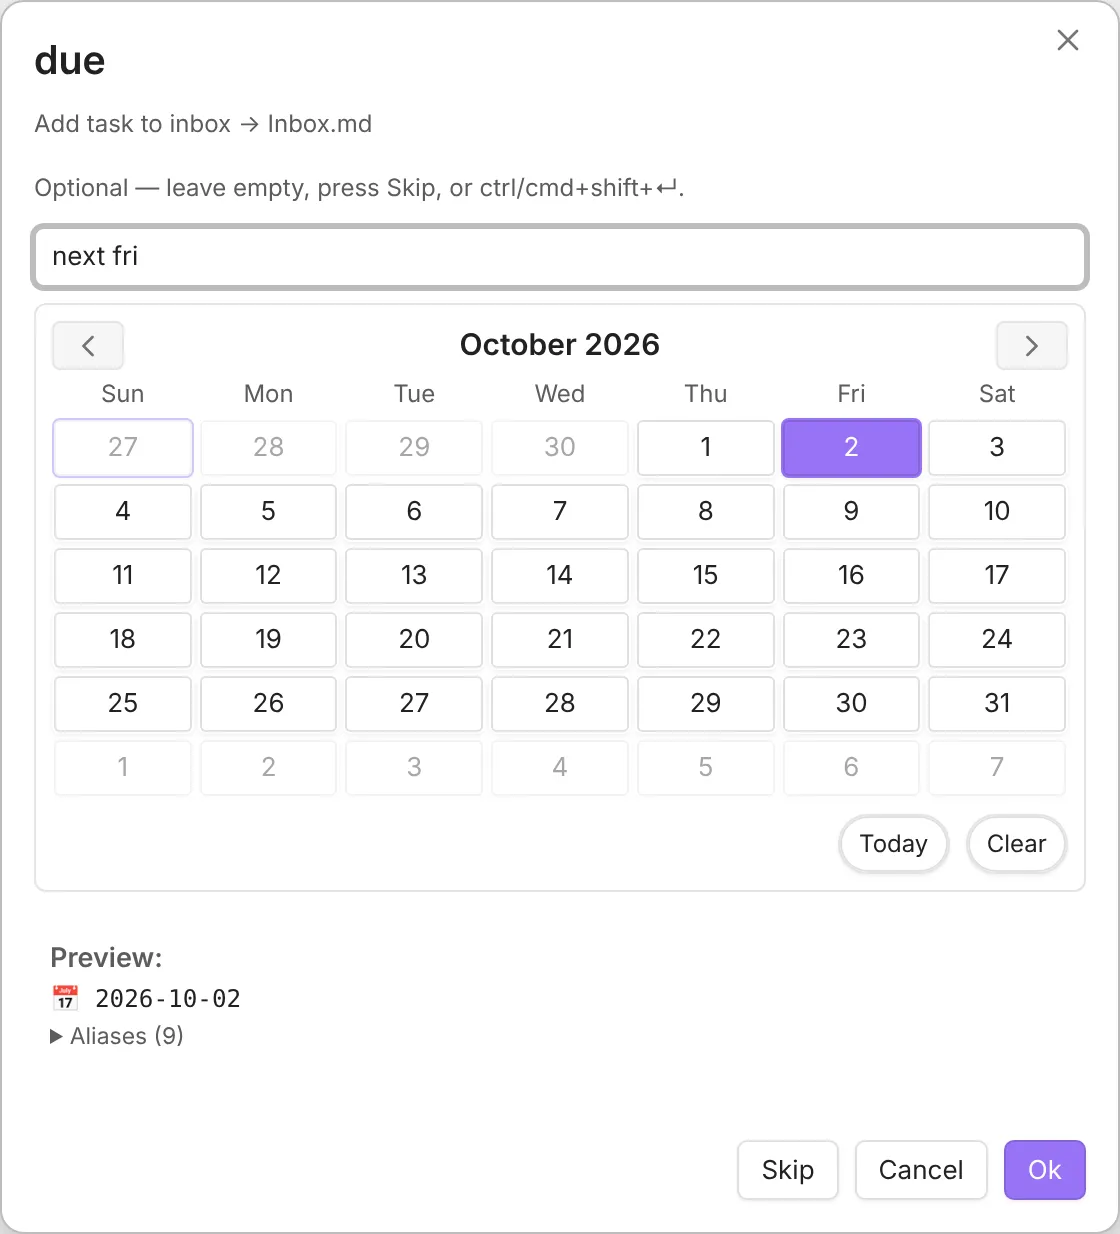
Skipping is an answer; pressing **Esc** still cancels the whole choice. If the same variable appears in several places, put `|optional` on every occurrence - that is the one spelling that behaves the same in both the sequential prompts and the one-page form.
## Keys that submit, skip, and cancel
[Section titled “Keys that submit, skip, and cancel”](#submit-keys)
| Prompt | Submit | Also useful |
| --------------------------------------------------------- | -------------------------------------------- | ------------------------------------------ |
| Single-line input (also number, slider, and date prompts) | `Enter` | |
| Multi-line input | `Ctrl/Cmd+Enter` (`Enter` inserts a newline) | `Tab` indents; `Shift+Tab` moves focus out |
| Pick list / suggester | `Enter` picks the highlighted option | |
| Math prompt ([`{{MVALUE}}`](/docs/FormatSyntax/#mvalue)) | `Ctrl/Cmd+Enter` | `Tab` jumps to the cursor marker |
| One-page input form | `Ctrl/Cmd+Enter` | `Tab` moves between fields |
| Any optional prompt | | `Ctrl/Cmd+Shift+Enter` skips |
`Esc` cancels the prompt and with it the whole run - nothing is created or captured by the cancelled choice. (In a macro, steps that already ran are not undone.) To get a notice when that happens, enable **Show input cancellation notifications** under [Settings → QuickAdd → Advanced](/docs/Settings/#advanced-notifications) (QuickAdd 2.30.0 or later; earlier versions show it on the main QuickAdd tab).
## Peek at the note
[Section titled “Peek at the note”](#peek)
Single-line and multi-line text prompts, plus the one-page input form, can get out of the way so you can read or select text in the open note, then come back to the same draft.

* **Peek at note** on the prompt, or `Ctrl/Cmd+Shift+E` on desktop, hides the prompt without cancelling the run. On the one-page form, it hides the whole form. Everything in the prompt survives the peek: the draft, its undo history, a paste still saving, even the text you had selected in the field.
* A chip stays on screen: **Insert selection** replaces the field’s selection (or drops in at the caret) and returns, **Return** comes back as-is, and **Cancel** aborts the run. On the one-page form, **Insert selection** uses the last text field you focused, or the first text field if you have not focused one. On desktop, `Ctrl/Cmd+Shift+E` also returns. Peek does not bind `Esc` in the editor, so Vim users can still leave insert mode, and your other Obsidian hotkeys keep working while the chip is up.
* The command **QuickAdd: Return to prompt** is available while a peek is open. On a phone the chip is a one-line bar under the note header, so the bottom nav and home indicator stay free, and prompt actions stay on one row (Peek / Cancel / Ok) so the keyboard does not cover Cancel.
* Peek appears on text prompts opened during a choice run or from the [API](/docs/QuickAddAPI/), and on the one-page input form. It does not appear on QuickAdd’s own settings and builder prompts, or when the prompt opens over another dialog, because there is no note to look at. Only one run can be parked: peeking a second prompt cancels the first, and returning waits until any other open prompt is closed.
## Autocomplete while you type
[Section titled “Autocomplete while you type”](#autocomplete-inside-prompts)
Inside a prompt, `#` searches your vault’s tags and `[[` searches your files (headings, blocks, and relative paths work too). See [Suggester System](/docs/SuggesterSystem/) for all triggers and keys.
These triggers work in single-line and multi-line prompts, and in text and textarea fields on the one-page form. Field and pick-list widgets keep their own inline suggestions.
## One form instead of many prompts
[Section titled “One form instead of many prompts”](#one-form-instead-of-many-prompts)
Rather than answering prompts one at a time, QuickAdd can collect everything in a single form before the choice runs. Every unanswered variable appears as the right widget - text, textarea, date with a calendar, dropdown, slider - with optional fields badged, and Template choices with a file name format get a live file name preview.
* Turn it on for everything with **One-page input for choices** under [Settings → Input](/docs/Settings/#input).
* Template and Capture choices each have a **One-page input override** dropdown in their builder (**Follow global setting**, **Always**, **Never**), so you can flip the form on or off for one choice.
* A few inputs still run as follow-up steps after the form, such as [`{{FIELD:...|multi}}`](/docs/FormatSyntax/#field-multi) pickers and Capture’s insert-after heading picker.
* Cancelling the form cancels the whole run, exactly like cancelling a sequential prompt.
The full behavior - what is collected, date parsing, defaults, and script-declared inputs - is documented in [One-page Inputs](/docs/Advanced/onePageInputs/).
## Style pickers with CSS
[Section titled “Style pickers with CSS”](#style-pickers-with-css)
*Requires QuickAdd 2.28.0 or later.*
QuickAdd’s pickers are standard Obsidian pickers, so they open near the top of the window like the command palette, while text prompts open in the middle. To change that, target these classes from a [CSS snippet](https://obsidian.md/help/snippets):
| Class | Picker |
| --------------------- | ------------------------------------------------------------------------------------------------------------------------------------------------------------ |
| `qa-choice-suggester` | The QuickAdd launcher and Multi choices |
| `qa-suggester` | Single-value pick lists such as `{{VALUE:a,b,c}}`, the note picker for Template choices that look for existing notes, and `quickAddApi.suggester` in scripts |
For example, this centers QuickAdd’s pickers on desktop and leaves the command palette and other plugins alone:
```css
body:not(.is-mobile) .prompt:is(.qa-choice-suggester, .qa-suggester) {
top: auto;
}
```
A centered picker re-centers as you type, so the search box moves a little when the list gets shorter.
## For script authors
[Section titled “For script authors”](#for-script-authors)
User scripts can declare their inputs so they appear in the one-page form (`quickadd.inputs`), and can open a one-page form of their own at runtime with [`quickAddApi.requestInputs`](/docs/QuickAddAPI/). Both are covered in [One-page Inputs](/docs/Advanced/onePageInputs/#user-scripts-declare-inputs-optional).
# Examples
> Browse ready-made QuickAdd workflows for captures, templates, and macros, with setup difficulty, prerequisites, and what each creates
Use these examples when you want to copy a working pattern instead of starting from a blank choice. Every workflow below ships as a package: on its page, check what the **Get this workflow** card says it needs, click **Copy package**, import it in Obsidian, and follow **After importing** under **How to install** in the card. See [Install an example from the docs](/docs/Choices/Packages/#install-an-example) for the full walkthrough.
| Workflow | Choice type | Setup | Prerequisites | What it creates |
| --------------------------------------------------------------------------------------------------- | ------------------ | ------------ | ------------------------------------------ | ------------------------------------------------------------ |
| [Capture to Your Daily Note](/docs/Examples/Capture_ToDailyNote/) | Capture | Beginner | Daily note path | Timestamped entries, tasks, quotes, callouts, and table rows |
| [Capture to Inbox with GPS](/docs/Examples/Macro_CaptureInboxGps/) | Macro | Intermediate | Obsidian mobile 1.11+ for GPS | A timestamped inbox line with coordinates |
| [Brain dump](/docs/Examples/Macro_BrainDump/) | Macro and Capture | Beginner | QuickAdd 2.29.0 or later | Several inbox lines in one go, one per entry |
| [Add a Task to a Kanban Board](/docs/Examples/Capture_AddTaskToKanbanBoard/) | Capture | Beginner | Obsidian Kanban plugin | A task in a board section |
| [Fetch Tasks from Todoist](/docs/Examples/Capture_FetchTasksFromTodoist/) | Capture and Macro | Intermediate | Todoist API token | Imported Todoist tasks |
| [Canvas Capture](/docs/Examples/Capture_CanvasCapture/) | Capture | Intermediate | An Obsidian Canvas file | Text added to a selected or targeted card |
| [Add an Inbox Item](/docs/Examples/Template_AddAnInboxItem/) | Template | Beginner | Inbox folder or note | A new inbox note |
| [Meeting notes and project updates](/docs/Examples/Template_MeetingNotes/) | Template | Beginner | QuickAdd 2.27.0 or later | Dated notes and updates, ready to type in |
| [Create an MOC Note with a Link Dashboard](/docs/Examples/Template_CreateMOCNoteWithLinkDashboard/) | Template | Intermediate | Base template file | A note with an embedded Base dashboard |
| [Automatic Book Notes from Readwise](/docs/Examples/Template_AutomaticBookNotesFromReadwise/) | Template and Macro | Advanced | Readwise account and access token | Book notes with highlights |
| [Book Finder](/docs/Examples/Macro_BookFinder/) | Macro | Intermediate | Book lookup script | A populated book note |
| [Movie and Series Script](/docs/Examples/Macro_MovieAndSeriesScript/) | Macro | Intermediate | OMDb API key | Media notes with metadata |
| [Move Notes with a Tag](/docs/Examples/Macro_MoveNotesWithATagToAFolder/) | Macro | Intermediate | Tagged notes | Notes moved into a target folder |
| [Zettelizer](/docs/Examples/Macro_Zettelizer/) | Macro | Intermediate | Headings in an existing note | New notes split from headings |
| [Toggl Manager](/docs/Examples/Macro_TogglManager/) | Macro | Advanced | Toggl Track account and integration plugin | Preset time entries |
## Pick by goal
[Section titled “Pick by goal”](#pick-by-goal)
### Capture information faster
[Section titled “Capture information faster”](#capture-information-faster)
Start with [Capture to Your Daily Note](/docs/Examples/Capture_ToDailyNote/) for daily-note captures. Use [Capture to Inbox with GPS](/docs/Examples/Macro_CaptureInboxGps/) when the line should also store device coordinates. Use [Brain dump](/docs/Examples/Macro_BrainDump/) to type several entries in a row without reopening the Capture. Move to [Canvas Capture](/docs/Examples/Capture_CanvasCapture/) when your target is a Canvas card instead of a Markdown note.
### Create structured notes
[Section titled “Create structured notes”](#create-structured-notes)
Start with [Add an Inbox Item](/docs/Examples/Template_AddAnInboxItem/) for a small template. Try [meeting notes and project updates](/docs/Examples/Template_MeetingNotes/) to create a dated note or add a section, then start typing where you put the cursor marker. Use [Create an MOC Note with a Link Dashboard](/docs/Examples/Template_CreateMOCNoteWithLinkDashboard/) when you want a generated note to include a live Base dashboard.
### Run scripted workflows
[Section titled “Run scripted workflows”](#run-scripted-workflows)
Start with [Book Finder](/docs/Examples/Macro_BookFinder/) to see the common macro pattern: prompt for input, call a script, write a note, and open the result.
# Capture: Add journal entry
> Compact Capture reference for appending timestamped journal lines under a heading in your date-formatted daily note file
This pattern has a full step-by-step guide: [Capture: Add entries to your daily note](/docs/Examples/Capture_ToDailyNote/). It covers the journal-entry recipe below plus creating today’s note, inserting under a heading, tasks, quotes, callouts, table rows, and newline gotchas. Use **Copy package** on that page to install a journal capture and four other recipes; the packaged journal capture uses `{{DAILY}}` and `## Journal` and needs QuickAdd 2.30.0 or later.
For reference, the journal entry capture in compact form:
| Setting | Value |
| ------------------------------- | ---------------------------------------------------- |
| Capture to | `{{DAILY}}` (click **Daily note** next to the field) |
| Create file if it doesn’t exist | On |
| Write position | **After line…** |
| Insert after | `## What did I do today?` |
| Capture format | `- {{DATE:HH:mm}} {{VALUE}}` |
Before QuickAdd 2.30.0, set **Capture to** to your daily-note path and date pattern instead, for example `Daily/{{DATE:YYYY-MM-DD - ddd MMM D}}.md`, turn on **Create file if it doesn’t exist** yourself, and turn on the **Capture format** toggle.
# Capture: Add a Task to a Kanban Board
> Add a task to a chosen lane on an Obsidian Kanban board by capturing after the lane heading, with optional date formatting
You end up with one QuickAdd command that drops whatever you type onto a Kanban board as a card in the lane you choose - without opening the board first.
## Prerequisites
[Section titled “Prerequisites”](#prerequisites)
* The [Kanban](https://github.com/mgmeyers/obsidian-kanban) community plugin, installed and enabled.
* A Kanban board with at least one lane. Each lane is a Markdown heading, for example `## Backlog`.
## Setup
[Section titled “Setup”](#setup)
Imported the package above? Follow **After importing** in the card, then skip the manual setup below and read [What you get](#what-you-get).
1. In **Settings → QuickAdd**, click **New choice** → **Capture**. The Capture builder opens; click its name at the top to rename it (for example, `Add to board`).
2. Set **Capture to** to your Kanban board file.
3. Enable the **Task** toggle (in the **Content** section). This wraps your text in `- [ ]` so Kanban reads it as a card.
4. Set **Write position** to **After line…**.
5. In the **Insert after** field that appears, write `## `followed by the name of the lane you want to add the card to. For a lane called `Backlog`, that is `## Backlog`.
## What you get
[Section titled “What you get”](#what-you-get)
You run the choice, type `Buy milk`, and QuickAdd adds `- [ ] Buy milk` as a new card at the top of the `Backlog` lane.
## Add a date to the card
[Section titled “Add a date to the card”](#add-a-date-to-the-card)
Kanban recognizes a date written as `@{YYYY-MM-DD}` on a card. Set **Capture format** to add one (before QuickAdd 2.30.0, turn on the **Capture format** toggle first):
* Use today’s date automatically:
```plaintext
{{VALUE}} @{{{DATE}}}
```
* Get asked which date to use each time:
```plaintext
{{VALUE}} @{{{VDATE:DATE,YYYY-MM-DD}}}
```
You can type an exact date or a natural-language date such as `tomorrow`.
Read more about [format syntax here](/docs/FormatSyntax/).
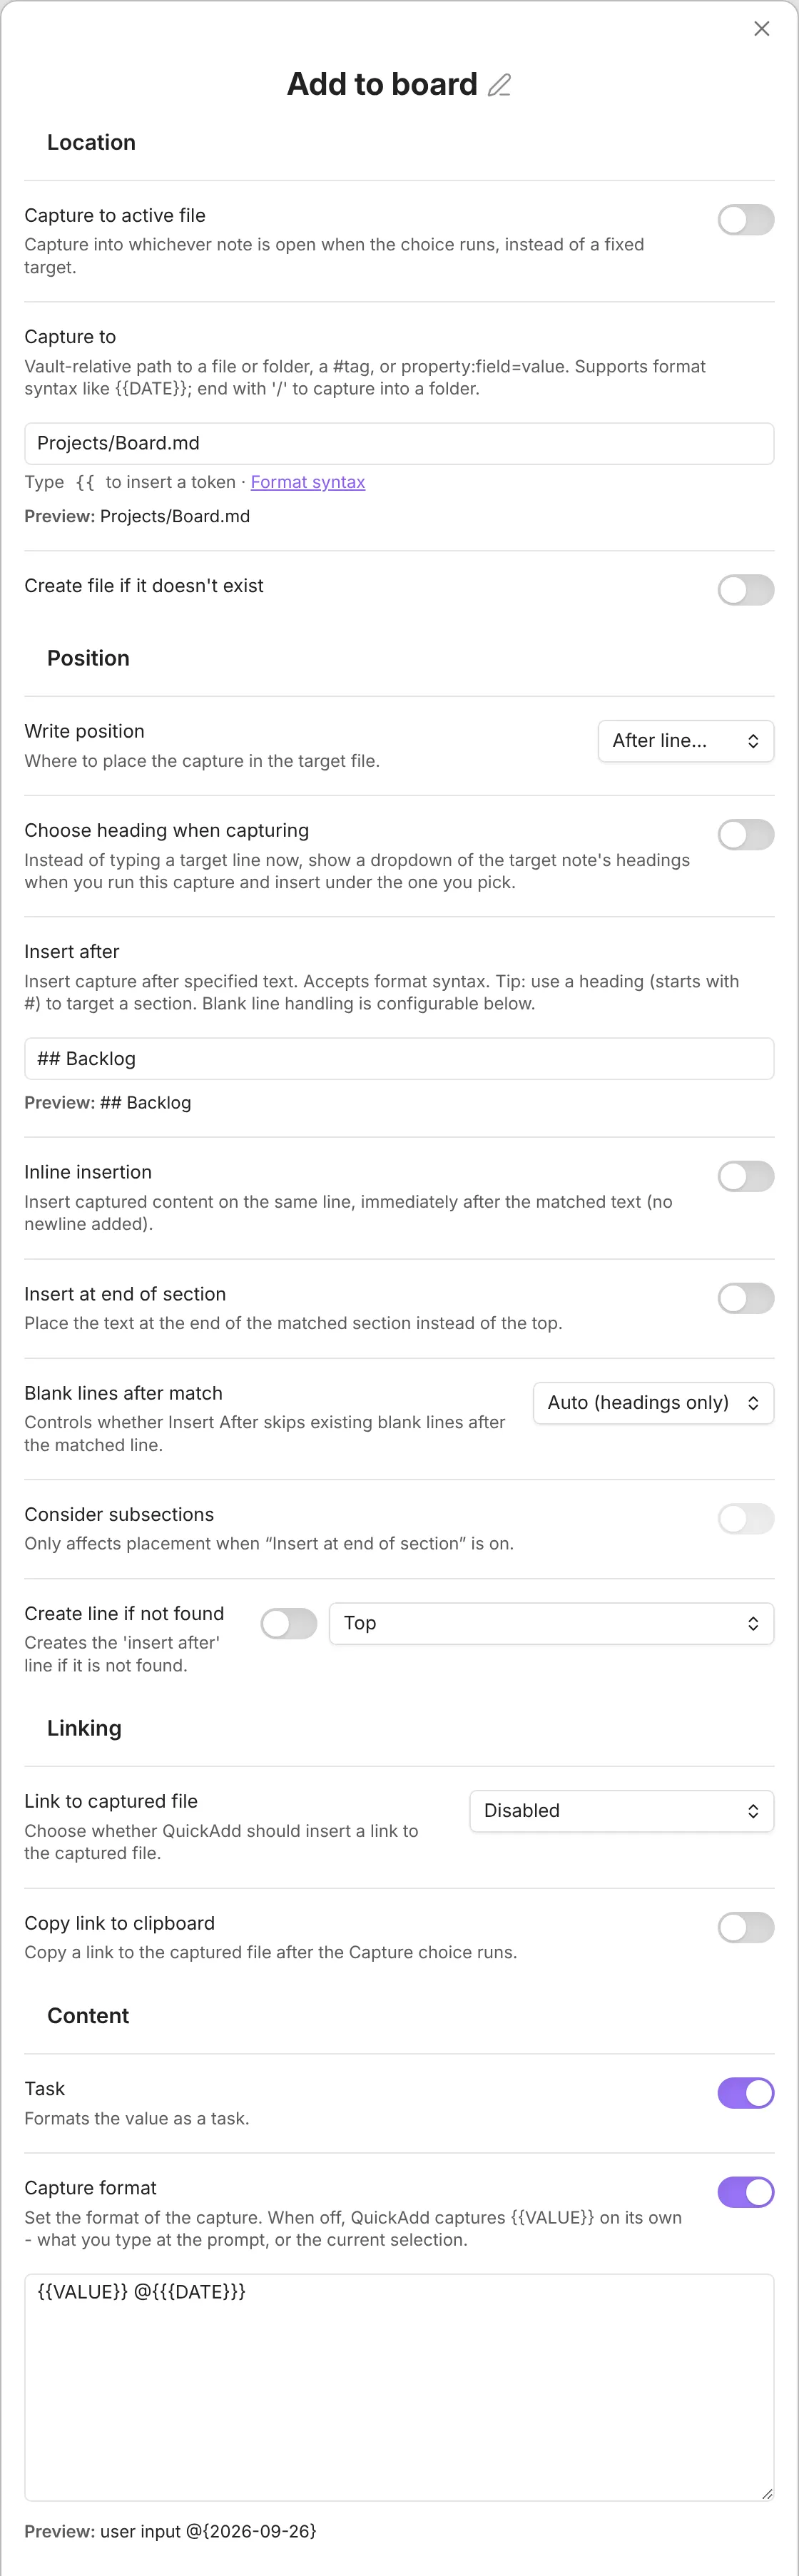
# Capture: Canvas Capture
> Capture formatted text into a selected Canvas card or a specific node in a .canvas file, with supported write positions and linking
You end up with a Capture choice that writes into an Obsidian Canvas: either the card you have selected on the board, or one specific card in a `.canvas` file you name ahead of time.
## Prerequisites
[Section titled “Prerequisites”](#prerequisites)
* An Obsidian Canvas file. Canvas is built into Obsidian, so there is no plugin to install.
## When to use this
[Section titled “When to use this”](#when-to-use-this)
Use Canvas capture when your workflow starts in a visual board, but you still want QuickAdd’s capture formats, variables, and hotkeys.
Good fits:
* Add a timestamped note to a selected brainstorming card.
* Append a task to a project card.
* Send repeated updates to one known Canvas card.
## Capture to the selected card
[Section titled “Capture to the selected card”](#capture-to-the-selected-card)
Imported the package above? Follow **After importing** in the card; the steps below build the same choice by hand.
1. Create a Capture choice.
2. Enable **Capture to active file**.
3. Open a Canvas file.
4. Select exactly one supported card.
5. Set **Write position** to **Top of file (after frontmatter)**, **Bottom of file**, or **After line…** / **Before line…**.
6. Run the Capture choice.
Supported selected-card targets:
* Text cards
* File cards that point to Markdown files
QuickAdd aborts with a notice if no card is selected, multiple cards are selected, or the selected card is unsupported.
## Capture to a specific card
[Section titled “Capture to a specific card”](#capture-to-a-specific-card)
1. Create a Capture choice.
2. Turn off **Capture to active file**.
3. Set **Capture to** to a `.canvas` file.
4. Choose **Target canvas node**.
5. Pick the card you want QuickAdd to write to.
6. Set a supported write position.
This is the best option for repeatable workflows where every capture should go to the same Canvas card.
## Write position support
[Section titled “Write position support”](#write-position-support)
Canvas capture supports these write positions:
* **Top of file** (shown as **Top of file (after frontmatter)** when **Capture to active file** is enabled)
* **Bottom of file**
* **After line…**
* **Before line…**
Canvas capture does not support cursor-based write positions:
* **At cursor**
* **New line above cursor**
* **New line below cursor**
If **Capture to active file** is enabled and the write position is still **At cursor**, QuickAdd aborts instead of writing to the wrong place.
## Link-to-captured-file behavior
[Section titled “Link-to-captured-file behavior”](#link-to-captured-file-behavior)
When **Link to captured file** is set to **Enabled (strict)** and capture runs from a Canvas card without a focused Markdown editor, the capture still writes. QuickAdd skips link insertion because there is no active Markdown file to link from.
## Troubleshooting
[Section titled “Troubleshooting”](#troubleshooting)
| Symptom | Likely cause | Fix |
| ------------------------------------------- | ------------------------------------------- | ----------------------------------------------------- |
| Capture aborts before writing | No card or multiple cards are selected | Select exactly one supported card |
| Capture aborts with cursor-position wording | The write mode is cursor-based | Use top, bottom, after-line, or before-line placement |
| Nothing is written to a file card | The file card points to a non-Markdown file | Use a Markdown file card or a text card |
| The target picker is not shown | Capture target is not a `.canvas` file | Set **Capture to** to the Canvas file path |
## Related docs
[Section titled “Related docs”](#related-docs)
* [Capture Choices](/docs/Choices/CaptureChoice/)
* [Format Syntax](/docs/FormatSyntax/)
* [Template: Create an MOC Note with a Link Dashboard](/docs/Examples/Template_CreateMOCNoteWithLinkDashboard/)
# Capture: Fetch Tasks From Todoist
> Import Todoist tasks into a note using a macro and user script, selecting from all tasks, a project, or a single section
You end up with one QuickAdd command that pulls tasks from your Todoist account into a note in your vault. This is useful for capturing tasks on the go with your phone, then adding them to Obsidian when you get back to your computer.
## Prerequisites
[Section titled “Prerequisites”](#prerequisites)
* A Todoist API token. In Todoist, open **Settings → Integrations → Developer** and copy the **API token**. The script talks to the [Todoist API](https://developer.todoist.com/api/v1/) directly, so you don’t need the Todoist plugin for Obsidian.
* The [Todoist Script](/scripts/TodoistScript.js), saved in your vault as a `.js` file, for example `scripts/todoistTaskSync.js`. Don’t save it inside the `.obsidian` folder - QuickAdd ignores scripts there.
* A [macro](/docs/Choices/MacroChoice/) that runs the script, and a [Capture choice](/docs/Choices/CaptureChoice/) that writes its output to a note (set up below).
## How it works
[Section titled “How it works”](#how-it-works)
The Todoist Script has three exports, `SelectFromAllTasks`, `GetAllTasksFromProject`, and `GetAllTasksFromSection`.
* `SelectFromAllTasks` will prompt you to select tasks from all tasks on your Todoist account,
* `GetAllTasksFromProject` will prompt you for a project and get all tasks from that project, and
* `GetAllTasksFromSection` will prompt you for a section and get all tasks from that section.
If you run the macro as-is, the script asks you which one to run. To always run one of them, reference it in the Capture format with `::`, for example `{{MACRO:Todoist::GetAllTasksFromProject}}`, or name it in the macro’s script command, for example `todoistTaskSync::GetAllTasksFromProject`.
Imported tasks are completed in Todoist
By default, the script completes every task it imports, so the same task isn’t imported twice. Recurring tasks move to their next occurrence instead. To keep the tasks open in Todoist, untick **Complete imported tasks in Todoist** in the script’s settings.
## Setup
[Section titled “Setup”](#setup)
Imported the package above? The script, the macro, and the Capture choice are already in place. Open the **Todoist** macro and follow step 3 to save your token and decide whether imported tasks are completed.
1. Save the [Todoist Script](/scripts/TodoistScript.js) to your vault, for example as `scripts/todoistTaskSync.js`.
2. In **Settings → QuickAdd**, add a [Macro choice](/docs/Choices/MacroChoice/) named `Todoist`, and add the script to its command list. Add it by its file name (`todoistTaskSync`) to pick an export when the macro runs, or append an export (`todoistTaskSync::GetAllTasksFromProject`) to always run that one. Either way, the script’s settings apply.
3. Click the gear (⚙️) next to the script command, paste your Todoist API token into **Todoist API token**, and click the save icon next to it. QuickAdd keeps it in Obsidian’s secret storage, not in `data.json`. Leave **Complete imported tasks in Todoist** ticked, or untick it to leave tasks open in Todoist.
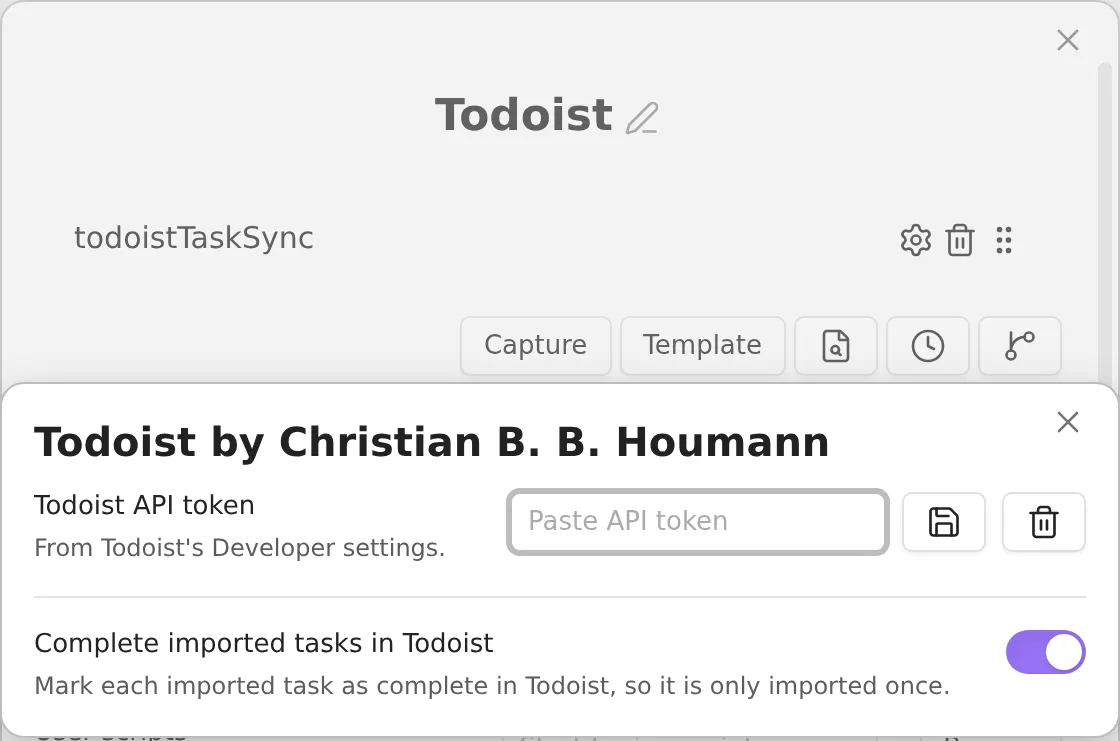
4. Add a [Capture choice](/docs/Choices/CaptureChoice/) with these settings:
* *Capture to:* the path to the file where you want to store the tasks.
* *Capture format:* Enabled - and in the format, write `{{MACRO:Todoist}}` to be asked which export to run, or `{{MACRO:Todoist::GetAllTasksFromProject}}` (or any of the other exports) to run that one directly.
You can make one Capture choice per export, so each has its own command.
## What you get
[Section titled “What you get”](#what-you-get)
The tasks are written in this format: `- [ ] 📅 `
Which equals: `- [ ] Buy groceries 📅 2021-06-27`
This task will be recognized by the Tasks plugin for Obsidian, as well. If there isn’t a date set for the task, they’ll simply be entered as `- [ ] Buy groceries`.
## Troubleshooting
[Section titled “Troubleshooting”](#troubleshooting)
* **“Add your Todoist API token in the Todoist script’s settings”**: open the macro, click the gear next to the script command, and paste the token. Settings belong to each script command, so if the macro has several commands for this script, set the token on the one that runs.
* **“Todoist rejected the API token (HTTP 401)”**: the token is wrong or was reset. Copy it again from Todoist’s Developer settings.
* **“Secret setting … is unavailable. Re-enter it on this device.”**: secrets are stored per device. Paste the token again on this device.
# Capture: Insert a Related Notes Base into an MOC Note
> Insert a live Base view of related notes into an active MOC note by capturing from a .base template into the current file
You end up with one QuickAdd command that inserts a live “related notes” Base view into whichever map-of-content (MOC) note you have open. The table shows every note that links to that MOC and updates itself as your vault changes.
## Prerequisites
[Section titled “Prerequisites”](#prerequisites)
* Obsidian’s **Bases** core plugin enabled (it renders `.base` files).
* A markdown note to run the capture from, such as your MOC note.
## Why this pattern
[Section titled “Why this pattern”](#why-this-pattern)
Capture does not write directly to `.base` files, but it can still pull content from a `.base` template and insert that content into the active markdown note. This is useful for MOCs where you want a note-local index of backlinks.
## Setup
[Section titled “Setup”](#setup)
Imported the package above? Follow **After importing** in the card; the steps below build the same choice by hand.
1. Create a `.base` template file, for example `Templates/MOC Related Notes.base`:
```yaml
filters:
and:
- 'file.ext == "md"'
- "file.hasLink(this.file)"
- "file.path != this.file.path"
views:
- type: table
name: Related notes
```
2. Create a Capture choice.
3. Enable **Capture to active file**.
4. Set **Write position** to **Top of file (after frontmatter)**.
5. (Before QuickAdd 2.30.0, turn on the **Capture format** toggle first.) In **Capture format**, reference your `.base` template with an explicit file extension:
Example:
````markdown
## Related Notes
```base
{{TEMPLATE:Templates/MOC Related Notes.base}}
```
Context: {{VALUE}}
````
6. Run the Capture choice while your MOC note is active (for example `MOCs/Alpha Project.md`).
QuickAdd reads the `.base` template and inserts its content into the active note. Because the base view is embedded in that note, `this.file` points at the MOC, so the table shows notes that link to that specific MOC.
# Capture: Add entries to your daily note
> Cookbook of Capture recipes that add timestamped lines, tasks, quotes, callouts, and table rows to today's daily note
This cookbook gives you one QuickAdd choice that adds text to today’s daily note - even when the note or the target heading doesn’t exist yet.
Every recipe starts from the same base Capture choice; you only change the **Capture format** and the target heading.
## Base setup
[Section titled “Base setup”](#base-setup)
The package above needs QuickAdd 2.30.0 or later. On an earlier version, the package writes its captures to a note named `{{DAILY}}.md`, so build the capture by hand with the base setup below instead.
Imported the package above? Follow **After importing** in the card, then skip the base setup below. [Recipes](#recipes) explains what each imported capture does and how to add more.
1. In **Settings → QuickAdd**, click **New choice** → **Capture**. The Capture builder opens as a page of the settings window; set **Name** to `Daily entry`. (Before QuickAdd 2.30.0, the builder is a dialog; click its name at the top to rename it.)
2. Disable **Capture to active file**.
3. Click **Daily note** next to **Capture to** (QuickAdd 2.30.0 or later). It fills in `{{DAILY}}`, which uses the folder, date format, and template from Obsidian’s **Daily notes** settings, or from Periodic Notes when it manages your daily notes. On earlier versions, type your daily-note path and date pattern instead, for example `Daily/{{DATE:YYYY-MM-DD}}.md`.
4. Make sure **Create file if it doesn’t exist** is on. The **Daily note** button turns it on. On earlier versions, turn it on yourself; to start a new note from your daily-note template, also turn on **Create file with a template** and pick the template.
5. Set **Write position** to **After line…**.
6. In the **Insert after** field, enter the heading you want entries placed under, for example `## Journal`.
7. Make sure **Insert at end of section** is on, so each capture appends at the bottom of the section.
8. Make sure **Create line if not found** is on, and set its placement to **Bottom**, so a note that lacks the heading gets it at the end instead of above its title. A new Capture starts with **Insert at end of section** and **Create line if not found** on in QuickAdd 2.30.0 or later; on earlier versions, turn them on.
9. Leave **Link to captured file** disabled.
10. Fill in **Capture format** with one of the recipes below.
## Recipes
[Section titled “Recipes”](#recipes)
Each recipe shows what to change from the base setup. Before QuickAdd 2.30.0, turn on the **Capture format** toggle to type a recipe.
### Timestamped journal line
[Section titled “Timestamped journal line”](#timestamped-journal-line)
Keep **Insert after** set to `## Journal`.
**Capture format:**
```plaintext
- {{DATE:HH:mm}} {{VALUE}}
```
Produces:
```markdown
## Journal
- 18:54 first journal entry
- 18:55 second journal entry
```
Before QuickAdd 2.30.0, end each recipe’s format with `\n` (for example `- {{DATE:HH:mm}} {{VALUE}}\n`). Without it, a capture at the end of a section removes the blank line before the next heading.
### Task line
[Section titled “Task line”](#task-line)
Change **Insert after** to `## Tasks`.
**Task:** on (in the **Content** section).
**Capture format:**
```plaintext
{{VALUE}}
```
**Task** wraps the value in `- [ ] ...` automatically. Do not add `- [ ]` to the format manually.
### Task with a date prompt
[Section titled “Task with a date prompt”](#task-with-a-date-prompt)
**Task:** on.
**Capture format:**
```plaintext
{{VALUE}} due {{VDATE:due,YYYY-MM-DD}}
```
QuickAdd prompts for the task text and then for `due`. You can enter an exact date or a natural-language date such as `tomorrow`. Result: `- [ ] pay rent due 2026-07-07`.
### Callout line
[Section titled “Callout line”](#callout-line)
Change **Insert after** to the callout opener, for example:
```plaintext
> [!info]- Captured today
```
**Capture format:**
```plaintext
> {{VALUE}}
```
Change the **Create line if not found** placement to **Top**, so on first use the callout opener goes at the top of the note. At **Bottom**, the opener lands inside the section of the heading above it, such as `## Quotes`, and the next capture to that heading goes into the callout. Before QuickAdd 2.31.0, an opener added right after a quoted line also joined that blockquote and didn’t render as a callout. To have the callout below the note’s title, put the opener line in your daily notes template instead. Each subsequent capture appends before the next blank line or heading, so keep the callout as one contiguous quoted block. The `>` prefix is required to keep the entry inside the callout block.
### Quote
[Section titled “Quote”](#quote)
Change **Insert after** to `## Quotes`.
**Capture format:**
```plaintext
> {{VALUE}}
```
Same format as the callout recipe but targeting a regular heading. Produces a blockquote line under the section.
### Table row
[Section titled “Table row”](#table-row)
Use this when the daily note already has a table under a heading and the table is the last block in that section. Keep **Write position** as **After line…**, set **Insert after** to the heading above the table, and keep **Insert at end of section** enabled. If more content follows the table in the same section, target the table separator row instead.
**Capture format:**
```plaintext
| {{DATE:HH:mm}} | {{VALUE}} |
```
This keeps the row attached to the table:
```markdown
## Log
| When | What |
| --- | --- |
| 09:00 | existing |
| 18:55 | section row |
```
### Tomorrow’s daily note
[Section titled “Tomorrow’s daily note”](#tomorrows-daily-note)
With **Capture to** set to `{{DAILY}}`, set **Which day** to **Custom…**, one day forward. `{{DAILY}}` follows [Which day](/docs/Choices/TemplateChoice/#date-origin), so the capture targets tomorrow’s note and creates it from your daily notes template.
With a typed path, change **Capture to** to:
```plaintext
Daily/{{DATE:YYYY-MM-DD+1}}.md
```
The `+1` shifts the target date one day forward. Combine with any of the formats above.
## Troubleshooting
[Section titled “Troubleshooting”](#troubleshooting)
**Pasted multiple lines became one task.** The **Task** setting wraps the whole capture once. Turn on [**One entry per line**](/docs/Choices/CaptureChoice/#one-entry-per-line) (QuickAdd 2.30.0 or later) to make each line its own task.
**The heading is not found and capture fails.** Turn on **Create line if not found** with placement **Bottom** (or **Top**). QuickAdd inserts the heading on first use and places new content after it.
**You need to insert above a placeholder.** Use **Before line…** instead of **After line…** and target the placeholder, such as ``. See [Insert before](/docs/Choices/CaptureChoice/#insert-before) for the full setting.
**Capture writes to the wrong file.** Use `{{DAILY}}` in **Capture to**, which reads the path from your Daily notes settings. With a typed path, the date pattern must match your vault’s daily-note naming exactly. If your notes are named `2025.01.15.md` inside `Journal/`, use `Journal/{{DATE:YYYY.MM.DD}}.md`.
# Macro: Add location long-lat from address
> Macro and user script that geocode an address into a location latitude-longitude property on the active note, for the Map View plugin
This macro asks you for an address, looks up its coordinates, and sets a `location` property on the note you have open. The value has the form `lat,lng`, for example `location: 48.8582599,2.2945006`. That is the front matter format the [Obsidian Map View plugin](https://github.com/esm7/obsidian-map-view) recommends and writes itself, so Map View places the note on its map.
## Before you start
[Section titled “Before you start”](#before-you-start)
* The script looks up addresses with [Nominatim](https://nominatim.org/), OpenStreetMap’s free geocoding service. It needs an internet connection but no account or API key. Nominatim uses the first match, so a specific address (street, city, country) gives the best result.
* No other plugin is needed to write the property. Install Map View if you want to see your notes on a map.
## Setup
[Section titled “Setup”](#setup)
Imported the package above? The script and the **Add location from address** macro are already in place; skip to [What you get](#what-you-get).
1. Grab the script from [this page](/scripts/getLongLatFromAddress.js). You can either click the download link, or copy the file contents and save them as `getLongLatFromAddress.js`. The `.js` extension is essential.
2. Save the file anywhere in your vault, except `.obsidian` or another hidden folder (one whose name starts with a dot). For a fuller walkthrough, see [how to add a script to a macro](/docs/UserScripts/#adding-scripts-to-macros).
3. In **Settings → QuickAdd**, click **New choice** → **Macro**. The Macro Builder opens; click its name at the top to rename it (I call mine `Mapper`). If you close the builder, click the gear (Configure) button on the choice in the list to reopen it. See [the Macro choice docs](/docs/Choices/MacroChoice/) for a full walkthrough.
4. In the Macro Builder, place your cursor in the **User scripts** field to bring up a suggester, pick `getLongLatFromAddress.js` (or click **Browse** to select the file), and click **Add**. It should appear as the first command.
5. Close the QuickAdd settings.
## What you get
[Section titled “What you get”](#what-you-get)
Open the note you want to place, run the macro with the `QuickAdd: Run` command in the command palette, and pick your choice. Enter an address, and QuickAdd sets the note’s `location` property to that address’s coordinates:
```yaml
---
location: 48.8582599,2.2945006
---
```
The prompt names the note it will update, for example **🏠 Address for Places/Eiffel Tower.md**. That note gets the location even if you [peek](/docs/ControllingPrompts/#peek) and open another note, say to copy the address, before you submit. If the note already has a `location` property, the script replaces its value. If Nominatim finds no match, you get a notice and the note is left unchanged.
Note
Earlier versions of this script needed MetaEdit to write the property, and this page told MetaEdit users in **All Multi** mode to edit the script. The script now writes the property with Obsidian’s own API, so MetaEdit and its edit mode no longer matter. Locations written by the old script keep working in Map View. If you use a different property name for locations in Map View’s settings, change `frontmatter.location` in the script to match.
# Book Finder Script
> Insert book details fetched from the Google Books API into your vault using a Macro choice and template, no API key required
This macro looks up a book by title and inserts its details into a new note in your vault. It uses the Google Books API, and you don’t need an API key because it only reads publicly available information.
## Installation
[Section titled “Installation”](#installation)
Imported the package above? The script, the template, and the **Add book note** macro are already in place; skip to [Usage](#usage).
This works by adding the BookFinder [user script](/docs/UserScripts/) to a [Macro choice](/docs/Choices/MacroChoice/) that you run from the main menu. You can find the script [here](/scripts/BookFinder.js).
1. Save the script (`BookFinder.js`) to your vault. Make sure it is saved as a JavaScript file, meaning that it has the `.js` at the end. **Important:** Do not save scripts in the `.obsidian` directory - they will be ignored. Valid locations include folders like `/scripts/`, `/macros/`, or any custom folder in your vault.
2. Create a new template in your designated templates folder. Example template is provided below.
3. In **Settings → QuickAdd**, click **New choice** → **Macro**. This is what activates the macro. The Macro Builder opens; click its name at the top to rename it - you decide what to name it. I named mine `Book`.
4. Add the user script to the command list.
5. Add a new Template step to the macro (the `Template` button in the command bar). This will be what creates the note in your vault. Settings are as follows:
1. Set the template path to the template you created.
2. Set **File name** to `{{VALUE:fileName}}` (before QuickAdd 2.30.0, this is **File name format**; turn its toggle on first). You can specify this however you like. The `fileName` value is the name of the Book without illegal file name characters.
3. The remaining settings are for you to specify depending on your needs.
You can now use the macro to create notes with book information in your vault.
### Example template
[Section titled “Example template”](#example-template)
```markdown

**Author**:: {{VALUE:authors}}
**Title**:: {{VALUE:title}}
**Category**::{{VALUE:categories}}
**Status**:: 📥
**Related Books**
### Core Questions for Me
### Actions
### My Notes
## Details
{{VALUE:description}}
```
## Usage
[Section titled “Usage”](#usage)
Run the macro and enter a book title; a short clipboard text is prefilled. The first Google Books match for that title becomes the note; there is no picker, so a full, exact title gives the best result.
You can pull any field from the API response into your template with a `{{VALUE:}}` placeholder (for example, `{{VALUE:title}}`). Below is an example response for the book ‘Flowers for Algernon’. The response is deeply nested, so if you want fields that the example template doesn’t already expose, you may need to extend the script to read them out.
```json
{
"kind": "books#volumes",
"totalItems": 119,
"items": [
{
"kind": "books#volume",
"id": "6P_jN6zUuMcC",
"etag": "FpDPG4koVaQ",
"selfLink": "https://www.googleapis.com/books/v1/volumes/6P_jN6zUuMcC",
"volumeInfo": {
"title": "Flowers for Algernon",
"authors": [
"Daniel Keyes"
],
"publisher": "Houghton Mifflin Harcourt",
"publishedDate": "2004",
"description": "Oscar-winning film Charly starring Cliff Robertson and Claire Bloom-a mentally challenged man receives an operation that turns him into a genius...and introduces him to heartache.",
"industryIdentifiers": [
{
"type": "ISBN_13",
"identifier": "9780156030083"
},
{
"type": "ISBN_10",
"identifier": "015603008X"
}
],
"readingModes": {
"text": false,
"image": true
},
"pageCount": 324,
"printType": "BOOK",
"categories": [
"Fiction"
],
"averageRating": 4,
"ratingsCount": 179,
"maturityRating": "NOT_MATURE",
"allowAnonLogging": true,
"contentVersion": "1.3.3.0.preview.1",
"panelizationSummary": {
"containsEpubBubbles": false,
"containsImageBubbles": false
},
"imageLinks": {
"smallThumbnail": "http://books.google.com/books/content?id=6P_jN6zUuMcC&printsec=frontcover&img=1&zoom=5&edge=curl&source=gbs_api",
"thumbnail": "http://books.google.com/books/content?id=6P_jN6zUuMcC&printsec=frontcover&img=1&zoom=1&edge=curl&source=gbs_api"
},
"language": "en",
"previewLink": "http://books.google.ca/books?id=6P_jN6zUuMcC&printsec=frontcover&dq=intitle:Flowers+for+Algernon&hl=&cd=1&source=gbs_api",
"infoLink": "http://books.google.ca/books?id=6P_jN6zUuMcC&dq=intitle:Flowers+for+Algernon&hl=&source=gbs_api",
"canonicalVolumeLink": "https://books.google.com/books/about/Flowers_for_Algernon.html?hl=&id=6P_jN6zUuMcC"
},
"saleInfo": {
"country": "CA",
"saleability": "NOT_FOR_SALE",
"isEbook": false
},
"accessInfo": {
"country": "CA",
"viewability": "PARTIAL",
"embeddable": true,
"publicDomain": false,
"textToSpeechPermission": "ALLOWED",
"epub": {
"isAvailable": false
},
"pdf": {
"isAvailable": true,
"acsTokenLink": "http://books.google.ca/books/download/Flowers_for_Algernon-sample-pdf.acsm?id=6P_jN6zUuMcC&format=pdf&output=acs4_fulfillment_token&dl_type=sample&source=gbs_api"
},
"webReaderLink": "http://play.google.com/books/reader?id=6P_jN6zUuMcC&hl=&source=gbs_api",
"accessViewStatus": "SAMPLE",
"quoteSharingAllowed": false
},
"searchInfo": {
"textSnippet": "WINNER OF THE HUGO AWARD AND THE NEBULA AWARD The classic novel that inspired the Academy Award-winning movie Charly Daniel Keyes, the author of eight books, was born in Brooklyn, New York, and received his B.A. and M.A. degrees from ..."
}
},
```
# Macro: Brain dump
> Jot down several inbox entries in a row - a macro opens a Capture again after each entry until you press Esc
A Capture closes after each entry, so writing down ten ideas means running it ten times. This macro opens its **Brain dump entry** Capture again after each entry: type, press Enter, type the next one, and press Esc when you’re done. Every entry becomes its own line in `Inbox.md`.
This example needs QuickAdd 2.29.0 or later. In earlier versions, each new prompt opened with the entry you had just saved.
## Setup
[Section titled “Setup”](#setup)
Imported the package above? It adds the **Brain dump** macro, the **Brain dump entry** Capture, and `scripts/brainDump.js`. Follow **After importing** in the card, then skip to [What you get](#what-you-get).
1. Create the Capture. In **Settings → QuickAdd**, click **New choice** → **Capture**. Click its name at the top of the settings window and rename it `Brain dump entry`.
2. Set **Capture to** to `Inbox.md` and turn on **Create file if it doesn’t exist**.
3. Set **Write position** to **Bottom of file**.
4. In **Capture format**, enter (before QuickAdd 2.30.0, turn on the **Capture format** toggle first):
```text
- {{VALUE}}
```
5. Set **Use editor selection as default value** to **Ignore selection**, so text you have selected in a note doesn’t stand in for the first entry. Click **Done**.
6. [Download brainDump.js](/scripts/brainDump.js) and save it in your vault. QuickAdd doesn’t list scripts in `.obsidian` or in other folders whose names start with a dot.
7. Click **New choice** → **Macro** and rename it `Brain dump`. In the Macro builder, type `brainDump` in the **User scripts** box, pick the script, and click **Add**.
8. Turn **Add to command palette** on and click **Done**.
## What you get
[Section titled “What you get”](#what-you-get)
Run **QuickAdd: Brain dump** from the command palette. A prompt titled **Text to capture** opens. Type an entry and press Enter: QuickAdd adds it to `Inbox.md` and opens an empty prompt for the next one. Press Esc to stop. Nothing is written for the prompt you close.
After three entries, `Inbox.md` ends like this:
```markdown
- Try a thinner sage glaze on the rims
- Price the espresso cups for Blue Harbor
- Ask Jonas if the saucers need a foot ring
```
## Repeat a different Capture
[Section titled “Repeat a different Capture”](#repeat-a-different-capture)
The macro can repeat any Capture that asks for input, such as one that adds a task to today’s daily note. In **Settings → QuickAdd**, hover over **Brain dump** and click its cog, then click the cog on the **brainDump** step and enter that Capture’s name in **Capture choice**.
If the Capture you name doesn’t ask for anything, the macro runs it once and stops with a notice, so it can’t keep writing the same line.
The script’s loop is one line:
```js
while (await askedForInput(() => params.quickAddApi.executeChoice(choice))) {}
```
`executeChoice` runs the Capture and rejects when you cancel its prompt, which ends the loop. `askedForInput` reports whether a dialog opened while the Capture ran, so a Capture that asks for nothing stops the loop too. The [QuickAdd API](/docs/QuickAddAPI/) page shows how to pass variables to the Capture.
# Macro: Capture to Inbox with GPS
> Append a timestamped inbox line with device GPS coordinates, for offline capture on Obsidian mobile 1.11+
This macro asks for a quick note, looks up your device location at the same time, and appends a timestamped line to `Inbox.md`. It is meant for capture on the go: voice-to-text in the prompt, GPS in the background, one line waiting when you get home.
GPS works on **Obsidian mobile 1.11 or newer**. The first run asks Android or iOS for location permission. Desktop cannot read GPS, so the line is still saved, just without coordinates. A cold satellite lock while offline can take a while; if it times out, the note is saved without GPS.
This is not a built-in `{{coordinates}}` token. A capture format that calls `{{MACRO:...}}` would wait for GPS *before* opening the prompt, which fights voice-to-text. The script starts the location lookup first, then prompts.
## Install from the package
[Section titled “Install from the package”](#install-from-a-package)
The package at the top of this page writes `scripts/captureInboxGps.js` and a Macro choice that runs it. After importing, open the cog on the script step to change the Inbox path (default `Inbox.md`) or to turn off creating the note when it is missing. Then assign a hotkey to **Capture to Inbox with GPS**, or run it from the command palette.
## Install by hand
[Section titled “Install by hand”](#install-by-hand)
1. Save [captureInboxGps.js](/scripts/captureInboxGps.js) anywhere in your vault except `.obsidian` or a hidden folder.
2. In **Settings → QuickAdd**, click **New choice** → **Macro**. The Macro Builder opens; click its name at the top to rename it `Capture to Inbox with GPS`.
3. In the Macro Builder, add that script as a **User Script**.
4. Turn on the ⚡ **Command palette** toggle on the choice’s row so it appears in the palette.
## What you get
[Section titled “What you get”](#what-you-get)
Each run appends one line:
```markdown
- 2026-08-31 15:42 Saw the trail marker at the ridge (55.676098, 12.568337)
```
If GPS is unavailable, the same line is written without the coordinates.
A run that already has `value` and `coordinates` set (URI, CLI, or an earlier macro step) skips the prompt and the location lookup.
# Macro: Change properties in your daily notes
> Update a property in your daily note by picking it from a suggester and entering a new value, using Obsidian's frontmatter API
This macro lists every property in today’s daily journal note in a menu. Pick one, type a new value, and the macro writes it back - a quick way to update a property without opening the note or editing frontmatter by hand.
## Before you start
[Section titled “Before you start”](#before-you-start)
* Today’s daily journal note must exist, and the property you want to change must already be in its frontmatter; the menu only lists existing properties, and only text, number and checkbox ones.
* The **Daily notes** core plugin turned on, or a custom **Daily note path** in the script settings (step 4).
## Setup
[Section titled “Setup”](#setup)
Imported the package above? The script and the **Change daily note property** macro are already in place; skip to step 4 to check its settings, then run it.
1. [Download changeDailyProperty.js](/scripts/changeDailyProperty.js) and save it somewhere in your vault (not inside the `.obsidian` folder). See [the user scripts guide](/docs/UserScripts/) for how QuickAdd loads scripts.
2. In **Settings → QuickAdd**, click **New choice** → **Macro**. The Macro Builder opens; click its name at the top to rename it (for example, `Change property`). See [the Macro choice docs](/docs/Choices/MacroChoice/) for a full walkthrough.
3. In the Macro Builder, add your script as a **User Script** command.
4. Click the cog on the script step. Leave **Daily note path** empty to use the Daily notes plugin’s folder and date format, or set it to where your daily notes live, with their date format, for example `bins/daily/{{DATE:YYYY-MM-DD - ddd MMM D}}.md`.
Run the macro, choose a property from the menu, and enter its new value. If the old value was a number or `true`/`false` and the new text still is one, it is written back as a number or boolean; otherwise as text. List properties such as `tags` are not offered, since a one-line prompt cannot edit them.
If you already know which properties you want to change and don’t want to be asked about the rest, edit the script and replace `keys` with a plain array of property names. You’d pass that array to the `suggester` method instead.
# Macro: Log book to daily journal
> Log the book you are reading to your daily journal note's Book property with an input prompt and Obsidian's frontmatter API
This macro asks which book you are reading and writes your answer to the **Book** property of today’s daily journal note, so you can log your current read without leaving the command palette.
## Before you start
[Section titled “Before you start”](#before-you-start)
* Today’s daily journal note must exist; the macro does not create one. The property is created if the note does not have it yet.
* The **Daily notes** core plugin turned on, or a custom **Daily note path** in the script settings (step 4).
## Setup
[Section titled “Setup”](#setup)
Imported the package above? The script and the **Log book** macro are already in place; skip to step 4 to check its settings, then run it.
1. [Download logBook.js](/scripts/logBook.js) and save it somewhere in your vault (not inside the `.obsidian` folder). See [the user scripts guide](/docs/UserScripts/) for how QuickAdd loads scripts.
2. In **Settings → QuickAdd**, click **New choice** → **Macro**. The Macro Builder opens; click its name at the top to rename it (for example, `Log Book`). See [the Macro choice docs](/docs/Choices/MacroChoice/) for a full walkthrough.
3. In the Macro Builder, add your script as a **User Script** command.
4. Click the cog on the script step. Leave **Daily note path** empty to use the Daily notes plugin’s folder and date format, or set it to where your daily notes live, with their date format, for example `bins/daily/{{DATE:YYYY-MM-DD - ddd MMM D}}.md`. Change **Property name** if you want to log to something other than `Book`.
Run the macro and enter a book title at the prompt. QuickAdd updates the **Book** property in today’s journal note to that title.
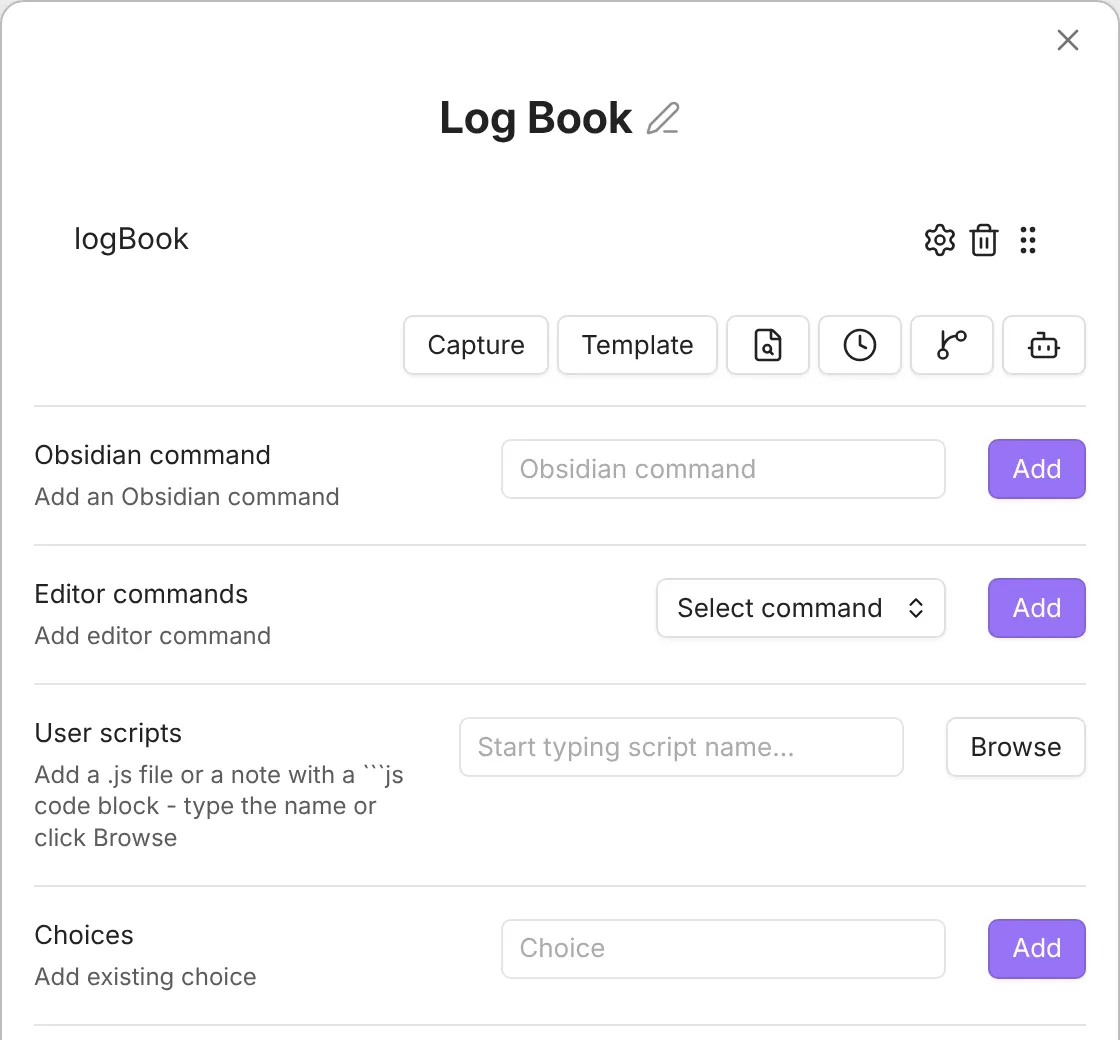
# Migrate Dataview Properties to Frontmatter
> Migrate inline Dataview properties to YAML frontmatter with wikilink-aware comma handling and selective property lists
This script allows you to migrate inline Dataview properties to YAML frontmatter. It’s particularly useful when transitioning from Dataview’s inline syntax to native Obsidian properties, which offer better performance and broader compatibility.
The script handles comma-separated values with special care for commas inside wikilinks, ensuring that links like `[[Note, with comma]]` are preserved correctly.
## Use Case
[Section titled “Use Case”](#use-case)
If you’ve been using Dataview’s inline property syntax like this:
```markdown
Reference:: [[2025-10-12 - Sun Oct 12]]
Related:: [[Agentic Engineering|Agentic coding]], [[Note, with comma]]
Tags:: #project, #important
```
This script will migrate those properties to frontmatter:
```markdown
---
Reference: "[[2025-10-12 - Sun Oct 12]]"
Related:
- "[[Agentic Engineering|Agentic coding]]"
- "[[Note, with comma]]"
tags:
- "project"
- "important"
---
```
The inline properties are removed from the body of the note after migration.
**Note:** The `tags` property is automatically normalized to lowercase and `#` symbols are stripped, following Obsidian’s frontmatter conventions for reserved property names.
## Installation
[Section titled “Installation”](#installation)
Imported the package above? The script and the **Migrate Dataview properties** macro are already in place, set to migrate only `Reference, Related`; skip to [Configuration](#configuration) to pick your properties.
1. Save the script (`migrateDataviewToFrontmatter.js`) to your vault. Make sure it is saved as a JavaScript file, meaning that it has the `.js` at the end. **Important:** Do not save scripts in the `.obsidian` directory - they will be ignored. Valid locations include folders like `/scripts/`, `/macros/`, or any custom folder in your vault.
2. In **Settings → QuickAdd**, click **New choice** → **Macro**. The Macro Builder opens; click its name at the top to rename it - I named mine `Migrate Properties`.
3. Add the user script to the macro’s command list.
4. Click the cog ⚙ icon next to the script command to configure its settings (see Configuration below).
You can download the script here: [migrateDataviewToFrontmatter.js](/scripts/migrateDataviewToFrontmatter.js)
## Configuration
[Section titled “Configuration”](#configuration)
The script offers two configuration options:
### Migrate All Properties
[Section titled “Migrate All Properties”](#migrate-all-properties)
**Type:** Toggle (on/off) **Default:** Off
When enabled, the script will migrate **all** inline properties found in the note, regardless of their names. When disabled, only the properties specified in “Properties to Migrate” will be migrated.
### Properties to Migrate
[Section titled “Properties to Migrate”](#properties-to-migrate)
**Type:** Text input **Default:** `Reference, Related`
A comma-separated list of property names to migrate (case-insensitive). This setting is ignored if “Migrate All Properties” is enabled.
**Examples:**
* `Reference, Related` - Migrates only Reference and Related properties
* `Author, Title, Date, Tags` - Migrates these four properties
* Leave empty with “Migrate All Properties” off to use the default (Reference, Related)
## Usage
[Section titled “Usage”](#usage)
1. Open a note that contains inline Dataview properties
2. Run the macro (via command palette, QuickAdd menu, or hotkey)
3. The script will:
* Add the properties to the note’s frontmatter
* Remove the inline property lines from the note body
* Show a notification with the migrated property names
## Key Features
[Section titled “Key Features”](#key-features)
* **Smart Wikilink Parsing**: Preserves commas inside wikilinks (e.g., `[[Note, with comma]]`)
* **Comma-Separated Values**: Automatically handles multiple values separated by commas
* **Single vs Multiple Values**: Stores single values as strings, multiple values as arrays
* **Case-Insensitive Matching**: Property names are matched case-insensitively
* **Selective Migration**: Choose to migrate all properties or only specific ones
* **Reserved Property Handling**: Special handling for Obsidian reserved properties like `tags`
* **Frontmatter Merging**: Merges with existing frontmatter values instead of overwriting (deduplicates)
* **Clean Output**: Removes excessive blank lines after migration
## Examples
[Section titled “Examples”](#examples)
### Example 1: Migrate Specific Properties
[Section titled “Example 1: Migrate Specific Properties”](#example-1-migrate-specific-properties)
**Configuration:**
* Migrate All Properties: Off
* Properties to Migrate: `Reference, Related`
**Input:**
```markdown
# My Note
Reference:: [[2025-10-12 - Sun Oct 12]]
Related:: [[Agentic Engineering|Agentic coding]]
Author:: John Doe
Status:: In Progress
```
**Output:**
```markdown
---
Reference: "[[2025-10-12 - Sun Oct 12]]"
Related: "[[Agentic Engineering|Agentic coding]]"
---
# My Note
Author:: John Doe
Status:: In Progress
```
Note: Only Reference and Related were migrated. Author and Status remain as inline properties.
### Example 2: Migrate All Properties
[Section titled “Example 2: Migrate All Properties”](#example-2-migrate-all-properties)
**Configuration:**
* Migrate All Properties: On
* Properties to Migrate: (ignored)
**Input:**
```markdown
# Project Notes
Reference:: [[Main Document]]
Related:: [[Doc A]], [[Doc B]]
Author:: John Doe
Status:: In Progress
Priority:: High
```
**Output:**
```markdown
---
Reference: "[[Main Document]]"
Related:
- "[[Doc A]]"
- "[[Doc B]]"
Author: "John Doe"
Status: "In Progress"
Priority: "High"
---
# Project Notes
```
All inline properties are migrated to frontmatter.
### Example 3: Handling Complex Wikilinks
[Section titled “Example 3: Handling Complex Wikilinks”](#example-3-handling-complex-wikilinks)
**Input:**
```markdown
Related:: [[Book Title, by Author]], [[Article, from Journal]], [[Simple Note]]
```
**Output:**
```markdown
---
Related:
- "[[Book Title, by Author]]"
- "[[Article, from Journal]]"
- "[[Simple Note]]"
---
```
Commas inside wikilinks are preserved correctly.
### Example 4: Handling Tags Property
[Section titled “Example 4: Handling Tags Property”](#example-4-handling-tags-property)
**Input:**
```markdown
Tags:: #project, #work, #important
```
**Output:**
```markdown
---
tags:
- "project"
- "work"
- "important"
---
```
The `tags` property is special in Obsidian:
* It’s automatically normalized to lowercase (even if you write `Tags::` or `TAGS::`)
* The `#` symbols are stripped from tag values
* This follows Obsidian’s frontmatter convention where tags don’t use `#`
### Example 5: Merging with Existing Frontmatter
[Section titled “Example 5: Merging with Existing Frontmatter”](#example-5-merging-with-existing-frontmatter)
**Input:**
```markdown
---
tags:
- existing-tag
Reference: "[[Existing Reference]]"
---
# My Note
Tags:: #new-tag, #another-tag
Reference:: [[New Reference]]
Related:: [[Some Link]]
```
**Output:**
```markdown
---
tags:
- existing-tag
- new-tag
- another-tag
Reference:
- "[[Existing Reference]]"
- "[[New Reference]]"
Related: "[[Some Link]]"
---
# My Note
```
The script **merges** values instead of overwriting:
* Existing `tags` are preserved and new tags are added
* Existing `Reference` value is kept and the new one is added
* `Related` is added as a new property
* All values are deduplicated
## Obsidian Reserved Properties
[Section titled “Obsidian Reserved Properties”](#obsidian-reserved-properties)
Obsidian has special handling for certain property names in frontmatter. The script automatically handles these:
### tags
[Section titled “tags”](#tags)
* **Must be lowercase**: `Tags::` is converted to `tags:` in frontmatter
* **No hash symbols**: `#project` becomes `project`
* **Why**: Obsidian’s native tag system expects tags without `#` in frontmatter
**Example:**
```markdown
# Inline format (with #)
Tags:: #project, #important
# Frontmatter format (without #)
---
tags:
- project
- important
---
```
Other reserved properties (like `aliases`, `cssclass`) are preserved as-is but may have special behaviors in Obsidian. Always verify the [Obsidian documentation](https://help.obsidian.md/Editing+and+formatting/Properties) for the latest reserved property names.
## Technical Details
[Section titled “Technical Details”](#technical-details)
### Smart Comma Splitting
[Section titled “Smart Comma Splitting”](#smart-comma-splitting)
The script uses a custom parser that tracks whether it’s inside a wikilink when splitting comma-separated values:
```javascript
function parseCommaSeparatedWithWikilinks(value) {
let insideWikilink = false;
for (let i = 0; i < value.length; i++) {
if (char === '[' && nextChar === '[') {
insideWikilink = true;
}
if (char === ']' && prevChar === ']') {
insideWikilink = false;
}
// Only split on commas outside wikilinks
if (char === ',' && !insideWikilink) {
// Split here
}
}
}
```
### How the write works (and a concurrency caveat)
[Section titled “How the write works (and a concurrency caveat)”](#how-the-write-works-and-a-concurrency-caveat)
The script updates the frontmatter with `processFrontMatter`, then strips the migrated inline properties from the body inside an `app.vault.process` callback. Using `process` for the body rewrite (rather than a separate `read` + `modify`) means the body’s read-and-rewrite happens in one callback, so it does not clobber an unrelated concurrent edit elsewhere in the body:
```javascript
// Update the frontmatter first
await app.fileManager.processFrontMatter(activeFile, (frontmatter) => {
// Add properties to frontmatter
});
// Then strip the migrated inline properties from the body
await app.vault.process(activeFile, (data) => {
const { cleanedContent } = parseInlineFieldsWithWikilinks(data, propertiesToMigrate, migrateAll);
return cleanedContent;
});
```
These are still two separate steps. The frontmatter is written from the file as it was first read, while the body is re-scanned at rewrite time. If another device or window adds a *new* inline field to the same note in the brief window between the two steps, that field can be removed from the body without being captured in frontmatter. This is why the Tips above matter: avoid running a bulk migration on a note that is being edited or synced at the same time, and keep a backup.
## Tips
[Section titled “Tips”](#tips)
1. **Test on a Copy First**: Try the script on a copy of your note to ensure it works as expected
2. **Use Version Control**: If you use Git, commit your vault before running bulk migrations
3. **Migrate Gradually**: Start with specific properties before using “Migrate All”
4. **Check Frontmatter Format**: After migration, verify that the frontmatter is formatted correctly
5. **Tags Property**: Remember that `tags` must be lowercase in frontmatter and shouldn’t have `#` symbols
6. **Combine with Other Macros**: You can add additional steps to the macro, such as opening a specific note or running another script
## Troubleshooting
[Section titled “Troubleshooting”](#troubleshooting)
**Properties not migrating:**
* Check that the property names are spelled correctly in the settings
* Ensure the inline properties use `::` syntax (two colons)
* Verify that the properties aren’t inside fenced/inline code or task checkboxes (these are intentionally skipped - see “Code blocks” below)
* Inline-field-shaped lines inside fenced code blocks (` ``` ` or `~~~`) and inline code spans (`` `...` ``) are detected and left untouched, so they are never migrated or removed. This holds for fences at the top level, inside blockquotes, and nested in a list item (for example a ` ``` ` fence whose opener sits on the same line as a `-` bullet).
* 4-space *indented* code blocks are **not** detected. A line shaped like `name:: value` inside an indented code block can still be migrated and removed from the body. Distinguishing a genuine indented code block from ordinary indented list or paragraph text requires block context that a single-pass line scanner does not have, and a partial heuristic would either delete real indented code or silently skip a genuine inline field that is merely indented under a list (which Dataview *does* treat as a field). The script therefore favors migrating real fields over silently skipping them - so use a fenced code block (` ``` `) rather than 4-space indentation for any code you want to protect.
* As a general safety net, prefer migrating a specific property list over “Migrate All Properties”, and follow the Tips above - test on a copy and keep your vault under version control before a bulk migration.
**Commas not handled correctly:**
* Make sure wikilinks use proper `[[` and `]]` syntax
* Check for unmatched brackets in your wikilinks
**How are existing frontmatter values handled:**
* The script merges with existing frontmatter values instead of overwriting
* If a property already exists in frontmatter, the new values are combined and deduplicated
* Example: If frontmatter has `tags: [project]` and inline has `Tags:: #work`, result will be `tags: [project, work]`
## Related Resources
[Section titled “Related Resources”](#related-resources)
* [QuickAdd API Reference](/docs/QuickAddAPI/)
* [User Scripts Documentation](/docs/UserScripts/)
* [processFrontMatter API](https://docs.obsidian.md/Reference/TypeScript+API/FileManager/processFrontMatter)
# Macro: Move notes with a tag to a folder
> Move every note carrying a chosen tag to a target folder, matching both frontmatter and inline tags, via a macro script
This macro moves every note carrying a tag you pick into a folder you pick. It matches the tag whether it lives in a note’s frontmatter or inline in the body, and it can optionally include nested tags (for example `#project/work` when you choose `#project`). No extra plugins are needed - it uses only Obsidian’s own API.
## Setup
[Section titled “Setup”](#setup)
Imported the package above? The script and the **Move notes with a tag** macro are already in place; skip the setup steps and read how to run it below.
1. Save the [Move notes with a tag script](/scripts/moveNotesWithTag.js) to your vault, for example as `scripts/moveNotesWithTag.js` (not inside the `.obsidian` folder). See [the user scripts guide](/docs/UserScripts/) for how QuickAdd loads scripts.
2. In **Settings → QuickAdd**, click **New choice** → **Macro**. The Macro Builder opens; click its name at the top to rename it (for example, `Move tagged notes`). See [the Macro choice docs](/docs/Choices/MacroChoice/) for a full walkthrough.
3. In the Macro Builder, add your script as a **User Script** command.
Back up your vault before you run it: the move happens as soon as you pick the folder, with no preview or undo. Run the macro, pick a tag, choose whether nested tags count too, then pick the destination folder; the folder menu shows how many notes will move. Notes whose path contains `template` (in any case, such as `Templates/`) are left where they are.
# Movie & Series Script
> Insert a movie or TV show note from the OMDb API into your vault with a Macro choice and template, requires an API key
This script allows you to easily insert a movie or TV show note into your vault.
We use OMDb api to get the movie or TV show information. You can get an API key on the website [here](https://www.omdbapi.com/). This will be needed to use this script.
## Demo
[Section titled “Demo”](#demo)
## Installation
[Section titled “Installation”](#installation)
Imported the package above? The script, the `Movie.md` template and the **Add movie note** macro are already in place. Save your OMDb API key as described under **After importing** in the card, then skip to [Usage](#usage).
Prerequisites
* You must have an OMDb API key. Request one at `https://www.omdbapi.com/` and keep it handy. The script will not run without it.
This works by adding the movies [user script](/docs/UserScripts/) to a [Macro choice](/docs/Choices/MacroChoice/) that you run from the main menu. I have made a video which shows you how to do so - [click here](https://www.youtube.com/watch?v=gYK3VDQsZJo\&t=1730s). You can find the script [here](/scripts/movies.js).
1. Save the script (`movies.js`) to your vault. Make sure it is saved as a JavaScript file, meaning that it has the `.js` at the end. **Important:** Do not save scripts in the `.obsidian` directory - they will be ignored. Valid locations include folders like `/scripts/`, `/macros/`, or any custom folder in your vault.
2. Create a new template in your designated templates folder. Example template is provided below.
3. In **Settings → QuickAdd**, click **New choice** → **Macro**. This is what activates the macro. The Macro Builder opens; click its name at the top to rename it - you decide what to call it. I named mine `🎬 Movie`.
4. Add the user script to the command list.
5. Add a Template command to the macro. This will be what creates the note in your vault. Settings are as follows:
1. Set the template path to the template you created.
2. Set **File name** to `{{VALUE:fileName}}` (before QuickAdd 2.30.0, this is **File name format**; turn its toggle on first). You can specify this however you like. The `fileName` value is the name of the Movie or TV show without illegal file name characters.
3. The remaining settings are for you to specify depending on your needs.
6. Click on the cog icon to the right of the script command to configure the script settings. This should allow you to enter the API key you got from OMDb; click the save icon next to it and QuickAdd keeps it in Obsidian’s secret storage, not in `data.json`.
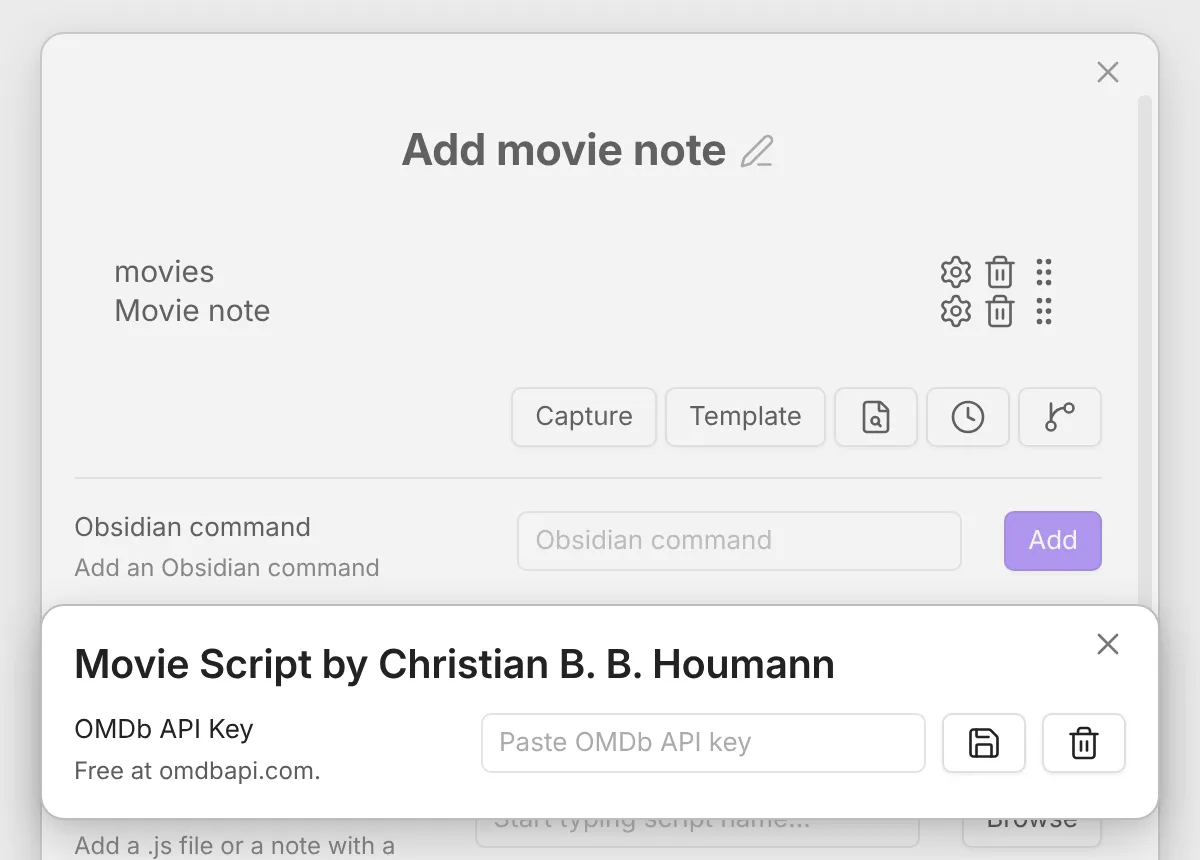
You can now use the macro to create notes with movie or TV show information in your vault.
### Troubleshooting
[Section titled “Troubleshooting”](#troubleshooting)
* “TypeError: Failed to construct ‘URL’: Invalid URL”
* Ensure you are using the latest `movies.js` from this repo. The example has been updated to avoid `new URL()` internally.
* Verify your OMDb API key is entered in the script settings (cog icon on the script step).
* “No results found.”
* Try searching by the exact IMDb ID (e.g. `tt0111161`).
* Check for typos in the title or try a more specific query.
* Confirm your OMDb API key is valid and not rate limited.
### Example template
[Section titled “Example template”](#example-template)
This template stores the movie’s metadata as Obsidian **front matter properties**. The multi-value fields (`cast`, `genre`, `director`) come from the script as lists and become proper **List** properties with clickable links. Scalar link/text values are wrapped in quotes so the front matter stays valid, and the plot lives in the note body so longer text (with punctuation or quotes) can’t break the front matter.
```markdown
---
category: "{{VALUE:typeLink}}"
director: {{VALUE:directorLink}}
genre: {{VALUE:genreLinks}}
cast: {{VALUE:actorLinks}}
year: "{{VALUE:Year}}"
imdbId: "{{VALUE:imdbID}}"
imdb: "[IMDb]({{VALUE:imdbUrl}})"
ratingImdb: "{{VALUE:imdbRating}}"
rating:
cover: "{{VALUE:Poster}}"
---

{{VALUE:Plot}}
```
Tip
Keep the quotes around single-link and text values (for example `category` and `imdbId`). A bare `[[Movies]]` in front matter is read by Obsidian as a nested list rather than a link. The list fields (`cast`, `genre`, `director`) don’t need quotes - QuickAdd writes them as real list properties for you.
## Usage
[Section titled “Usage”](#usage)
It’s possible to access whichever JSON variables are sent in response through a `{{VALUE:}}` tag (e.g. `{{VALUE:Title}}`). Below is an example response for the TV show ‘Arcane’.
```json
{
"Title": "Arcane",
"Year": "2021–",
"Rated": "TV-14",
"Released": "06 Nov 2021",
"Runtime": "N/A",
"Genre": "Animation, Action, Adventure",
"Director": "N/A",
"Writer": "N/A",
"Actors": "Hailee Steinfeld, Kevin Alejandro, Jason Spisak",
"Plot": "Set in utopian Piltover and the oppressed underground of Zaun, the story follows the origins of two iconic League champions-and the power that will tear them apart.",
"Language": "English",
"Country": "United States, France",
"Awards": "N/A",
"Poster": "https://m.media-amazon.com/images/M/MV5BYmU5OWM5ZTAtNjUzOC00NmUyLTgyOWMtMjlkNjdlMDAzMzU1XkEyXkFqcGdeQXVyMDM2NDM2MQ@@._V1_SX300.jpg",
"Ratings": [
{
"Source": "Internet Movie Database",
"Value": "9.2/10"
}
],
"Metascore": "N/A",
"imdbRating": "9.2",
"imdbVotes": "105,113",
"imdbID": "tt11126994",
"Type": "series",
"totalSeasons": "2",
"Response": "True"
}
```
# Toggl Manager
> Start preset Toggl Track time entries from a customizable menu using a macro and the Obsidian Toggl integration plugin
This [Macro](/docs/Choices/MacroChoice/) allows you to set preset time entries for [Toggl Track](https://track.toggl.com).
It uses the [Toggl plugin](https://github.com/mcndt/obsidian-toggl-integration) for [Obsidian](https://obsidian.md). Make sure that is set up before you continue.
We’ll need to install a QuickAdd user script for this to work. I have made a video which shows you how to do so - [click here](https://www.youtube.com/watch?v=gYK3VDQsZJo\&t=1730s). You will need to add the user script to a new Macro choice, which you then run from the QuickAdd menu. You can find the script [here](/scripts/togglManager.js).
## Installation
[Section titled “Installation”](#installation)
Imported the package above? The script and the **Toggl manager** macro are already in place. Connect the Toggl plugin as described under **After importing** in the card if you have not yet, then skip to [Configuration](#configuration) to set up your own menu.
1. Save the script (`togglManager.js`) to your vault. Make sure it is saved as a JavaScript file, meaning that it has the `.js` at the end. **Important:** Do not save scripts in the `.obsidian` directory - they will be ignored. Valid locations include folders like `/scripts/`, `/macros/`, or any custom folder in your vault.
2. In **Settings → QuickAdd**, click **New choice** → **Macro**. The Macro Builder opens; click its name at the top to rename it - you decide what to name it. I named mine `⏳ Toggl Manager`.
3. Add the user script to the command list.
Your Macro should look like this:
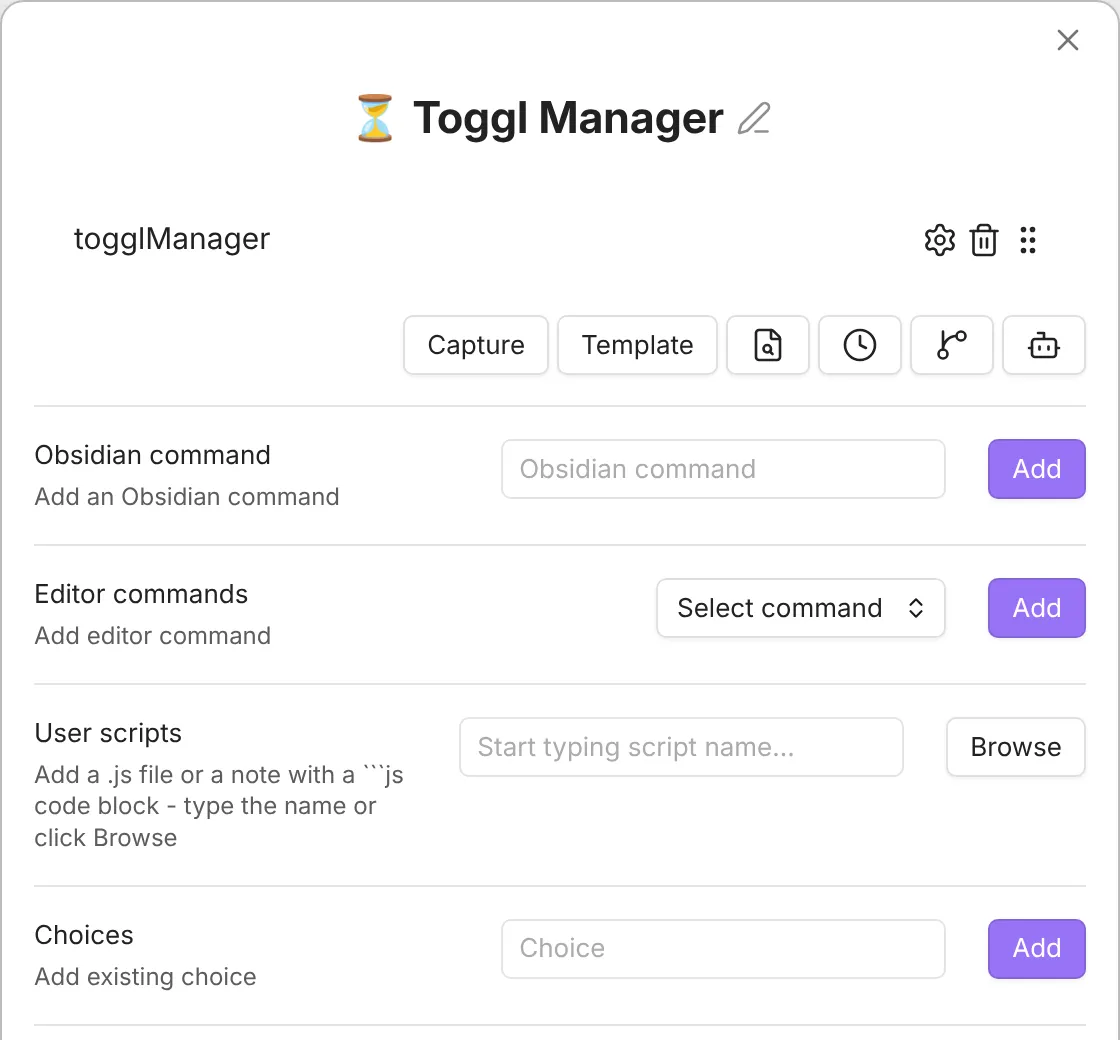
## Configuration
[Section titled “Configuration”](#configuration)
You will need to configure your script to match your own settings. I have included some example settings from my own setup, but you’ll likely want to make it match your own preferences.
To customize the script, open the JavaScript file you just saved. You’ll see this menu setup:
```js
const menu = {
"🧠 Learning & Skill Development": { // Sub-menu for Learning and Skill Development
togglProjectName: "Learning & Skill Development", // Name of your corresponding Toggl project
menuOptions: {
"✍ Note Making": "Note Making", // Preset time entry. The left part is what's displayed, and the right part is what Toggl gets.
"🃏 Spaced Repetition": "Spaced Repetition", // So for this one, I would see '🃏 Spaced Repetition' in my menu, but Toggl would receive 'Spaced Repetition' as the entry.
"📖 Read Later Processing": "Read Later Processing",
"👨💻 Computer Science & Software Engineering": "Computer Science & Software Engineering",
}
},
"🤴 Personal": {
togglProjectName: "Personal",
menuOptions: {
"🏋️♂️ Exercise": "Exercise",
"🧹 Chores": "Chores",
"👨🔬 Systems Work": "Systems Work",
"🌀 Weekly Review": "Weekly Review",
"📆 Monthly Review": "Monthly Review",
"✔ Planning": "Planning",
}
},
"👨🎓 School": {
togglProjectName: "School",
menuOptions: {
"🧠 Machine Intelligence (MI)": "Machine Intelligence (MI)",
"💾 Database Systems (DBS)": "Database Systems (DBS)",
"🏃♂ Agile Software Engineering (ASE)": "Agile Software Engineering (ASE)",
"💻 P5": "P5",
}
}
};
```
In the menu, there’ll be 3 sub-menus with their own time entries. I have added some comments to explain the anatomy of the menu.
You can customize it however you like. You can add more menus, remove menus, and so on.
# Zettelizer
> Create a linked note from each heading of a chosen level in your active file, naming it after the heading text
This macro turns the headings of your active note into separate linked notes. For each heading of the level you choose, it creates a new note named after the heading text and links back to that heading - a fast way to break a big note into atomic, connected notes.

## Setup
[Section titled “Setup”](#setup)
Imported the package above? The script and the **Zettelize headings** macro are already in place; skip the download and check the two settings below before you run it.
Get the `.js` file for this user script [here](/scripts/zettelizer.js), then add it to a Macro choice. To install it, follow [how to add a script to a macro](/docs/UserScripts/#adding-scripts-to-macros), and see [the Macro choice docs](/docs/Choices/MacroChoice/) for a full walkthrough of creating a macro.
The script has two settings. In **Settings → QuickAdd**, open your macro and click the cog on the script’s step to change them:
* **Folder for new notes** - where the new notes go. Defaults to `Zettels`, which is created if it does not exist; leave it empty to use the vault root.
* **Heading level** - which headings become notes. Defaults to `3`, meaning headings with three pound symbols, like `### header`.
The script looks for headers in your active file with the desired level. If such a header is found, it will ignore the first ‘word’ (any sequence of characters - i.e., letters, numbers, symbols, etc - followed by a space). Then, it will create a file with a name containing the remaining text in the heading.
In that file, it will link to the heading it created the file from.
# Template: Add an Inbox Item
> Create a timestamped inbox note from a template, naming the file with the current date and time plus your input
This example gives you a QuickAdd choice that creates a new inbox note in one step. QuickAdd asks you for a short name, then makes a note whose file name is the current date and time followed by what you typed - so every capture lands in your inbox as its own dated note, ready to process later.
## Before you start
[Section titled “Before you start”](#before-you-start)
* A template note you want each inbox item to start from. The package includes the one below as `Templates/Inbox Template.md`. Building by hand? Save it yourself, or use any note: a template can be as simple as an empty file or contain any [format placeholders](/docs/FormatSyntax/) you like.
```markdown
---
created: {{DATE:YYYY-MM-DD HH:mm}}
tags: [inbox]
---
# {{NAME}}
```
## Setup
[Section titled “Setup”](#setup)
Imported the package above? Follow **After importing** in the card, then skip the manual setup below and read [What you get](#what-you-get).
1. In **Settings → QuickAdd**, click **New choice** → **Template**. The Template choice settings open; click its name at the top to rename it (for example, `Inbox Item`). For a full tour of these settings, see [the Template choice docs](/docs/Choices/TemplateChoice/).
2. Set **Template path** to your inbox template:
```plaintext
Templates/Inbox Template.md
```
3. Set **File name** to (before QuickAdd 2.30.0, this is **File name format**; turn its toggle on first):
```plaintext
{{DATE:YYYY-MM-DD-HH-mm-ss}} {{NAME}}
```
`{{DATE:YYYY-MM-DD-HH-mm-ss}}` becomes the current date and time down to the second, and `{{NAME}}` becomes whatever you type when the choice runs. Together they keep every inbox note uniquely named and in date order.
4. Set **New note location** to **In a specific folder**, enter `Inbox` in **Folder path**, and click **Add**. Set the remaining options to your liking.
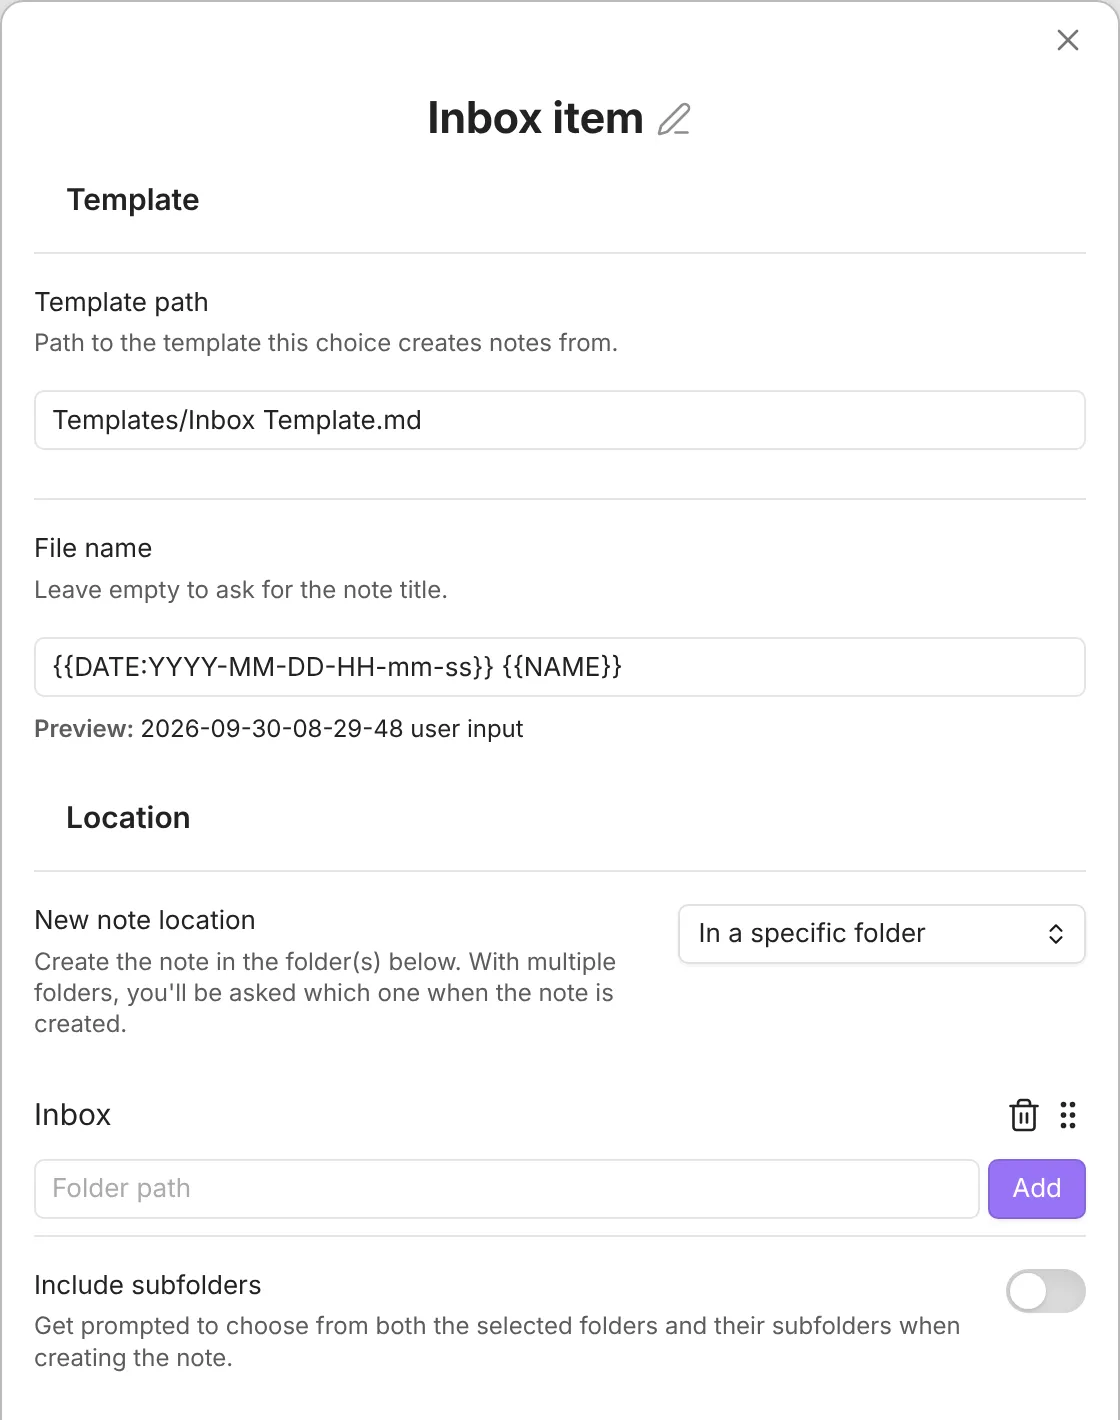
## What you get
[Section titled “What you get”](#what-you-get)
Run the choice and type a short name, such as `call dentist`. QuickAdd creates a note named like `2026-07-08-14-30-05 call dentist.md` from your inbox template.
# Template - My Book Notes template
> Pull a book's highlights from Readwise into a new note using a Template choice and a bundled highlight-fetching macro
This example creates a new book note from a template and fills in a book’s highlights straight from [Readwise](https://readwise.io). When you run it, you pick a book, and QuickAdd builds a note whose body already contains that book’s highlights and notes.
## Before you start
[Section titled “Before you start”](#before-you-start)
* A Readwise account and its access token. Get your token [here](https://readwise.io/access_token).
## Installation
[Section titled “Installation”](#installation)
Imported the package above? The script, the **Readwise** macro, the template and the **Add Book Notes** choice are already in place. Save your access token as described under **After importing** in the card, then skip to [the notes on how it behaves](#how-it-behaves).
New to user scripts? See [how to add a script to a macro](/docs/UserScripts/#adding-scripts-to-macros).
1. Download the [Readwise script](/scripts/readwise.js) and save it in your vault.
2. Create the macro that runs the script: in **Settings → QuickAdd**, click **New choice** → **Macro**. The Macro Builder opens; click its name at the top to rename it (I use `Readwise`). See [the Macro choice docs](/docs/Choices/MacroChoice/) for a full walkthrough.
3. In the builder, add a **User Script** command: type the name of the script you saved (or click **Browse**) and click **Add**.
4. Click the cog on the script’s step, paste your token into **Readwise access token**, and click the save icon next to it. QuickAdd keeps it in Obsidian’s secret storage, not in `data.json`.
5. Create a [Template choice](/docs/Choices/TemplateChoice/) whose **Template path** points at the template you made from the [one below](#template). Set **File name** to `{{MACRO:Readwise::getBooks}}` (before QuickAdd 2.30.0, this is **File name format**; turn its toggle on first), so the note is named after the book you pick. Set the remaining options to your liking. The screenshot shows the packaged choice:
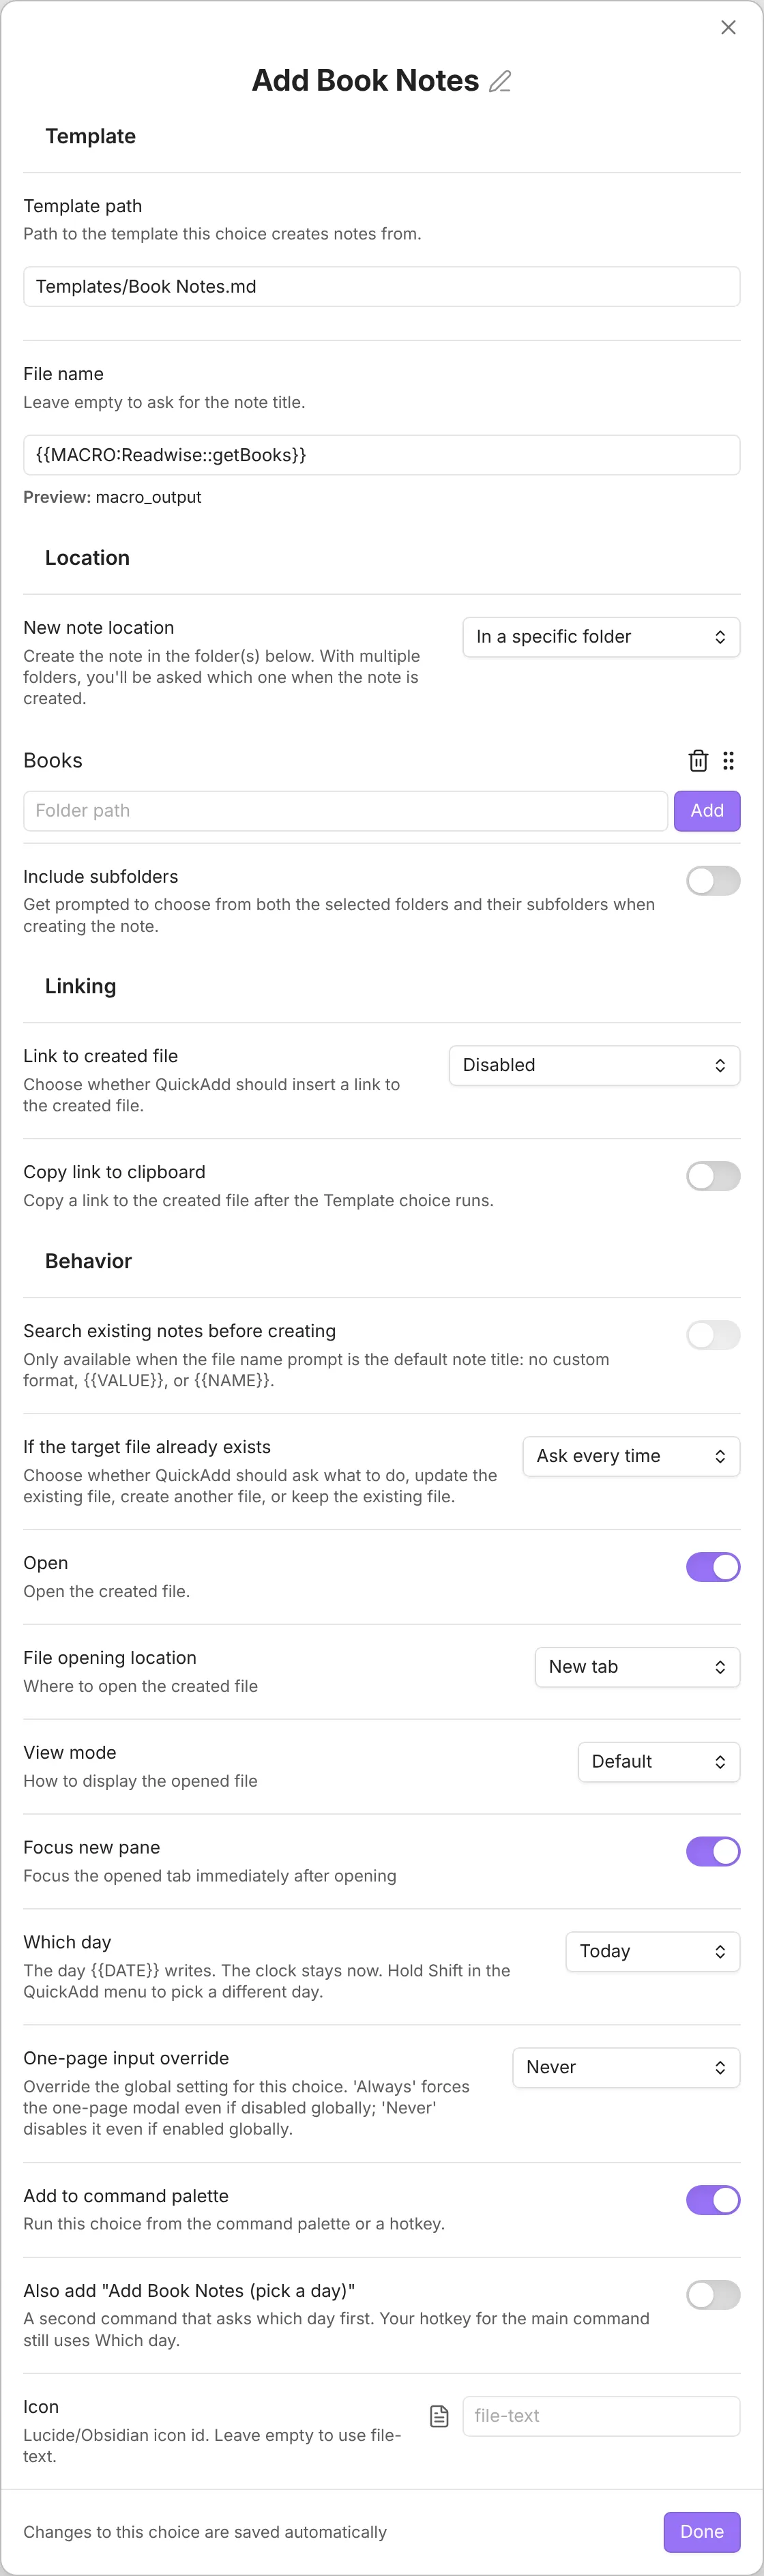
[]()A few notes on how it behaves:
* The note is named after the book you select, minus what a file name can’t hold: `Dune: Part One` becomes `Dune - Part One`. The alias keeps the real title.
* Running the choice opens a menu to choose a book, and the highlights are appended into the template where the macro placeholder sits.
* Customize the template however you like, but keep `{{MACRO:Readwise::instaFetchBook}}` - that placeholder is what fetches the highlights and marks where they are inserted. If you named your macro something other than `Readwise`, replace `Readwise` in that placeholder with your macro’s name.
* The script fills in `{{VALUE:author}}` and `{{VALUE:Book Title}}` from the book you pick. If you use [one-page input](/docs/Advanced/onePageInputs/), set **One-page input override** to **Never** on the **Add Book Notes** choice (the package already does), or the form asks you for them before the script has a chance to.
## Script
[Section titled “Script”](#script)
Most of the setup is shown in the gif.
The script is the [Readwise script](/scripts/readwise.js) from step 1; open it to read or adapt it.
## Template
[Section titled “Template”](#template)
```md
---
image:
tags: in/books
aliases:
- "{{VALUE:Book Title}}"
cssclass:
---
# Title: [[{{TITLE}}]]
## Metadata
Tags::
Type:: [[Book]]
Author:: {{VALUE:author}}
Reference::
Rating::
Reviewed Date:: [[{{DATE:YYYY-MM-DD - ddd MMM D}}]]
Finished Year:: [[{{DATE:YYYY}}]]
# Thoughts
# Actions Taken / Changes
# Summary of Key Points
# Highlights & Notes
{{MACRO:Readwise::instaFetchBook}}
```
# Template: Create an MOC Note with a Link Dashboard
> Create a map-of-content note with an embedded Base dashboard showing its backlinks and outgoing links, via a Template choice
Use this pattern when you want QuickAdd to create a new map-of-content note that already contains a live Base dashboard for both backlinks and outgoing links.
Note
This example uses Obsidian’s [Bases](https://help.obsidian.md/bases) core plugin to render the dashboard, so make sure Bases is enabled in **Settings > Core plugins** before you begin.
## Why this pattern
[Section titled “Why this pattern”](#why-this-pattern)
A Template choice can create the note and insert the dashboard in one step. The note stays markdown, while the embedded `.base` block gives you a live view of how that note connects to the rest of your vault.
This works well for maps of knowledge, hub notes, topic notes, and evergreen indexes.
## Setup
[Section titled “Setup”](#setup)
Imported the package above? Run **New MOC note** from the command palette and enter a title, then skip to [What you get](#what-you-get).
1. Create a reusable `.base` template, for example `Templates/MOC Link Dashboard.base`:
```yaml
formulas:
note_link: "file.asLink()"
properties:
formula.note_link:
displayName: Note
file.folder:
displayName: Folder
file.mtime:
displayName: Updated
views:
- type: table
name: Backlinks
filters:
and:
- 'file.ext == "md"'
- "file.hasLink(this.file)"
- "file.path != this.file.path"
order:
- formula.note_link
- file.folder
- file.mtime
- type: table
name: Outgoing links
filters:
and:
- 'file.ext == "md"'
- "this.file.hasLink(file)"
- "file.path != this.file.path"
order:
- formula.note_link
- file.folder
- file.mtime
```
2. Create a markdown template, for example `Templates/MOC Link Dashboard.md`:
````markdown
---
tags:
- moc
---
# {{VALUE:moc_title}}
## Link Dashboard
Use the view picker in this embedded base to switch between backlinks and
outgoing links for this note.
```base
{{TEMPLATE:Templates/MOC Link Dashboard.base}}
```
## Notes
- Start linking this note to related ideas.
````
3. Create a **Template** choice (see [the Template choice docs](/docs/Choices/TemplateChoice/)) with settings like these:
* **Template Path**: `Templates/MOC Link Dashboard.md`
* **File name**: `{{VALUE:moc_title}}` (before QuickAdd 2.30.0, this is **File name format**; turn its toggle on first)
* **Create in folder**: your MOC folder, for example `MOCs`
* **Open**: enabled
* **If the target file already exists**: `Create another file`
* **New file naming**: `Increment trailing number`
4. Run the Template choice and enter a title such as `Alpha Project`.
## What you get
[Section titled “What you get”](#what-you-get)
QuickAdd creates a new markdown note with an embedded Base block. Inside the note:
* `Backlinks` shows notes that link to the new MOC.
* `Outgoing links` shows notes the MOC links to.
* Both views use `this.file`, so the dashboard automatically scopes itself to the note that was just created.
After the note exists, add links in either direction and the dashboard updates with the current graph around that note.
# Create a meeting note and start typing
> Create a meeting note or add a project update, then keep typing where you put the CURSOR marker.
Create a dated meeting note, answer one question, and start typing under **Notes**. Then use the same `{{CURSOR}}` marker to add an update to an existing project note.
These examples require QuickAdd 2.27.0 or later, and the package above needs QuickAdd 2.30.0 or later. They use QuickAdd’s own templates, so you do not need Templater.
## Create the meeting template
[Section titled “Create the meeting template”](#create-the-meeting-template)
Imported the package above? Both templates and both choices are already set up, so skip to [Run it and start typing](#run-it-and-start-typing).
Create folders named `Templates` and `Meetings` in your vault. In `Templates`, create a note named `Meeting` and paste this content:
Templates/Meeting.md
```markdown
# {{VALUE:Meeting}}
Date: {{DATE:YYYY-MM-DD}}
## Notes
- {{CURSOR}}
## Next steps
- [ ]
```
`{{VALUE:Meeting}}` asks for the meeting name. `{{DATE:YYYY-MM-DD}}` fills in today’s date. `{{CURSOR}}` marks where you want to type after QuickAdd creates the note.
## Configure the choice
[Section titled “Configure the choice”](#configure-the-choice)
1. Open **Settings → QuickAdd** and choose **New choice → Template**.
2. Click the choice name at the top of the settings window. Rename it `New meeting` and confirm with **Ok**.
3. Set **Template path** to `Templates/Meeting.md`.
4. In **File name**, enter (before QuickAdd 2.30.0, this is **File name format**; turn its toggle on first):
```text
{{DATE:YYYY-MM-DD}} {{VALUE:Meeting}}
```
5. Set **New note location** to **In a specific folder**.
6. Enter `Meetings` in **Folder path** and click **Add**.
7. Turn **Open** on.
8. Set **File opening location** to **Reuse current tab** and **View mode** to **Live Preview**.
9. Choose **Done** and close Settings.
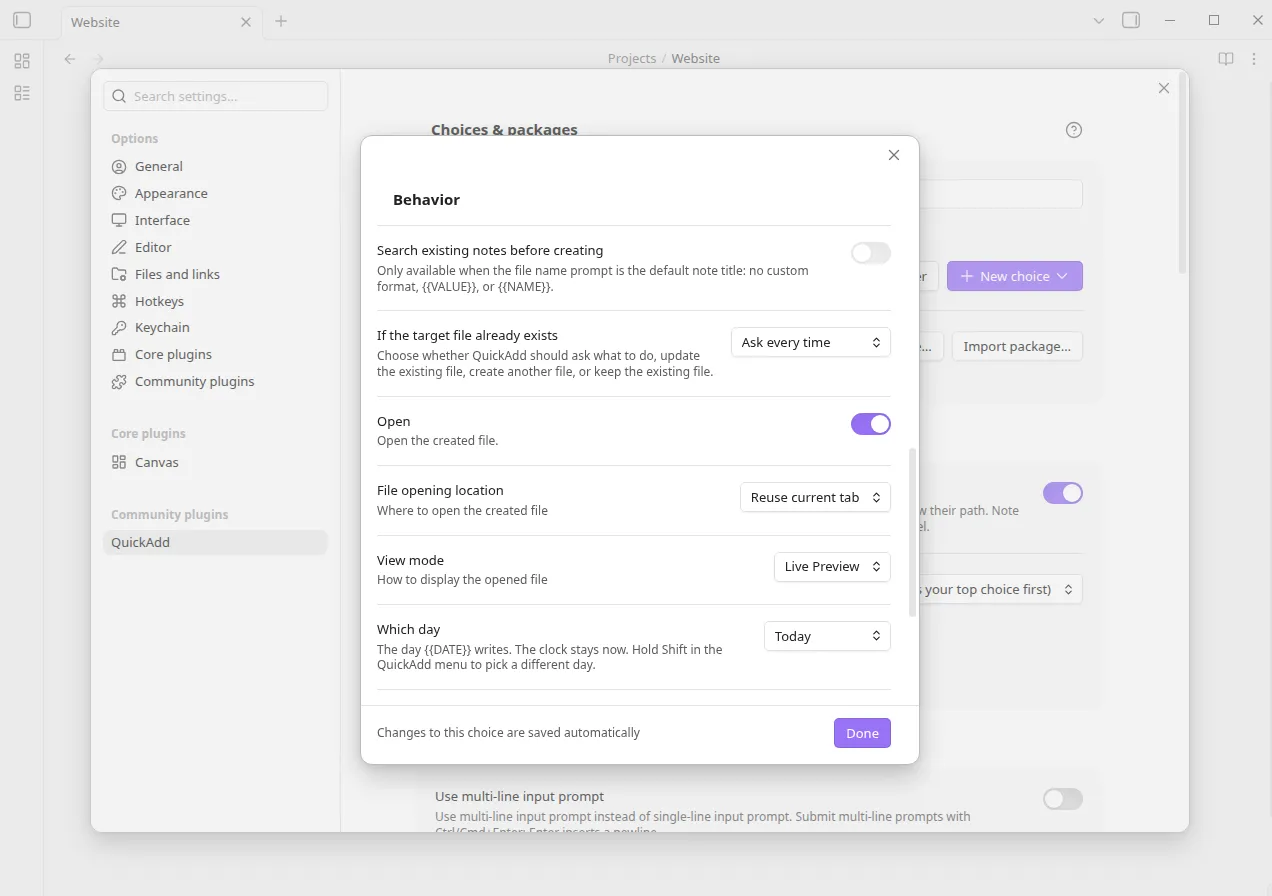
## Run it and start typing
[Section titled “Run it and start typing”](#run-it-and-start-typing)
1. Open Obsidian’s command palette and run **QuickAdd: Run**.
2. Choose **New meeting**.
3. Enter `Website planning` for **Meeting** and choose **Ok**.
4. Without clicking in the note, type `Agree on the first three pages.`
QuickAdd creates a note in `Meetings` with today’s date in the file name. On September 20, 2026, that file is `Meetings/2026-09-20 Website planning.md`:
```markdown
# Website planning
Date: 2026-09-20
## Notes
- Agree on the first three pages.
## Next steps
- [ ]
```
The marker is gone, and your sentence appears in the first bullet under **Notes**. QuickAdd uses your meeting name in both the file name and the heading without asking twice.
To start in **Next steps** instead, remove the marker from **Notes** and change the checklist line to `- [ ] {{CURSOR}}`. The first marker in the note body sets the cursor position. QuickAdd removes any additional markers.
## Add an update to an existing project
[Section titled “Add an update to an existing project”](#add-an-update-to-an-existing-project)
Use a second template when you want to keep a project’s history in one note.
Imported the package? Open a project note in **Live Preview**, click in the note body, and run **Add project update** from the command palette. The steps below build the same thing by hand.
1. Create a `Templates` folder if you do not already have one. Create `Templates/Project update.md` with:
```markdown
## Update - {{DATE:YYYY-MM-DD}}
### Progress
- {{CURSOR}}
### Next steps
- [ ]
```
2. Open **Settings → QuickAdd**.
3. Under **Template folders**, click **Add folder** (or **+**, once you have a folder) and choose `Templates`. If `Templates` is already listed, leave it as it is. Before QuickAdd 2.30.0, the setting is **Template folder paths** under **Templates & properties**: enter `Templates` and click **Add**.
4. Close Settings.
5. Create a `Projects` folder and `Projects/Website.md` with:
```markdown
# Website
Build a clear three-page site for the pottery studio.
## Decisions
- Start with Home, Work, and Contact.
```
6. Open `Projects/Website.md` in **Live Preview** or **Source mode** and click in the note body.
7. From the command palette, run **QuickAdd: Apply template to active note**.
8. Choose **Template: Templates/Project update.md**.
9. Choose **Append to bottom**.
10. Without clicking in the note, type `The homepage draft is ready for review.`
The file keeps its name, description, and **Decisions** section. QuickAdd adds a dated section at the bottom:
```markdown
## Update - 2026-09-20
### Progress
- The homepage draft is ready for review.
### Next steps
- [ ]
```
Recorded in Obsidian; played at twice the original speed.
Apply this template again for the next update. You do not need a separate Template choice for this workflow.
## Use the marker in your own templates
[Section titled “Use the marker in your own templates”](#use-the-marker-in-your-own-templates)
Put `{{CURSOR}}` wherever you want to continue typing in the note body. The destination must be focused in an editing mode. For a Template choice that creates a note, turn **Open** on and choose **Live Preview** or **Source**. If you open a new tab or pane, also turn **Focus new pane** on.
For a note you already have open, use **Live Preview** or **Source mode**. The marker does not switch a note out of Reading view or bring a background tab into focus.
See [cursor position](/docs/FormatSyntax/#cursor) for the full behavior and [Apply Template to Note](/docs/ApplyTemplateToNote/) for the other insertion modes.
# FAQ
> How to sync your QuickAdd choices, macros, and scripts between devices, and why API keys stay local to each one
## Syncing QuickAdd between devices
[Section titled “Syncing QuickAdd between devices”](#syncing-quickadd-between-devices)
QuickAdd keeps everything - your choices, macros, global variables, and settings - in `/.obsidian/plugins/quickadd/data.json`. As long as your sync setup includes Obsidian’s configuration folder, that one file brings your whole QuickAdd setup to the other device.
Two things don’t travel with it:
* **The plugin itself.** QuickAdd must be installed and enabled on the other device. Obsidian tracks enabled plugins in `/.obsidian/community-plugins.json`.
* **Secrets.** API keys stored through Obsidian’s secret storage stay on the device where you entered them, so enter them once per device.
In QuickAdd 2.30.0 or later, a device that’s already running picks up the synced `data.json` on its own, so your changes appear without a restart. Earlier versions read `data.json` only when QuickAdd loads: after the files have synced, restart Obsidian on the receiving device - or toggle QuickAdd off and on in **Settings -> Community plugins** - and your changes appear.
If you use **Obsidian Sync**, also check **Settings -> Sync** on each device:
* Enable **Active community plugin list** and **Installed community plugin list** under **Vault configuration sync** if you want Obsidian Sync to install and enable QuickAdd for you.
* If a macro runs a standalone `.js` user script, enable **Sync all other types**. Obsidian Sync skips `.js` files unless that setting is on (see [Sync settings](https://obsidian.md/help/sync/settings)) - which is why a macro can arrive on the other device with its script missing: the configuration syncs, the script doesn’t, and the macro fails.
* Scripts kept in Markdown notes sync like any other note and sidestep the file-type toggle entirely. See [User Scripts](/docs/UserScripts/) for both script forms.
With iCloud, Dropbox, Git, Syncthing, or any other file-sync tool, the file-type toggle doesn’t apply - just make sure the tool syncs the whole `.obsidian` folder plus your script files. Before QuickAdd 2.30.0, also restart or re-enable QuickAdd on the other device.
For a one-time transfer, [export a QuickAdd package](/docs/Choices/Packages/) and import it on the other device. A package moves your QuickAdd configuration and bundled dependent scripts. Secrets still stay local, so enter those on each device.
# Format syntax
> Placeholders like {{DATE}} and {{VALUE}} that QuickAdd replaces with real values: dates, your answers, links, clipboard content, and more
Format syntax lets you put **placeholders** in anything QuickAdd creates. When a choice runs, each placeholder is replaced with a real value: today’s date, an answer you type, a link to the note you came from.
You can use placeholders anywhere QuickAdd asks for a format: file name fields, capture formats, folder paths, “Insert after” targets, and inside template files.
In the format fields of a choice’s settings (such as **Capture format**, **Capture to**, **File name**, and the insert after/before targets), type `{{` to get a list of placeholders, then keep typing to filter it. Template files and folder pickers don’t show this list. Press Enter to insert the highlighted one. For placeholders that take an argument, like `{{VDATE:}}`, the cursor lands inside so you can finish it.

For example, a Capture with this format:
```markdown
- {{DATE:HH:mm}} {{VALUE}}
```
asks you for a value, and if you answer `Standup moved to Wednesday`, it inserts:
```markdown
- 09:42 Standup moved to Wednesday
```
You describe the shape once; QuickAdd fills in the blanks every run.
Answers, selected text, clipboard contents and `value-` URI parameters are inserted as written. A placeholder or Templater `<% %>` tag inside them stays text. A Templater tag in the format itself can still use an answer, as in `<% "{{VALUE:title}}".toUpperCase() %>`.
## Quick reference
[Section titled “Quick reference”](#quick-reference)
**Ask for input**
| Placeholder | What it does |
| -------------------------------------------- | ------------------------------------------------------------ |
| [`{{VALUE}}`](#value) | Ask for text |
| [`{{VALUE:title}}`](#named-value) | Ask for text once, reuse the answer anywhere as `title` |
| [`{{VALUE:Red,Green,Blue}}`](#value-suggest) | Pick from a list |
| [`{{VDATE:due,YYYY-MM-DD}}`](#vdate) | Ask for a date (“tomorrow” works) |
| [`{{FIELD:project}}`](#field) | Suggest values that property already has in your vault |
| [`{{PROPERTY}}`](#property) | Insert the property’s current value (property Captures only) |
| [`{{CURSOR}}`](#cursor) | Place the cursor inside a Template or Capture |
| [`{{FILE:People}}`](#file) | Pick a note from a folder |
| [`{{MVALUE}}`](#mvalue) | Write a math formula (LaTeX) |
**Dates**
| Placeholder | What you get |
| ---------------------------------------------- | ------------------------------------------- |
| [`{{DATE}}`](#date) | Today, like `2026-07-08` |
| [`{{DATE:MMMM Do}}`](#date-format) | Today, formatted your way: `July 8th` |
| [`{{DATE+7}}`](#date) | Seven days from today |
| [`{{DATE:YYYY-MM\|startof:week}}`](#date-snap) | The week’s starting month, for weekly notes |
| [`{{TIME}}`](#time) | The current time, like `14:05` |
| [`{{DAILY}}`](#daily) | The daily note, like `Journal/2026-07-08` |
| [`{{WEEKLY}}`](#periodic-notes) | This week’s note, like `Weekly/2026-W28` |
**The note you ran QuickAdd from**
| Placeholder | What you get |
| ----------------------------------------- | --------------------------------------- |
| [`{{LINKCURRENT}}`](#linkcurrent) | A link to it: `[[That note]]` |
| [`{{LINKSECTION}}`](#linksection) | A link to the section your cursor is in |
| [`{{FILENAMECURRENT}}`](#filenamecurrent) | Its file name |
| [`{{FOLDERCURRENT}}`](#foldercurrent) | Its folder |
| [`{{SELECTED}}`](#selected) | The text you had selected |
**The note being created**
| Placeholder | What you get |
| ----------------------- | -------------------------------- |
| [`{{TITLE}}`](#title) | The new note’s file name |
| [`{{FOLDER}}`](#folder) | The folder the new note lands in |
**Other content**
| Placeholder | What it inserts |
| ------------------------------------------------ | --------------------------------- |
| [`{{CLIPBOARD}}`](#clipboard) | Whatever you copied last |
| [`{{TEMPLATE:Templates/Meeting.md}}`](#template) | The contents of a template file |
| [`{{MACRO:My Macro}}`](#macro) | Whatever a macro returns |
| [`{{GLOBAL_VAR:Header}}`](#global-var) | A snippet you defined in settings |
| [`{{RANDOM:6}}`](#random) | A random ID like `x7k2p9` |
## Dates
[Section titled “Dates”](#dates)
### Today’s date: `{{DATE}}`
[Section titled “Today’s date: {{DATE}}”](#date)
`{{DATE}}` becomes today’s date in `YYYY-MM-DD` format.
A choice can aim that token at another day, so the same `Daily/{{DATE}}.md` template opens yesterday when you ask it to. `{{DATE+3}}` is still three days later. `{{TIME}}` is always the time you ran the choice. See [Which day](/docs/Choices/TemplateChoice/#date-origin).
`{{DATE:HH:mm}}` only prints the clock, so it looks like `{{TIME}}`. The day is still the chosen one. Write `{{DATE:YYYY-MM-DD HH:mm}}` if you want both.
Add `+N` to move the date: `{{DATE+3}}` is three days from that day, `{{DATE+-3}}` is three days before it.
You write
```markdown
Daily/{{DATE}}.md
Review on {{DATE+7}}
```
You get (on July 8th, 2026)
```markdown
Daily/2026-07-08.md
Review on 2026-07-15
```
[]()
Seeing `+3` or `{{DATE+3}}` in your note?
Obsidian’s **Daily notes** and **Templates** core plugins fill `{{date}}`, `{{time}}`, and `{{title}}` themselves, and nothing else. If **Open today’s daily note** or **Insert template** filled in the note, `{{DATE}}` works, but `{{DATE:YYYY-MM-DD+3}}` becomes `2026-07-08+3`, `{{DATE+3}}` stays as-is, and `|startof:` turns into gibberish. Run the file from a QuickAdd [Template choice](/docs/Choices/TemplateChoice/) instead.
### Choose the date format: `{{DATE:}}`
[Section titled “Choose the date format: {{DATE:\}}”](#date-format)
Put a [Moment.js format](https://momentjs.com/docs/#/displaying/format/) after the colon to control how the date looks. The `+N` day offset works here too: `{{DATE:YYYY-MM-DD+3}}`.
| You write | You get |
| --------------------------- | ------------------ |
| `{{DATE:MMMM Do, YYYY}}` | `July 8th, 2026` |
| `{{DATE:YYYY-MM-DD_HH-mm}}` | `2026-07-08_09-42` |
| `{{DATE:[Week] w}}` | `Week 28` |
Tip
Literal text inside a date format goes in square brackets, like `[Week]` above. Otherwise Moment.js treats every letter as a date token.
### Change date text casing: `|case:`
[Section titled “Change date text casing: |case:”](#date-case)
Add `|case: